Showing posts with label drilling out. Show all posts

Saturday, 30 September 2017

Modifying the new cross members

As I mentioned in the last post, I now have some new 'German' cross members which I am going to be using as a foundation to produce some year correct ones (i.e: '64 - '66 Beetle). They will not be 100% accurate, but will come pretty damn close. I have given this a lot of thought and it seems like the best approach as mid-sixties cross members simply don't exist as a repro item. Cross members commonly rust out on a vast majority of old bugs, so getting hold of a rot-fee OG section is almost impossible and only exist on rare foreign cars that have been driven exclusively in dry climates. Anyway, I have not seen this particular modification done before, so hopefully this detailed overview will be of some help to others who may be interested in doing the same... 

I began by drilling out the spot welds and separating the reinforcement section from the main panel. This gave me better access and allowed for a neater job:


On the main panel I smoothed out the unnecessary hump by simply cutting around it and welding in flat sheet steel:


These repros include an access hole to the heater channel. This was not something that mid-sixties cross members had, so I welded it up:


The rear edge needed a new profile adding to accommodate the correct upward angle of the heater pipe. After careful measuring and scribbling a few notes I mocked up a cardboard version of the hump I was trying to recreate:


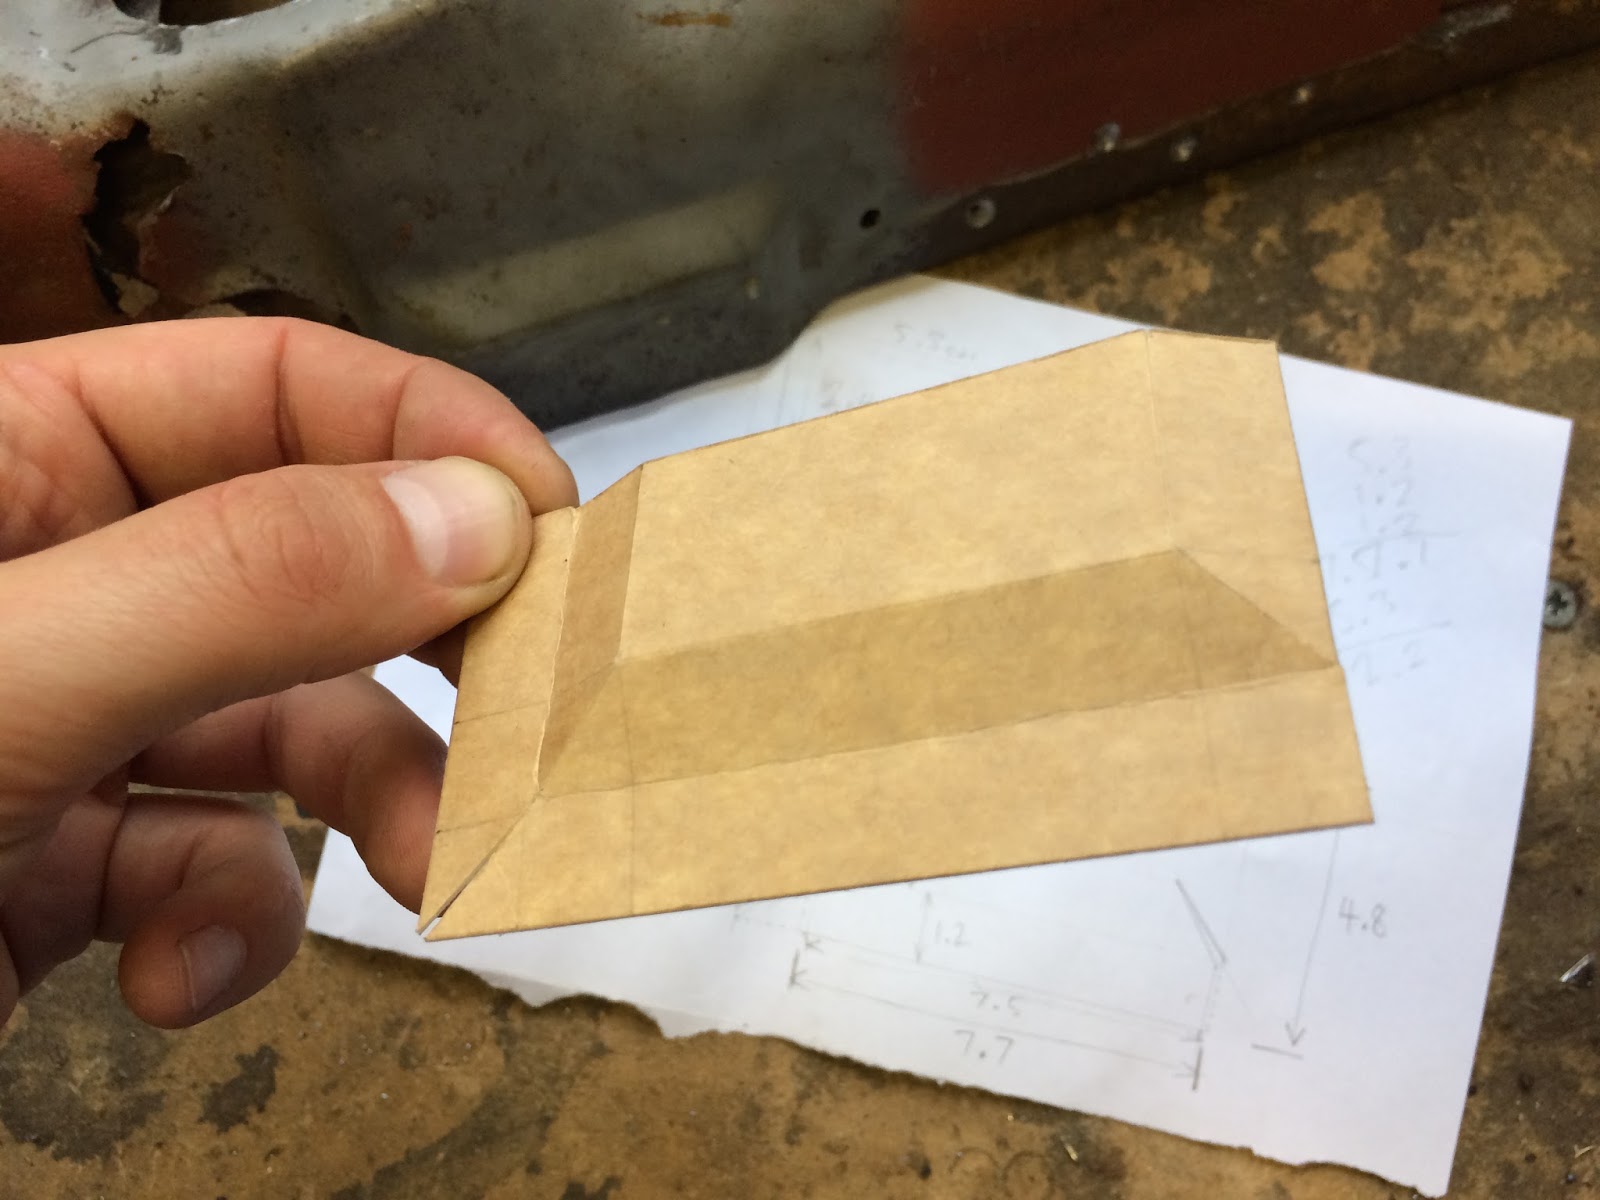
I then transferred the measurements to sheet steel and cut out the geometric net:


After some folding on the vice and a quick zap of the MIG welder to close up the slits:


Linished back and compared to the original:


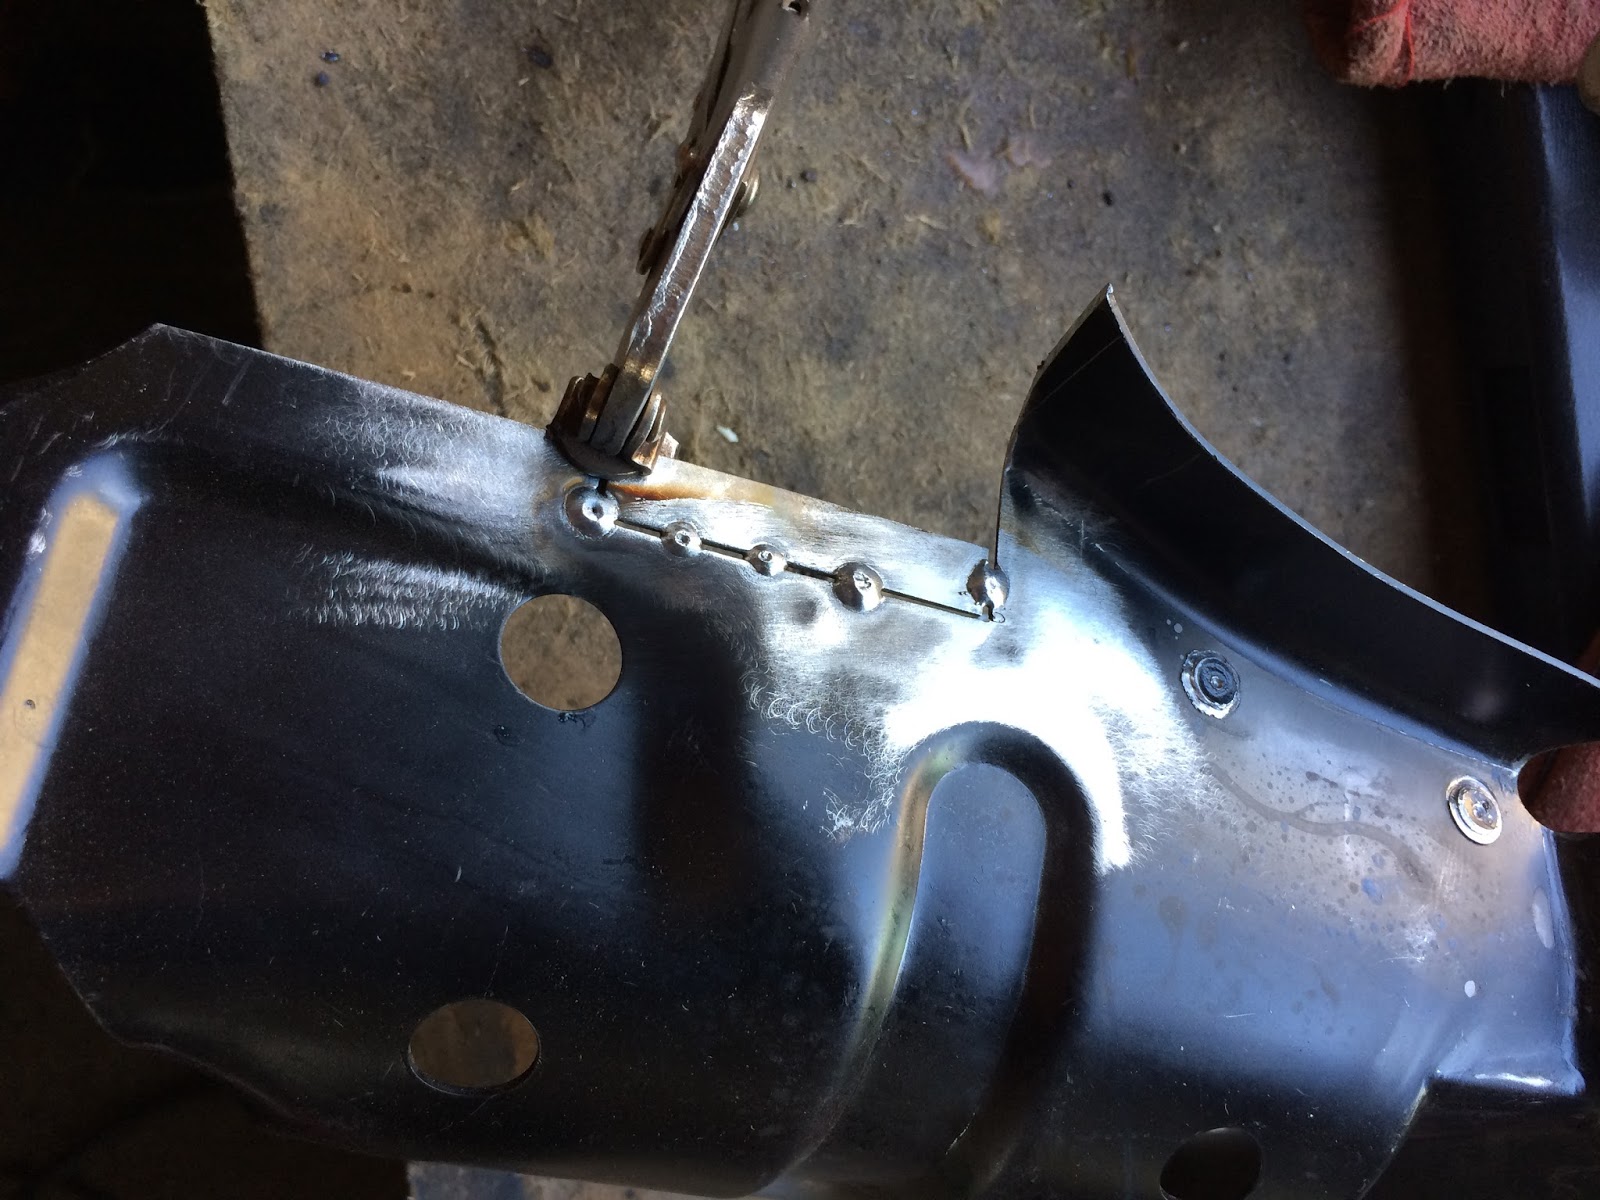
tacked into place on the cross member once the appropriate recess was measured and cut out:


After being fully welded, tweaked and dressed:


Just after the hump is a small section that is bent down on the original. I had to improvise around this section as access for clamping was tight. After some careful tapping with the hammer (remember that man light taps are better than fewer hard bashes), I got the 90 degree bend I was after:


Next task was to alter the heater pipe hole to the correct oval shape:


And trim the return flange to match the original (which terminates about halfway down):


At this point I roughly bolted up the heater channels to the pan and added the crossmembers. The fit wasn't as good as I had hoped and I was unsure at this stage if this was due to the restored pan being off or it the location of the mounting holes in the new panel were incorrect. After some head-scratching I discovered that the lower holes were not spaced apart close enough. There was a 5mm difference compared to the OG spacing. 

To correct this I elongated the hole;


Then using a copper backer I welded the other end to close up the gap slightly:


After some Dremel tool action I had it all looking correct again:


I then shot blast the entire panel before plug welded the mounting reinforcement sections back into place:


Moving on to the thicker supporting rear panel that I removed in the first step, I proceeded to cut out the unnecessary hump and chopped off the rear section that I assume adds strength to the underside of the boot corners. However, this was not present on the originals so I determined that it was surplus to requirements:


Welded in some flat sheet to replace that bump and welded up the access hole that was also present on the main section:


I welded up this little join to add a bit more rigidity:


Shaped the mating flange that will eventually fix to the inner side of the rear wheel arch:

Shot blast the reinforcement panel and got it realigned the best I could to the main section. I decided not to plug weld the pieces together at this point, just in case I needed to adjust anything further down the road. So, here is the nearly finished article just prior to spraying with zinc primer:


Now to do the same on the other side...

Monday, 6 February 2017

Auf Wiedersehen heater channels!

With the car firmly braced up the time had come for some brutal surgery! I started with the rear crossmembers and marked the location of all the spot-welds ready for drilling out:


A few areas had small weld stitch welds about an inch or so long, these were ground back using the dremel tool as I did not want to over grind the area, which is easily done with an angle grinder:


The Y-piece heater tubes had small blobs of brazing on the top and underneath to join them to the inlets of the heater channels. I also ground these back:


After a while of having fun with the power tools, the old crusty panels came free with forceful wiggle:


The old and the new (yep, there was quite a bit of material missing from that outer edge!):


Getting the remains of the heater channels out was largely the same process. Locate and drill out spot welds:


Cut carefully around and just to the inside of the seam welds of the B pillars and hack through the A posts ( I didn't have to be so precise here as these will be replaced):


Out they come ...after some twisting, tugging and leverage from a big flat headed screwdriver:


Comparison of the old and the new:


Interesting little discovery - the outer skin of the passenger side heater channel had apparently been patched up in the past using a now obsolete 'Veng' repair panel. Sticker still intact on the inside, as seen through several layers of corrosion:


With both channels now out of the car it would've been rude not to have a quick test fit of the Klassic Fab replacements:


Still some minor adjustments to make in order to make them sit right; namely, the carpet retaining strips that sit along the bottom edges of the door apertures appear to be too far back and foul both of the B-pillars. Nothing that a little trim wont take care of though. On the whole I would say it is looking fresh!


Edit (27/02/2017): The marginally incorrect position of the carpet retaining strips were really bugging me, particularly as they cost a pretty penny to buy. Klassic Fab are know for their outstanding attention to detail and it seemed a shame that this was letting the overall quality down. I sent my feedback to the UK vendor of the channels who got in touch with Gerson over at KF on my behalf. This is an extract of the replies I received:


"We got an email back from Gerson and hes checked all the channels he has and they are all the same. Hes sold over 400 pairs but has been told this by 2 other customers so he is now aware of it. He said that he thinks people just cut the small part out or de-spot weld and re-spot weld the strip."

"thank you for your email, yes Gerson knows all about this now so he will make sure that these are right in the future."

Happy to hear that this minor issue will be addressed going forward. Klassic Fab are a real asset to the aircooled VW restoration community and I am reassured by the fact that they take customer feedback onboard to improve their products.


Saturday, 26 November 2016

Rear valance removal

To start proper repair work on my bumper hangers I needed to detach the rear valance/apron. To begin with I removed the (incorrect) patch panel that had been welded over the top of the original (same old story as before!):


I then removed the buckled engine tray on the passenger side (L/H):


Removing the rear valance basically involves locating and drilling out all the factory spot welds. There are quite a few down the side lips. Most need drilling, but a few had already broken off, having weakened from corrosion:


A few more spot welds inside the engine bay on the upper protruding taps and down the inner flange: 


I then needed to grind a couple of small solid welds on the top edge of the lip:


Same procedure on the other side as you would expect:


And away it comes:


The valance hasn't faired well. The left hand side of the outer skin is misshapen from the rear end shunt (although this doesn't really show in the photos, but it is very obvious in real life). Additionally, the inner reinforcement section has a lot of corrosion and rust holes. It would take a lot of work to get this section anywhere near good again:


I will keep hold of it for reference, but ultimately replace it with a high quality BBT reproduction.