Thursday 4 October 2018

The front end is off

Well, I'm now in as deep as it gets with the restoration of Gretchen as the entire front has now been removed:


When I started this adventure I never thought I would be getting this savage with my beloved VW. If I did have any insight into the extent I would eventually be going to, I think I would have been too overwhelmed to even make a start!

Anyway, let me back up and go over the steps I took to remove the passenger side front quarter panel. Firstly, I removed the bonnet cable guide tube having carefully noted its position and orientation on the quarter panel. It was brazed on in several places and I will hopefully do the same (another skill I will need to learn) when I reattach it back to the new panel. The Dremel tool with mini grinding wheel was great for this delicate job:


With all the brazed welds either ground down or cut through, the guide tube came free without any trouble:


I then need to take care of a dodgy old 'repair' at the bottom of the A-post (nothing to do with me by the way). It was annoyingly seam welded to the inner arch as opposed to spot welded:


The angle grinder made fast work of it. Oh look, it appears to be another crappy old Veng repair panel:


With those smaller tasks out of the way I could then move forward with the Removal of the quarter panel. This was basically the same process as before, so I will just post a few visual highlights and spare you the protracted write up:


Cut around the top of the panel underneath the point where it meets the scuttle panel:


Had to locate and drill out a bunch of spot welds hiding at the bottom of the spare wheel well. Conveniently, I didn't have to bother with this step before as the same section on the other side had entirely disappeared due to rot: 


After a lot of patience I had the panel off:


To finish off it was a case of removing the few remaining spot welds to free the inner fuel tank and space wheel well structure, which I wanted to keep together as one assembly:


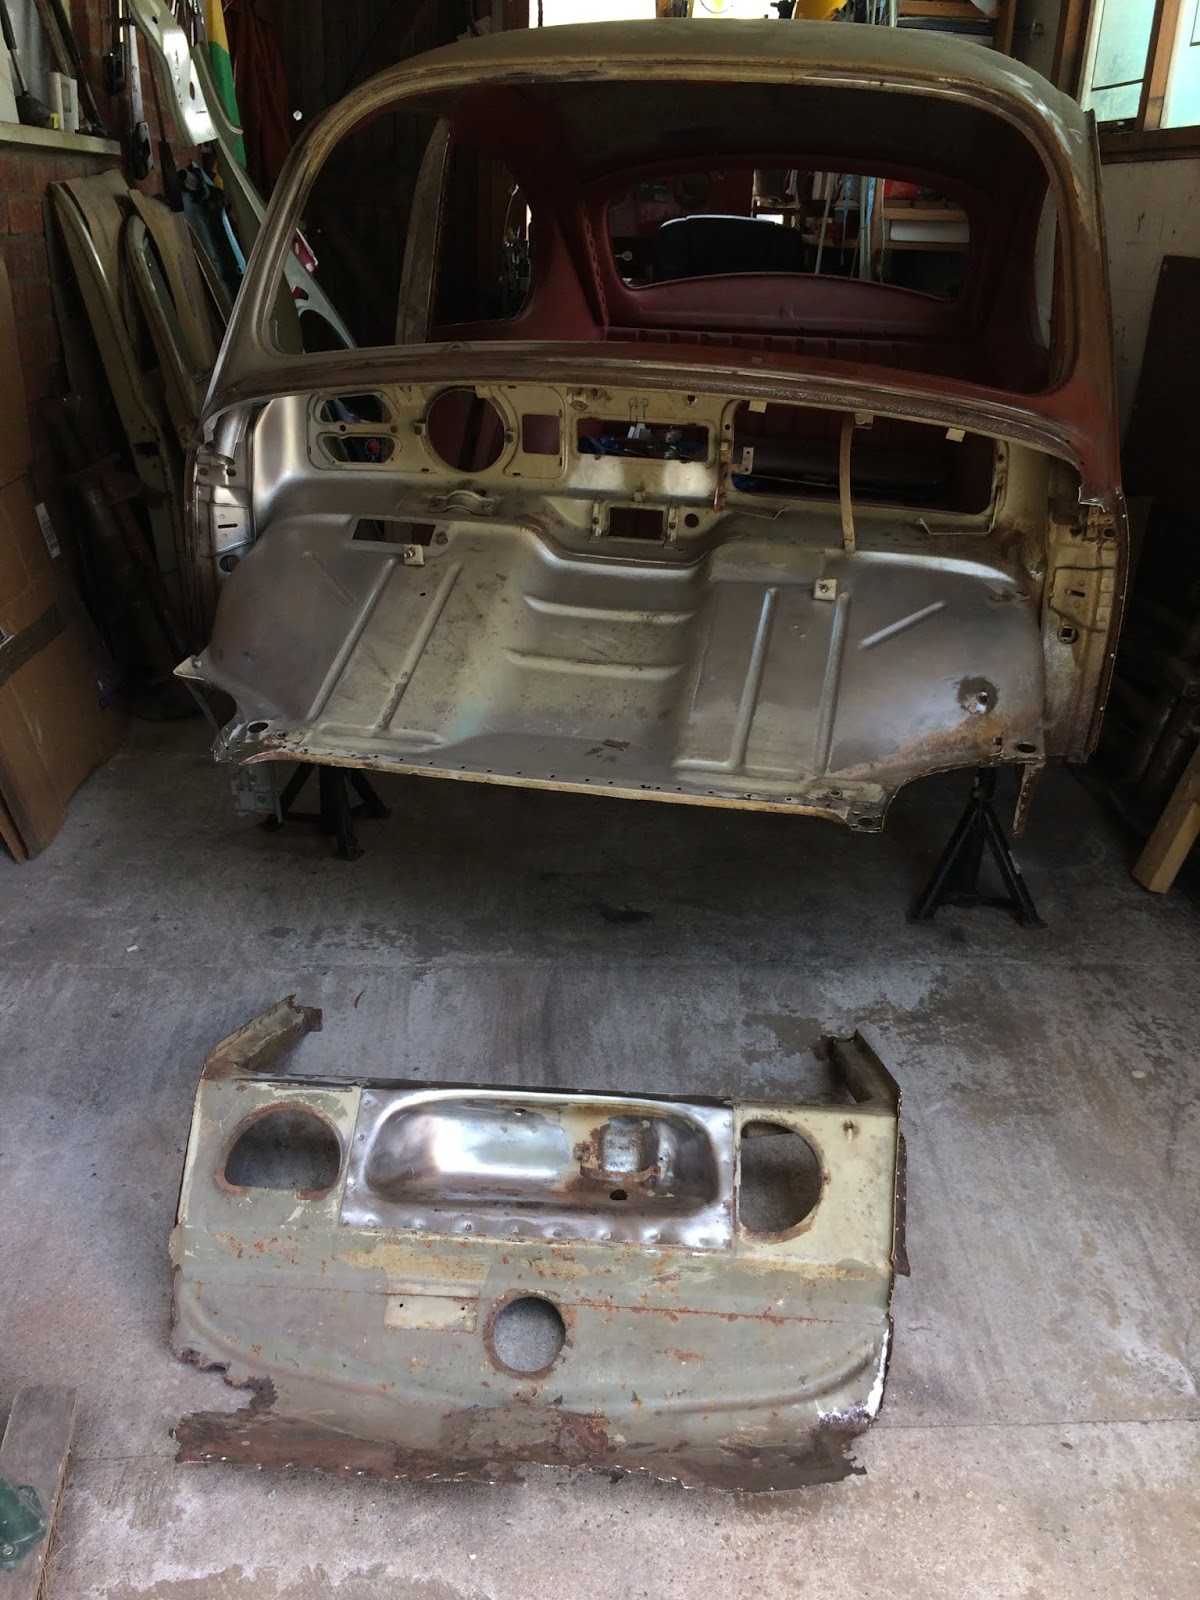
Having this section free of the car means it will be far easier to clean up and make repairs:


...And so this leaves me with a significantly shortened car, the advantage of which is that I have now liberated a couple of extra feet of precious workshop space, haha.

Thursday 6 September 2018

No Quarter

Close the door, put out the light. No, they won't be home tonight...


Ohh yes, the drivers side front quarter panel has now been removed! Here is a write up about how I undertook this procedure. Firstly, I need to give huge credit to Dan (aka 'Dodgerodder') over on the Samba forums, who's excellent approach to this particular task heavily influenced my own method. In fact, I literally 'carbon copied' what he did in some places. His thread can be viewed here and the panel removal begins on page 5.


To start I fabricated a jig that locates the position of the boltholes that house the petrol tank. This rigid brace helped to keep things in place whilst unpicking the panel, but I anticipate that it will be a valuable tool one I come to rebuild the front end (yes, you read that right. I am totally taking apart the front section of the car).


Built using 25mm angle iron and box section steel:


I added a couple of thick oversize nuts to act as spacers on the front bolts to prevent stress being added to the captive nuts once tightened as they do not sit in perfect horizontal alignment with the rear nuts:  


Bolted up and holding firm:


Next task was to make a seam picking tool to pry up the folded steel running up the gutter near the A-post. This was another one of Dodgerodder's ideas that I stole:


It is pretty easy to use, Simply pry up the lip of the gutter at the bottom a little until the tool slips in and then tap with a hammer all the way up the section: 


I did several passes apply a little outward pressure each time until the seam was fully open:


This gave me access to the rear vertical edge of the old quarter panel which was spot welded every 6 cm or so. I carefully ground these spot welds away using the Dremmel tool.

For the spot welds in the main panel I used a Sharpie to highlight there positions and then relied on my spot weld removal tool to drill out each one. This took a long time as there were an awful lot as you can tell from the pics below:


Eventually the panel came free. Patience really is key with this process:


Monday 27 August 2018

Quickie: Bumping the Bumps

Whilst I carefully consider my approach for the next phase of this restoration, I have been occupying my idle hands by working out a few of the unsightly blemishes peppering the car. I've been treating these old battle scars using nothing more than the humble hammer and dolly. I've not had much experience in this field, but by taking it slow and steady I found that I was able to achieve satisfyingly decent results. Here are some 'before and afters' of a couple of the more visually prominent damages that I have bumped back into perfect shape:  


Thats all for now (short and sweet), but I can assure you that the post will be a major one!

Friday 17 August 2018

Uniting the front bulkhead panels

So, now that the large firewall panel has been sorted I can now join the smaller inner section of the bulkhead to it to form the finished article. The trail fit looked pretty decent, but the inner section needed a few tweaks to make it perfect. Firstly, the flange on the left side had an awkward step cut into it. No idea why, it was just how the Mexi panel came.To be honest, I probably could have just left it alone, but I that is just not my style. So I cut some steel sheet to fit the profile and clamped it up ready for welding. Note that I left it deliberately oversized to make it easier to weld without blowing through on the edges:


All welded:


Ground flush, shaped up and finished:


In preparation for plug welding I added 6-7mm holes around the edges of the panel, in exactly the same locations that the factory spot welds were. Clamped up and ready for plug welding:


The two sections are now permanently joined:


Good penetration on the reverse:


Dressed the welds and generally cleaned up the panel. Another section of this grand jigsaw puzzle sorted: 


Thursday 19 July 2018

Converting the Klassic Fab firewall panel to RHD

With renewed vigor I have been cracking on with the adaptions to the replacement firewall panel. First of all I welded up the unneeded (on a '65) holes:


The central rounded pressing (shown above, that was formerly a hole) is the primary difference when compared to the original '65 panel, which resembles a protruding bulbous nose. I am not too fussed about this detail as trying to recreate it with my humble tools and limited knowledge would be an impossibility. Oh, and before you suggest it; no, unfortunately I cannot simply cut the original section out of the old and weld it into the new panel because the steel is a different thickness. Not to worry, I like how it now looks.


Next I had to consider how best to convert the panel to work for a RHD car. More specifically, the flanged hole that the steering column passes through needed moving over to the other side. My initial idea was to cut a hole and bend up a circular flange by hand. In fact, I had a brief practice at doing exactly that with some steel offcut of the same thickness. It didn't turn out all that badly considering it was all done quickly by hand tools:


However, I grew a little concerned that this would not be adequate as this section houses a rubber grommet which surrounds the steering column and keeps the elements out. If it was not perfectly round and smooth it could be susceptible to water ingress and then the inevitable arrival of rust! I shelved that idea and reverted to an approach that I felt more comfortable with; welding!

I removed the circular-flange-thingy off of the mexi bulkhead panel:


Trimmed it down to match the correct thickness of my original part:


Then drilled out a large hole in the KF panel:


and opened it up to the required size using the power file:


I think you can see where this is heading:


All tacked into place with alignment looking spot on, ready for the rest of the welding:


And here we have it:


After some careful grinding and finishing:


The backside had good penetration, but decided to grind as flat as I could so that the grommet would bed in correctly:


Test fit of the grommet confirmed that it was spot on:


Blanking of the left section was a lot more of a straight forward task. Here is the before:


The during:


And the after:


To finish up I had to drill a ...mm hole to the right of the steering column where a couple of wires pass through a grommet:


Took a bit of work, but I am pleased with the finished result: