Wednesday 29 September 2021

Fabricating spring clips (for rear drums)

Stripped down the rear drums, then bagged and tagged the components:

As I began to blast the scabby backing plates I noticed that something was amiss - the spring clips for the star adjusters were damaged and on one of them pretty much absent: 

I was able to drive out the damage remnants out of the slot using a flat-head screwdriver:


Aftermarket replacement spring clips are available, but I feel they are expensive for what they are (effectively a thin slip of steel with simple dimple pressings). Although perfectly functional, the repros are not an accurate copy of the original clips (not that this matters in the slightest, especially as the clips are hidden from view). So, more than saving a few pennies or obsessing over insignificant details, I saw this as an opportunity to do something I particularly enjoy; metal fabrication. As a fun excerise I wanted to create something with basic hand tools, but with the aim of having it look identical to the original item.

Trimmed and marked up some 22 gauge (0.75mm) steel:


Used a wide bolster chisel to form a step, using scrap bits of angle iron clamped in a vice to form around (an idea I must credit to Tony BMW over on the Retrorides forum);  

Turned the piece around and repeated the process to complete the desired indentation:


I then cut the piece into strips 10mm wide: 

To add the crucial pressings on the ends I needed to make a press tool. The simplest way I could think of was to round off the tip of an old nail that had the right diameter:

Matching it up against the remnant of the original showed that it was pretty much dead on:

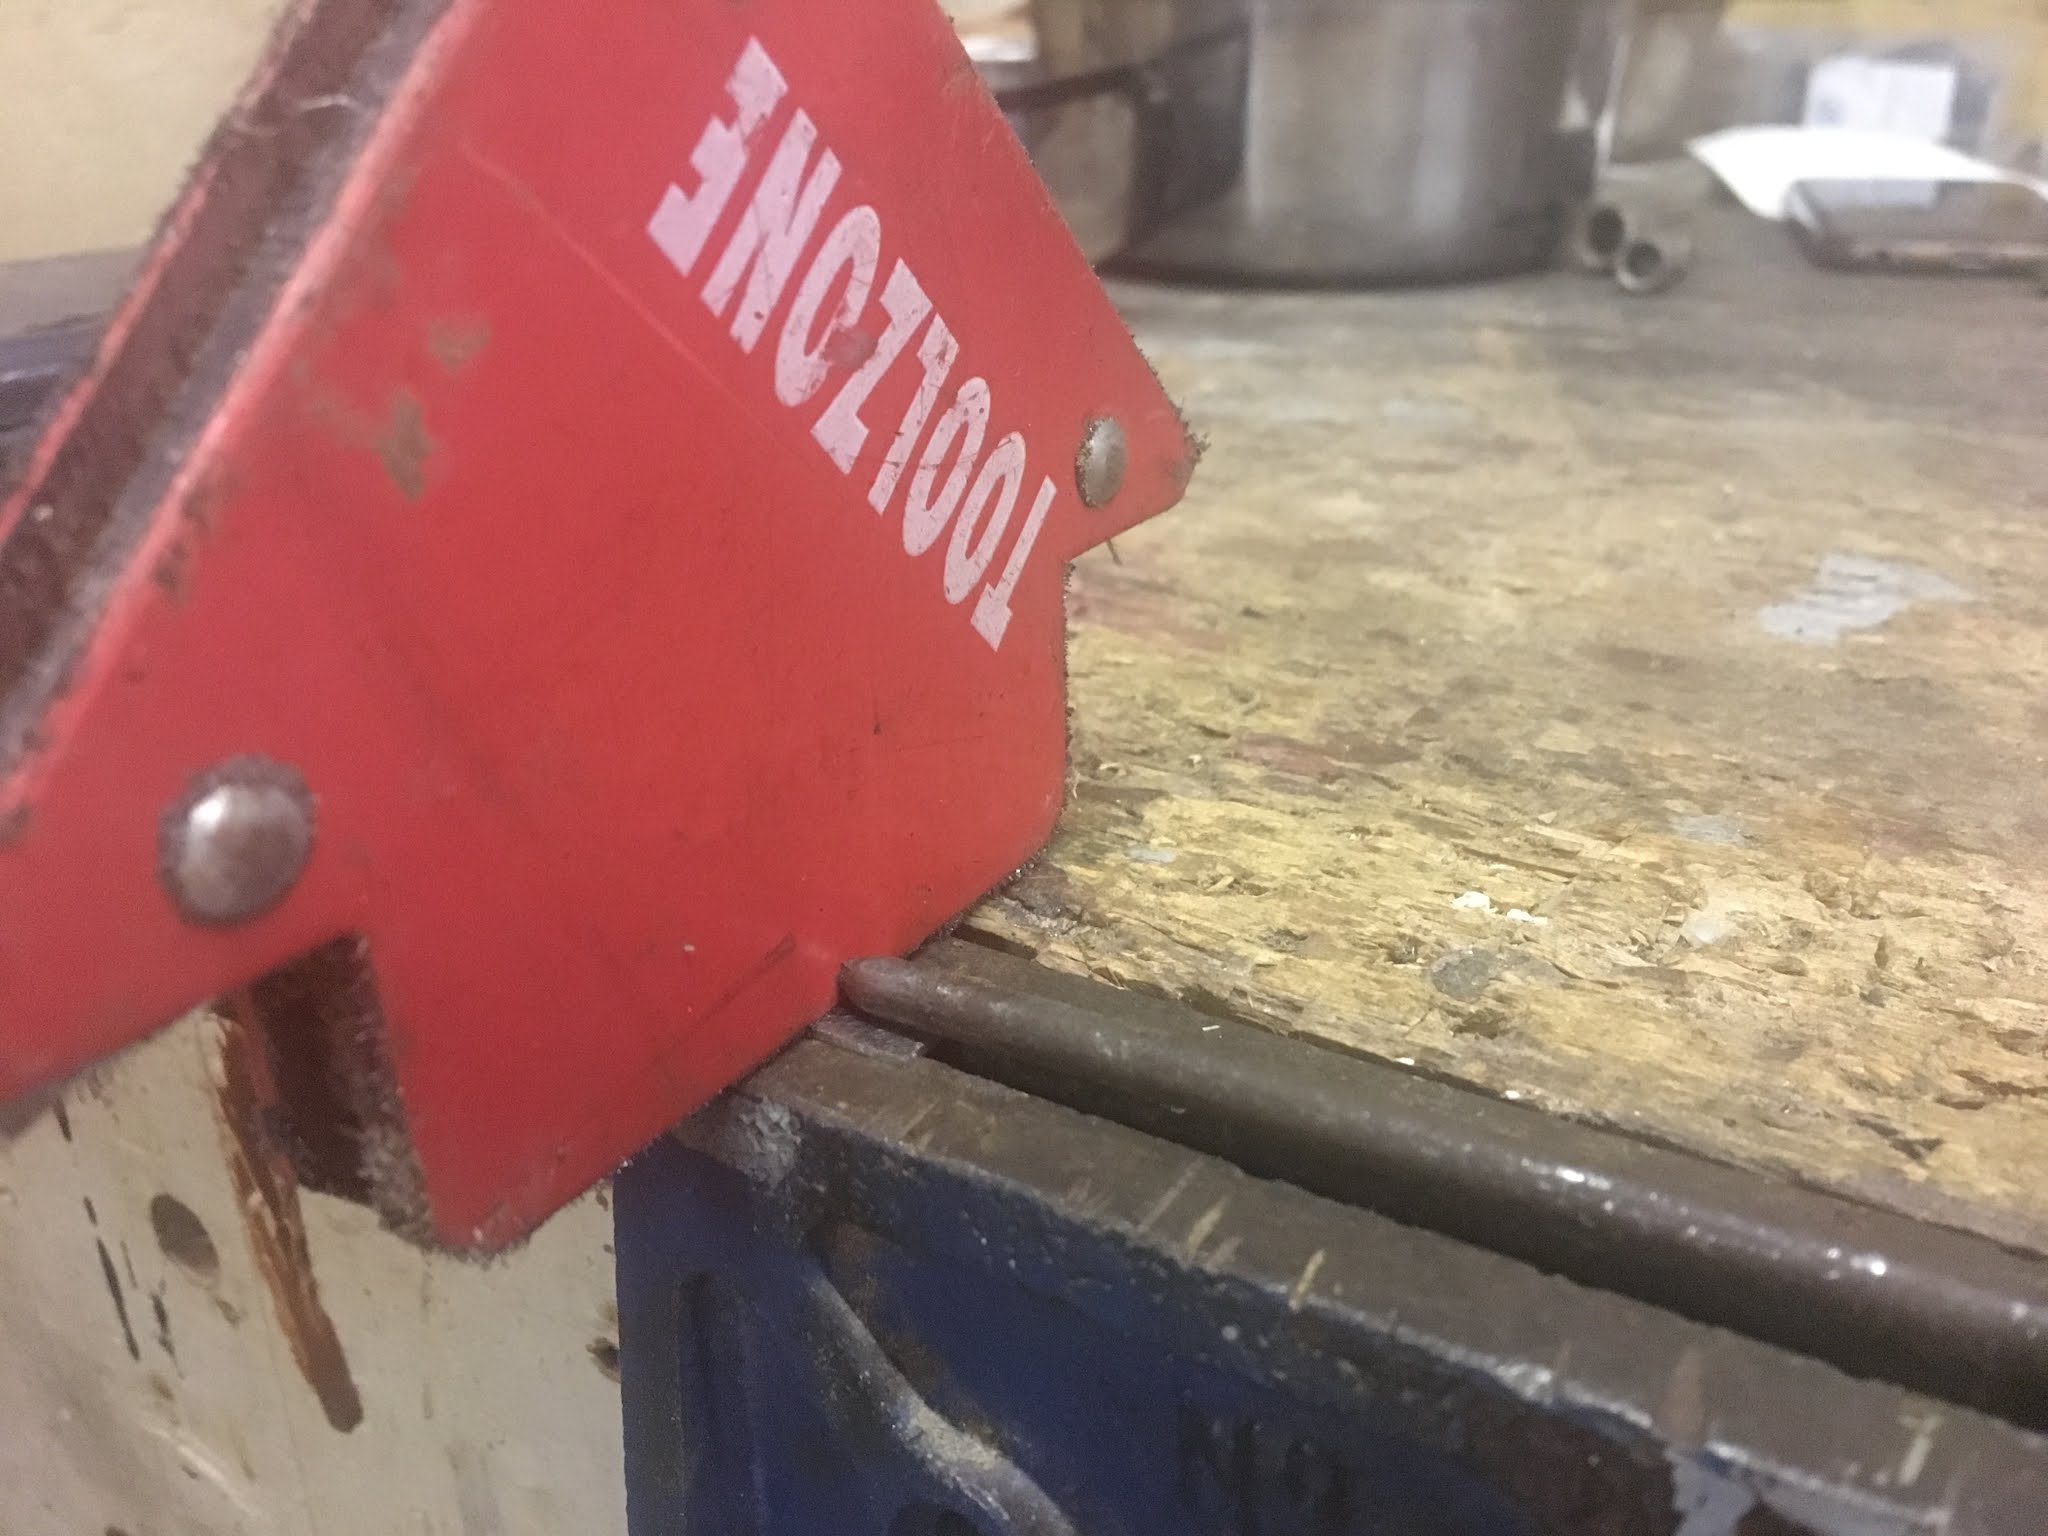
I then opened the jaws of my bench mounted vice to the corresponding width of the nail, plus a small amount extra. I held the 'blank' steel piece in place using a welding magnet over the gap for the first initial taps:

After a few firm (yet gentle) blows with the hammer on top of the nail, I was able to work the indentation until it was at the required depth and then carefully planished over the curling ends to flatten them back out:


The finished spring clips as per factory spec: 


Comparison with the intact original one in situ within the front drum backing plate:

Wednesday 22 September 2021

More glorious paint

As predicted, I got all of the recently blased chassis parts into paint. It is worth noting that because these parts were blasted at different times, some flash rusting started to emerge in some of the areas with heavy pitting. It goes to show how fast atmospheric humidity gets to work on bare steel; 'rust never sleeps' is a truism of classic car ownership! I swiftly remedied this by throwing the parts back in the cabinet for a quick once over with the blast gun, so that everything was equally immaculate before paint. Followed up with a careful bit of re-masking on some key parts and I was good to go:

Pretty happy with the results this time round (plus, I got this portable spray booth for a bargain):


Yes, I do believe that I have found the sweet spot in terms of gun settings and paint viscosity:  


A close up detail of one of the axle tubes with the masking removed. The transition lines were as sharp as I could have hoped for: 


Whilst I am in the flow of praising my own craftsmanship, I will also highlight that the crisp factory stampings are still perfectly legible after a couple of liberal coats: 

Wednesday 15 September 2021

Gearbox axle tubes get a blast

A little more chassis work progress over the past week; this time focusing on the scabby rear axle tubes. Cleaned the loose muck off manually:


Then masked off the areas which were to be left as bare steel using gaffer tape. This was to protect against abrasion when blasting the rest:

One down, one to go:

Both spotlessly clean and ready for paint;

I also cleaned up the the 'exposed-to-elements' bottom section of the steering column as there was significant rust pitting:


You can bet that next week's update will feature a lot of black paint!

Wednesday 8 September 2021

Yet more chassis parts blasted

Sadly, my old trusty blue vacuum gave up the ghost with a high pitched squeal and dramatically coughed out a dense dust cloud all of the workshop. Damn, me and that suction box go way back! Not one to lament the passing of a domestic appliance, I duly replaced it with something a bit more suitable. Introducing my new dedicated shop vac:

Once everything was hooked up to the cabinet, blasting could finally resume. Here is one of the track rods I disassembled last week getting the royal treatment:

...and a new batch of parts now awaiting an obligatory coat of Mastic 121:


The keenest of observers may notice that most of these parts were previously blasted and painted years ago, but at the time I applied the paint using a 1" decorators brush in the misplaced belief that the paint would self-level to an impeccable finish. Well, it didn't exactly do that and it's been bothering me every time I look at these parts to see all the blatant brush marks. I know these will look far better when sprayed and my mind will be at peace!

Wednesday 1 September 2021

Steering box clean up and track rod teardown

Here is the steering box that I scrubbed and cleaned with petrol (such a great degreaser), a stiff nylon brush and some old rags;

It is an OE quality reproduction part made by 'TRW'. They seem to have a mixed reputation, but it worked perfectly fine for me in all the years that I had the car on the road and is still in a good mechanical order. Although this part appears to come from the manufacturer in a bare steel finish, I may well mask it up and paint the cast section as I can see this flash rusting again in no time and all that scrubbing would have been in vain;


Continuing the loose theme of dismantling front end chassis components, I decided to take apart the track rod ends. These had rusted up to the point that they had essentially bonded tightly into the track rods to become one fused unit. This turned out to be a bit of a time consuming process for what should have been a quick procedure. Essentially, my default approach is to scrub around the visible parts of the joint with a wire brush, drench with penetrating fluid (WD-40 in this case) and leave overnight. The next day one may be lucky enough to get the old stubborn nut to move; 


However, when this fails (which is it usually does) then its time to break out the blow torch and heat until the local area is glowing cherry red. This expands the metal and helps to ease things up; 


A good couple of heavy blows is then all that is usually needed to crack the bond and gets things turning. If not, then it is a case of lather, rise and repeat;


Here we have both the short and long tie rods (finally) dismantled. Yes, the tie rod ends are completely mangled now that they have been clamped in a vice, heated and hit carelessly with a hammer; but these elements are designed to be routinely replaced anyway, so were always sacrificial. I am just happy that the track rods themselves sustained no damage - they will just need blasting and repainting and will be good to go;