Wednesday 29 March 2017

Original workshop manual

Whilst scouring the swap meet at this year’s Volksworld show I came across this original VW workshop manual from 1965:


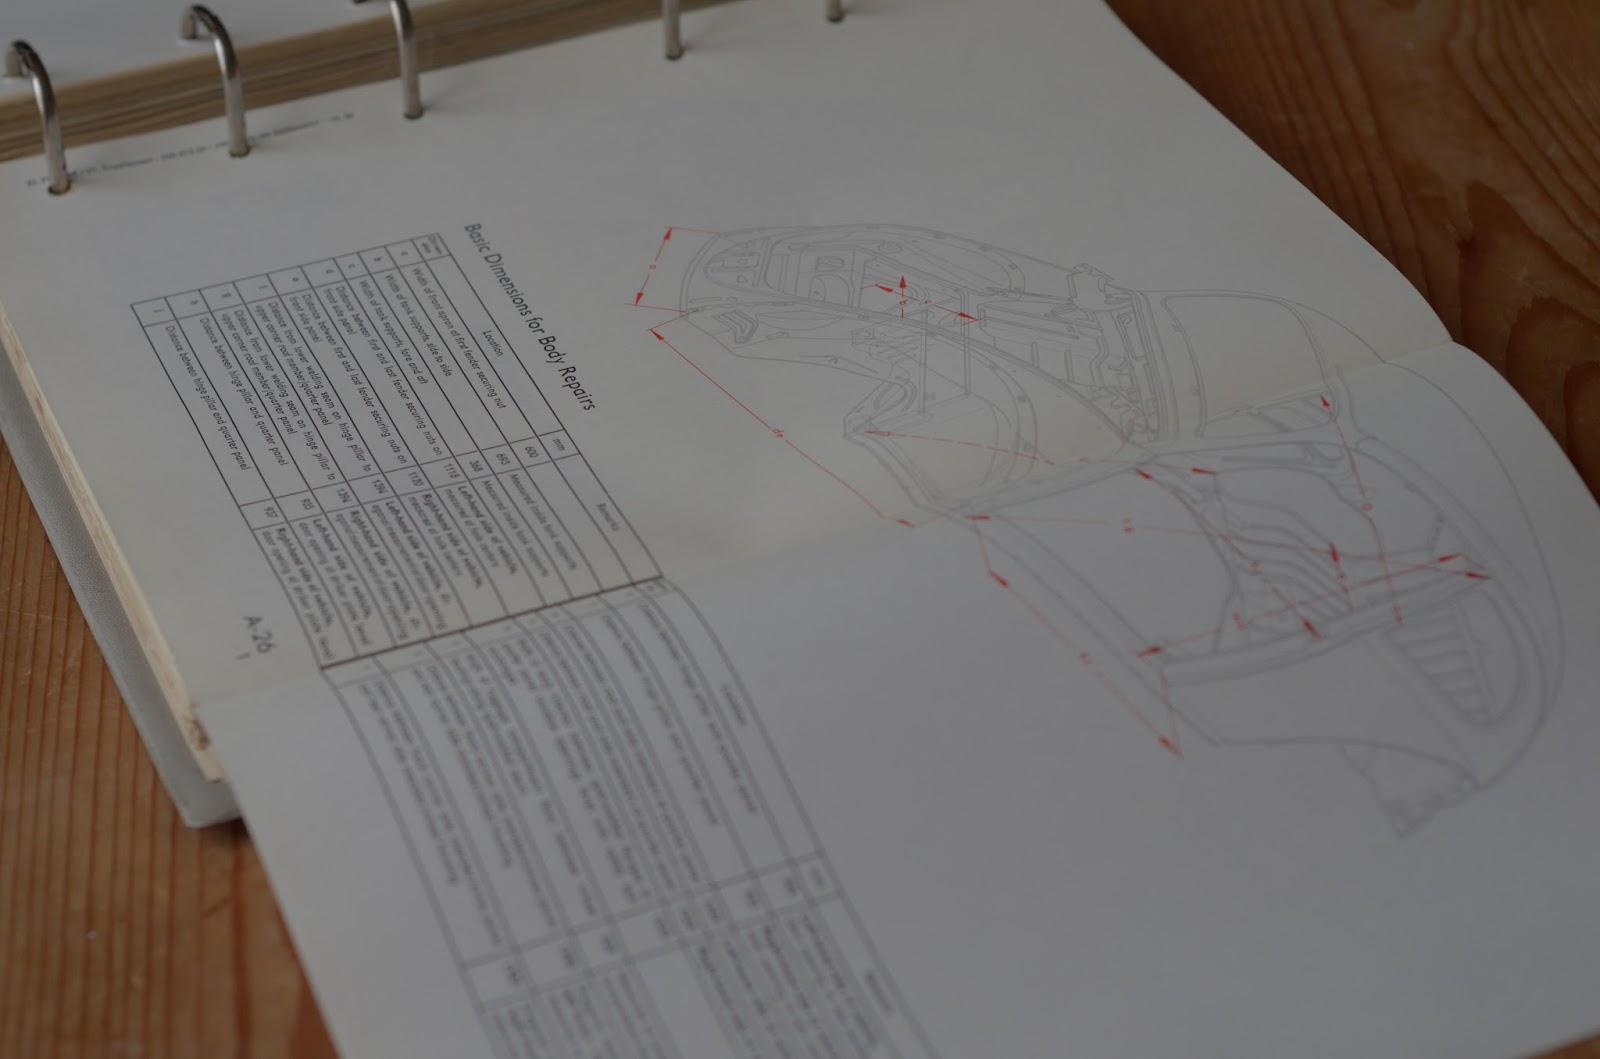
I have been on the hunt for one of these for some time as the technical information provided within is second to none. These were originally produced for official use at VW approved garages and not available to the general public:

Worth the investment in my opinion and this will now serve as my main reference source for crucial measurements and certain repair procedures:


Just need to keep my eyes peeled for Vol 1 now… Edit 20/09/17: I managed to get my grubby mits on Vol 1! One came up for sale as an auction on eBay, but didn't attract many bidders so was mine at ludicrously low price. Got to love eBay, it is the classic car restorer's best friend!

Tuesday 14 March 2017

A post inner reinforcement panel

With the remnants of the old heater channels out of the way I could begin work on the drivers side A-post. This was rusting through and had also been patched up once in the past. Started by roughly trimming away some sheet metal to reveal the inner reinforcement section: 


This was heavily corroded towards the bottom as expected. There was also a deep horizontal gouge that was clearly inflicted by a stray angle grinder during the past hasty repair (just visible about midway down this photo):


Shot blasted the area above the corrosion and damage to reveal solid material:


Cut the bottom portion of the reinforcement panel off with a hacksaw (yep, sometimes it feels right to revert back to handtools as they are less aggressive and offer more control):


Drilled out the spot welds of the Hookys repair panel to separate the inner and outer sections:


Using the Hookys Door Alignment Tool (DAT) I lined up the repair section and scribed a cut line:


trimmed it down to size:


I then spent a long time finessing the alignment of the repair panel. Filing small amounts here and there until I was happy with the fit. The profile of the repair panel doesn't line up exactly right, but it is close enough and will never be seen once the outer skin is on, so I am not too bothered:


Started welding one tack at a time to keep the heat build-up down:


Ground the welds back and linished smooth. Finally sprayed with the obligatory lick of zinc primer:


Wednesday 8 March 2017

Removal of front bulkhead

Time to get the old unsightly bulkhead out:


Located and drilled out a ton of spot welds up the side of the front quarter panel:


The other side needed some angle grinder action at the bottom to remove an old repair patch that was in the way:


I was then able to get at the last few spot welds hidden behind:


I used a piece of sandpaper to lightly rub along the top edge, which made the spot welds easier to identify:


I used a small 3.5mm bit and drilled through both panels. My thinking was that this would help with realignment later using Cleco fasteners to line up the holes and pull the seams snugly together:


The ends of petrol tank support rails were brazed to the bulkhead and I ground these back using the Dremmel tool and used a flathead screwdriver to gently separate:


On the inside of the car (underneath the dash) I used the heatgun to soften up the old seam sealer. Once heated it all scrapped off very easily and the panel started to loosen:


Patience was key at this point. I took my time redrilling certain holes a fraction larger if it seemed to be holding things up and delicately kept on wiggling the panel. I didn't want to apply too much force or I would have risked bending either the bulkhead or lip of the top panel out of shape. Once loosened I found the panel needed tapping backwards (i.e: towards the inside of the car) and away from the tank support brackets. The top lip of the bulkhead tucks up behind them in an awkward fashion, but eventually it came free without drama:


Clearly the bulkhead panel is in need of substantial work to make it straight again, but to better assess the overall condition I decided to separated the two sections. Drilled another bunch of spot welds:


Hey presto:


I shot blasted a few key areas in my cabinet and found that a fair amount of both sections are still usable:


Therefore, I will attempted to repair using sections from a repro panel and if that doesn't work, or it looks substandard in any way, then I can always resort to plan B and source a genuine Mexi replacement bulkhead (which will work, but looks vastly different to my mid 60's panel).