Showing posts with label MIG. Show all posts

Wednesday, 1 December 2021

Repair to the petrol tank support rail

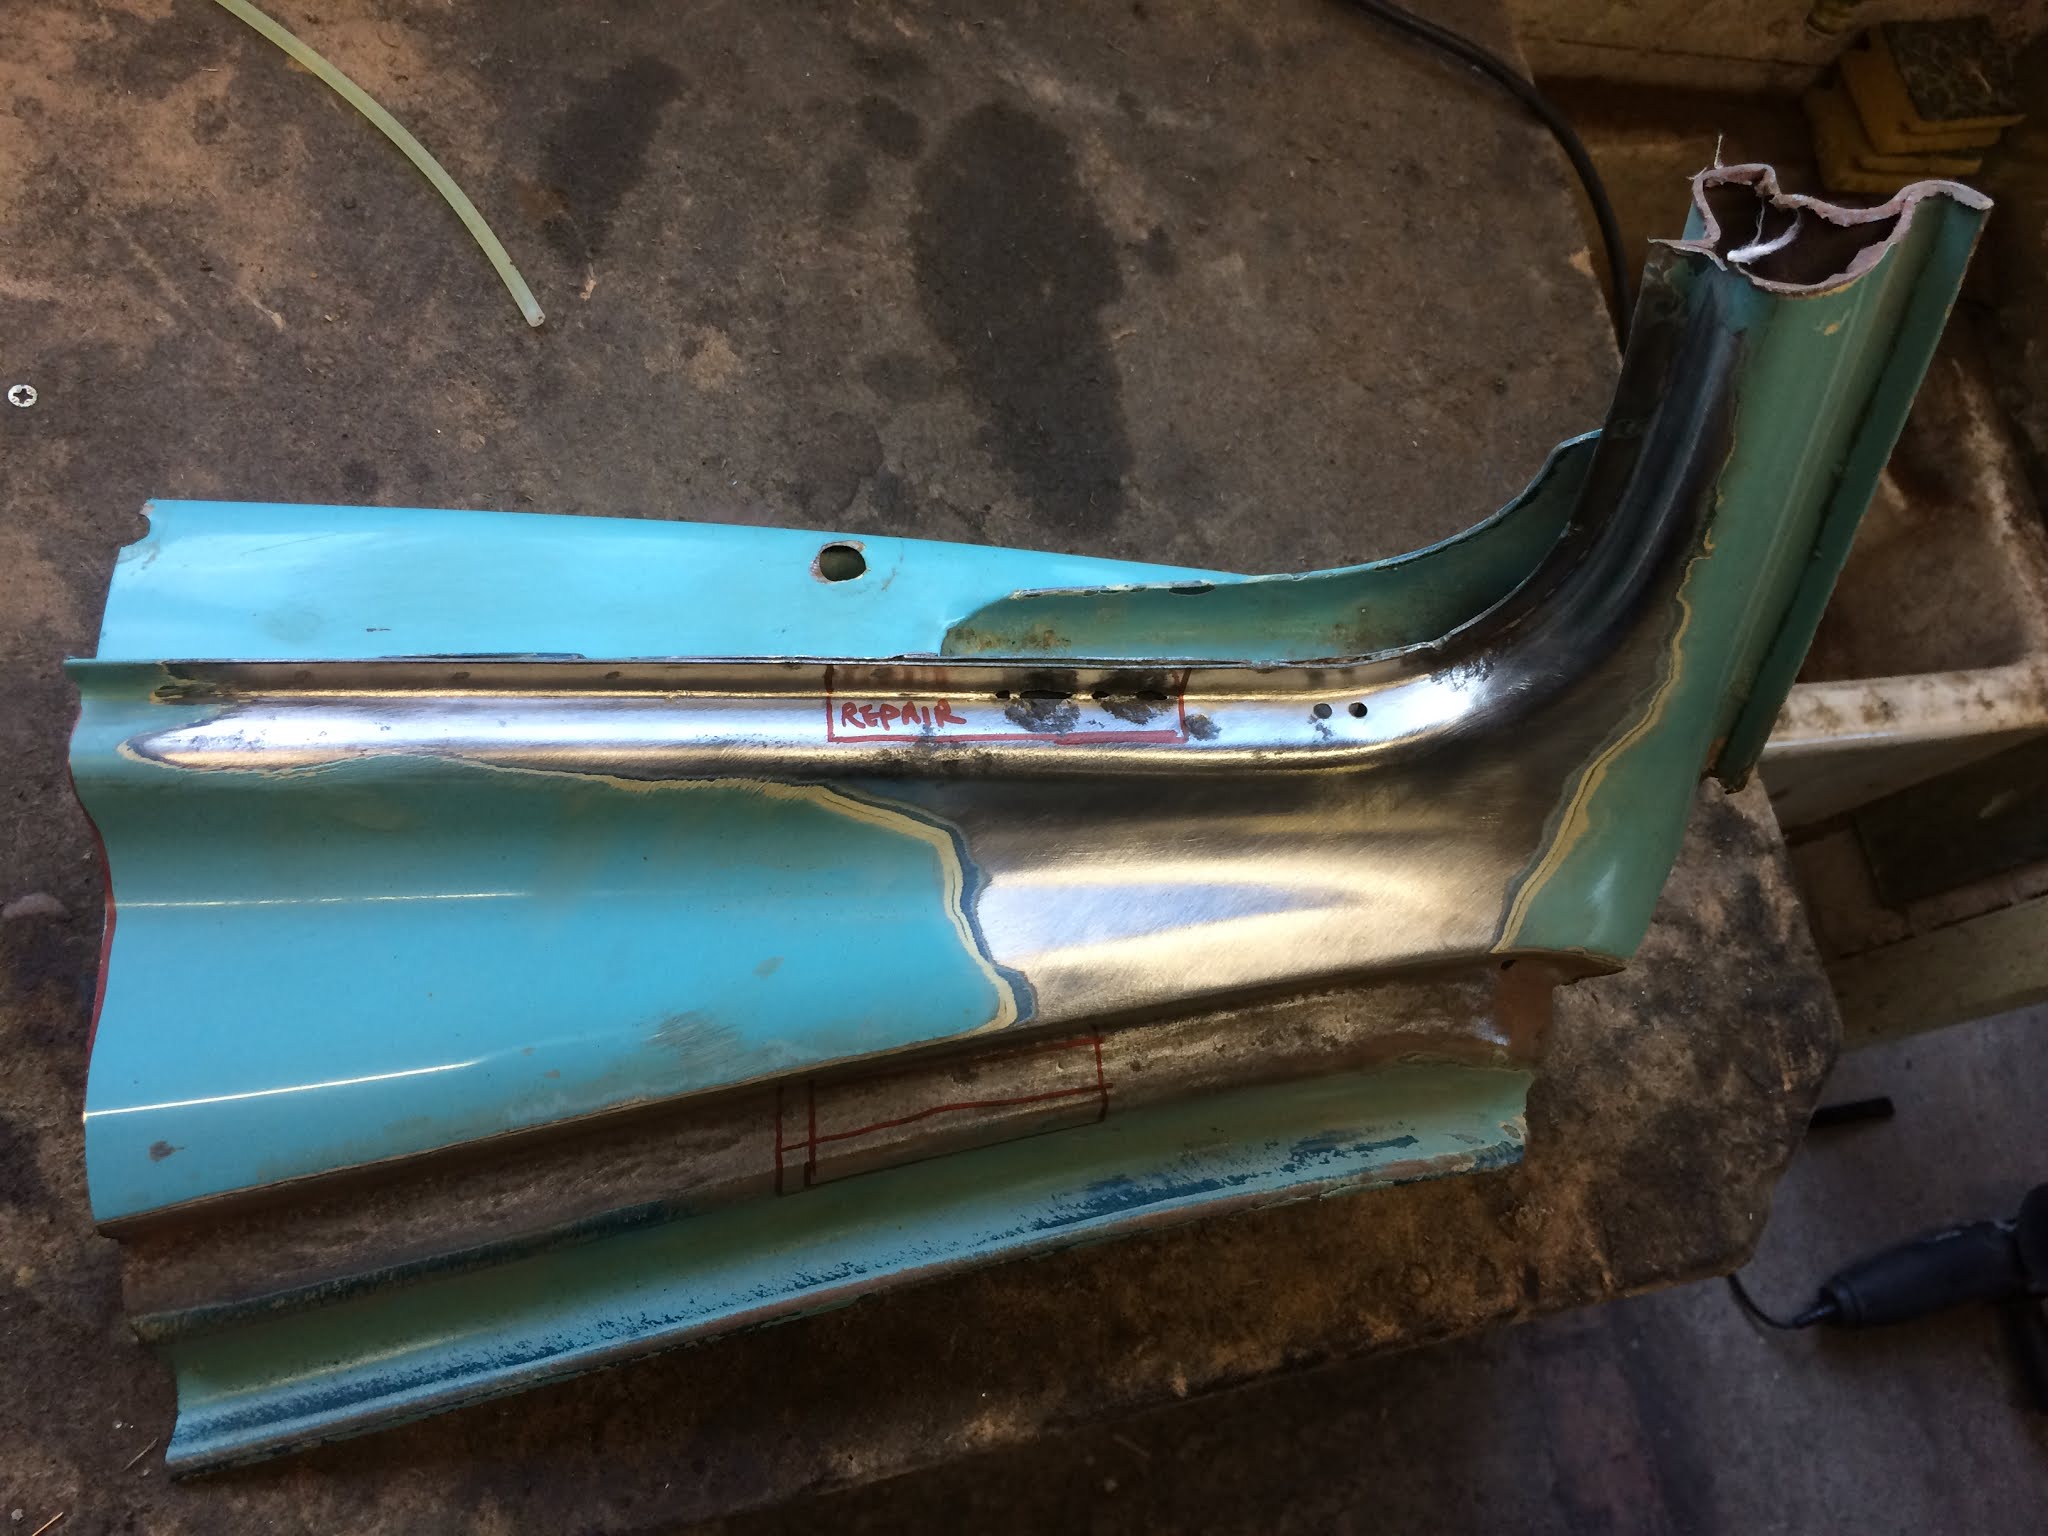
I was still in two minds about the tank support rails. My initial feeling was that they were fairly crispy and that heavy pitting (from both inside and out) had thinned them.

However, upon blasting, it turned out that my assumption only turned out to be partially true. It seems that these sections were made from a slightly lighter gauge steel, which would explain why they felt relatively light. Fortunately, the rot was not too extensive, so rather than replacing with new items I figured I would save them. Afterall, the more original steel that stays in the car, the happier I feel:

Marked up the worst sections:

Cut out the bad:

made up a patch from fresh steel:

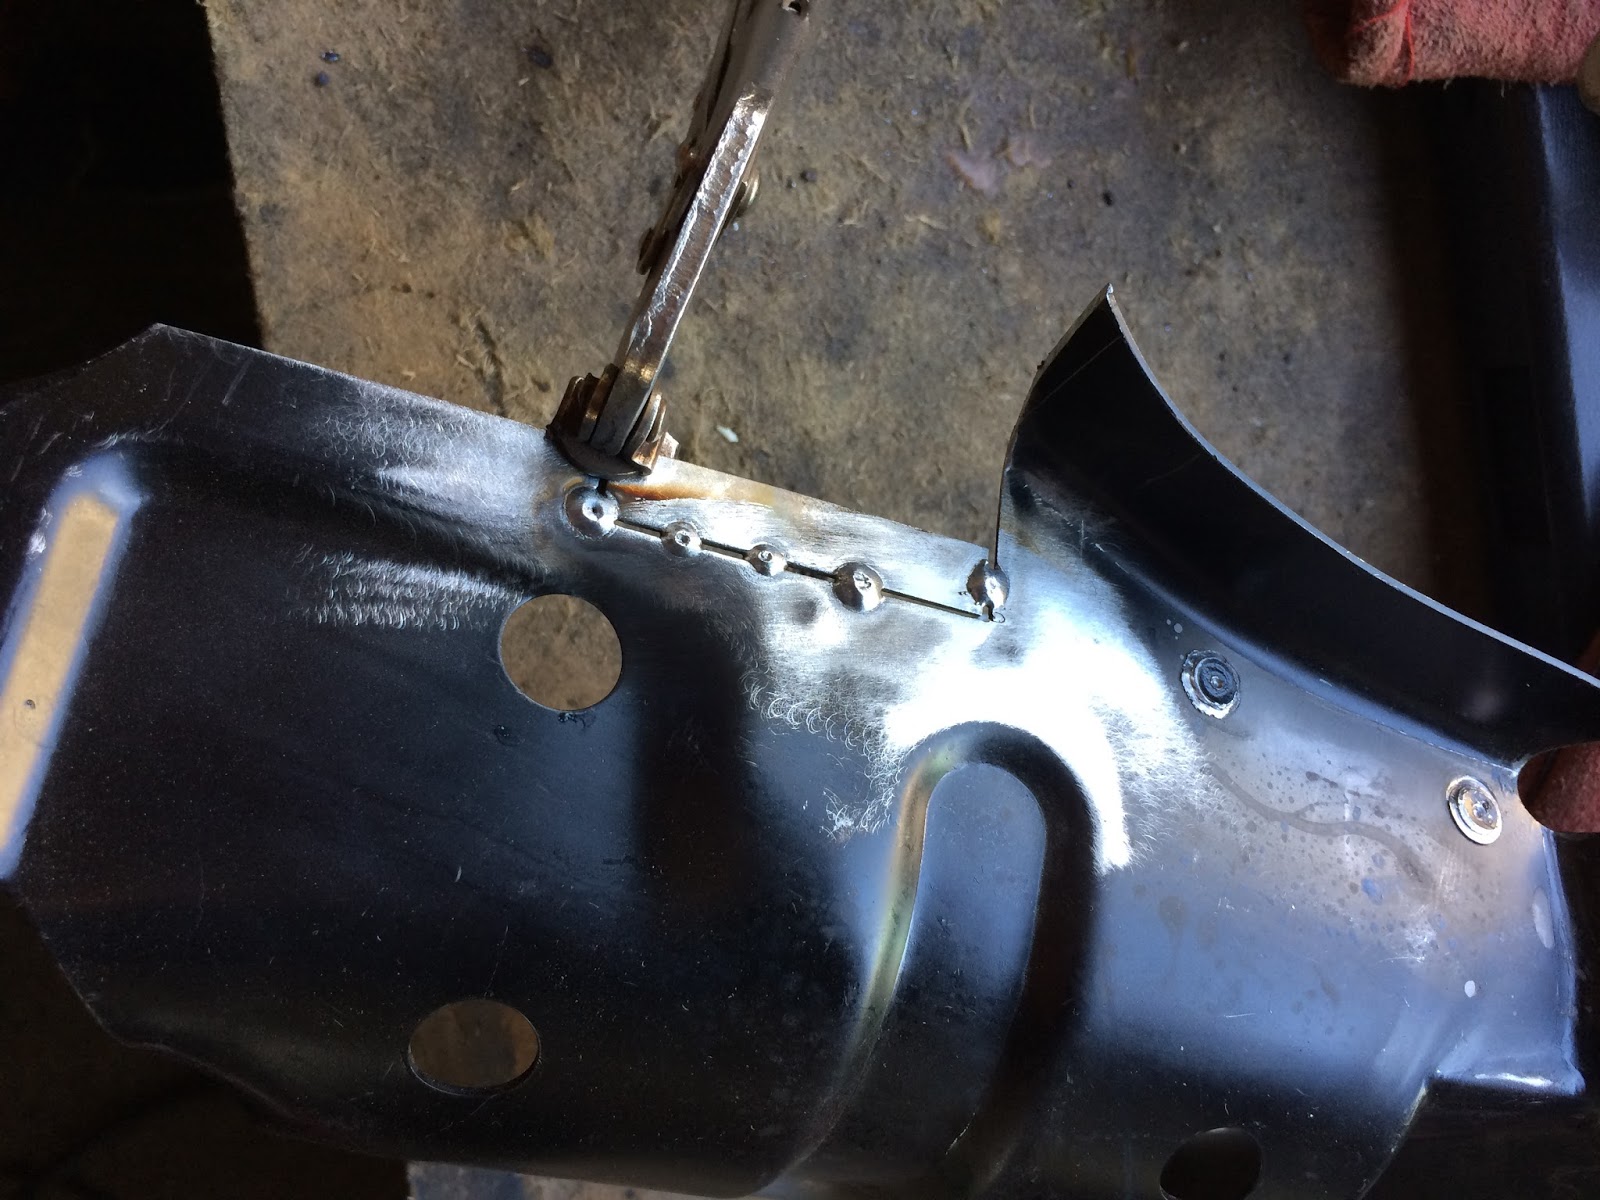
Clamped, welded and dressed:


I am not sure how I want to proceed with the forward section that curves downwards. It is actually a bit more complicated than it appears in photos because the planes sit at various angles rather than conveniently flat. I may end up using a section out of the Mexi tank rail and graft it in rather than trying to form it from scratch. I need a little thinking time, so will come back to it.

 Right, time to have a look at the other side...

Wednesday, 23 June 2021

Demystifying the demister

Continuing on from last week's undertakings... 

On the cowl section of the donor cut there was a 6" section that was totally shot along the rolled edge that forms the seam;

 
I flipped the piece over and marked out around the affected steel with a dotted line. This was duly cut out:


To make a repair piece I used a section from a different part of the donor panel. I had to pie cut the end to accurately recreate the corner curve using the old piece as a pattern;

Repair section was then glued into place:  

...and then ground back as per usual;

I then trimmed up the section to match the profile of the area to be filled;

Out with the old an in with the new; both pieces blasted and ready for fettling and final fitting;

Wednesday, 16 June 2021

Passenger side demister vent

A quick point of clarification up front; some of the following work was done in the old garage a few years back, but I didn't make significant enough progress to blog about it at the time. However, as I am now picking up where I left off you may notice that the environment changes in a few of the photos.

With the front of the car removed I have comfortable access to the rear dash area. There are a bunch of tasks that I need to do at the front end before I am in a possition to reinstall the bulkhead and heater channel assembly. So, I figured I would start with a job that I have already done once before on the drivers side - the demister outlet vent and surrounding rust. The underside revealed the extent of the undesirable mess;


As before, the whole area was pretty crispy and peppered with rust holes. Some of the worst heavy pitting extended downwards onto the cowl (outlined in red sharpie);

Learning from my previous experience, I knew that the best approach was to split the repair into two parts: the front (outside cowl) section and rear (inside dash) section. I marked up the outside cowl section with blue tape and set about removing the bad steel;


Once removed I had a better view of the sandwiched vent outlet section. Although not as bad as I expected it to be, I determined that it was too far gone to save, so opted to use my donor section to repair the entire piece. Once again, I outlined my cuts with blue tape and set about surgically removing the affected section from the inside dash;


Unfortunately the donor scuttle/dash was not without its faults, so it required a few repairs before I could use it. I split the panel into the two sections as per the above proceedure:


Once I had roughly blasted the vent section it became apparent that the steel had become paper thin on the end piece. I cut out this thinned section and fabricated a small patch:

Welded and smoothed to an invisible finish (a shame this neat work will never be seen);

 
On the flipside I cut the excess from the repair section using a low tech, but very accurate method. Basically I added masking tape to the original cut section and then used a dirty finger to trace the outline of the area. I then peeled this off and positioned on the doner section;

Gave me an accurate result;


The next step was to repair the angle grinder gash, which was the result of whoever cut up the doner car. Oh well, better make it solid again;


Almost there...


All welds ground down and looking like new again;

Saturday, 30 September 2017

Modifying the new cross members

As I mentioned in the last post, I now have some new 'German' cross members which I am going to be using as a foundation to produce some year correct ones (i.e: '64 - '66 Beetle). They will not be 100% accurate, but will come pretty damn close. I have given this a lot of thought and it seems like the best approach as mid-sixties cross members simply don't exist as a repro item. Cross members commonly rust out on a vast majority of old bugs, so getting hold of a rot-fee OG section is almost impossible and only exist on rare foreign cars that have been driven exclusively in dry climates. Anyway, I have not seen this particular modification done before, so hopefully this detailed overview will be of some help to others who may be interested in doing the same... 

I began by drilling out the spot welds and separating the reinforcement section from the main panel. This gave me better access and allowed for a neater job:


On the main panel I smoothed out the unnecessary hump by simply cutting around it and welding in flat sheet steel:


These repros include an access hole to the heater channel. This was not something that mid-sixties cross members had, so I welded it up:


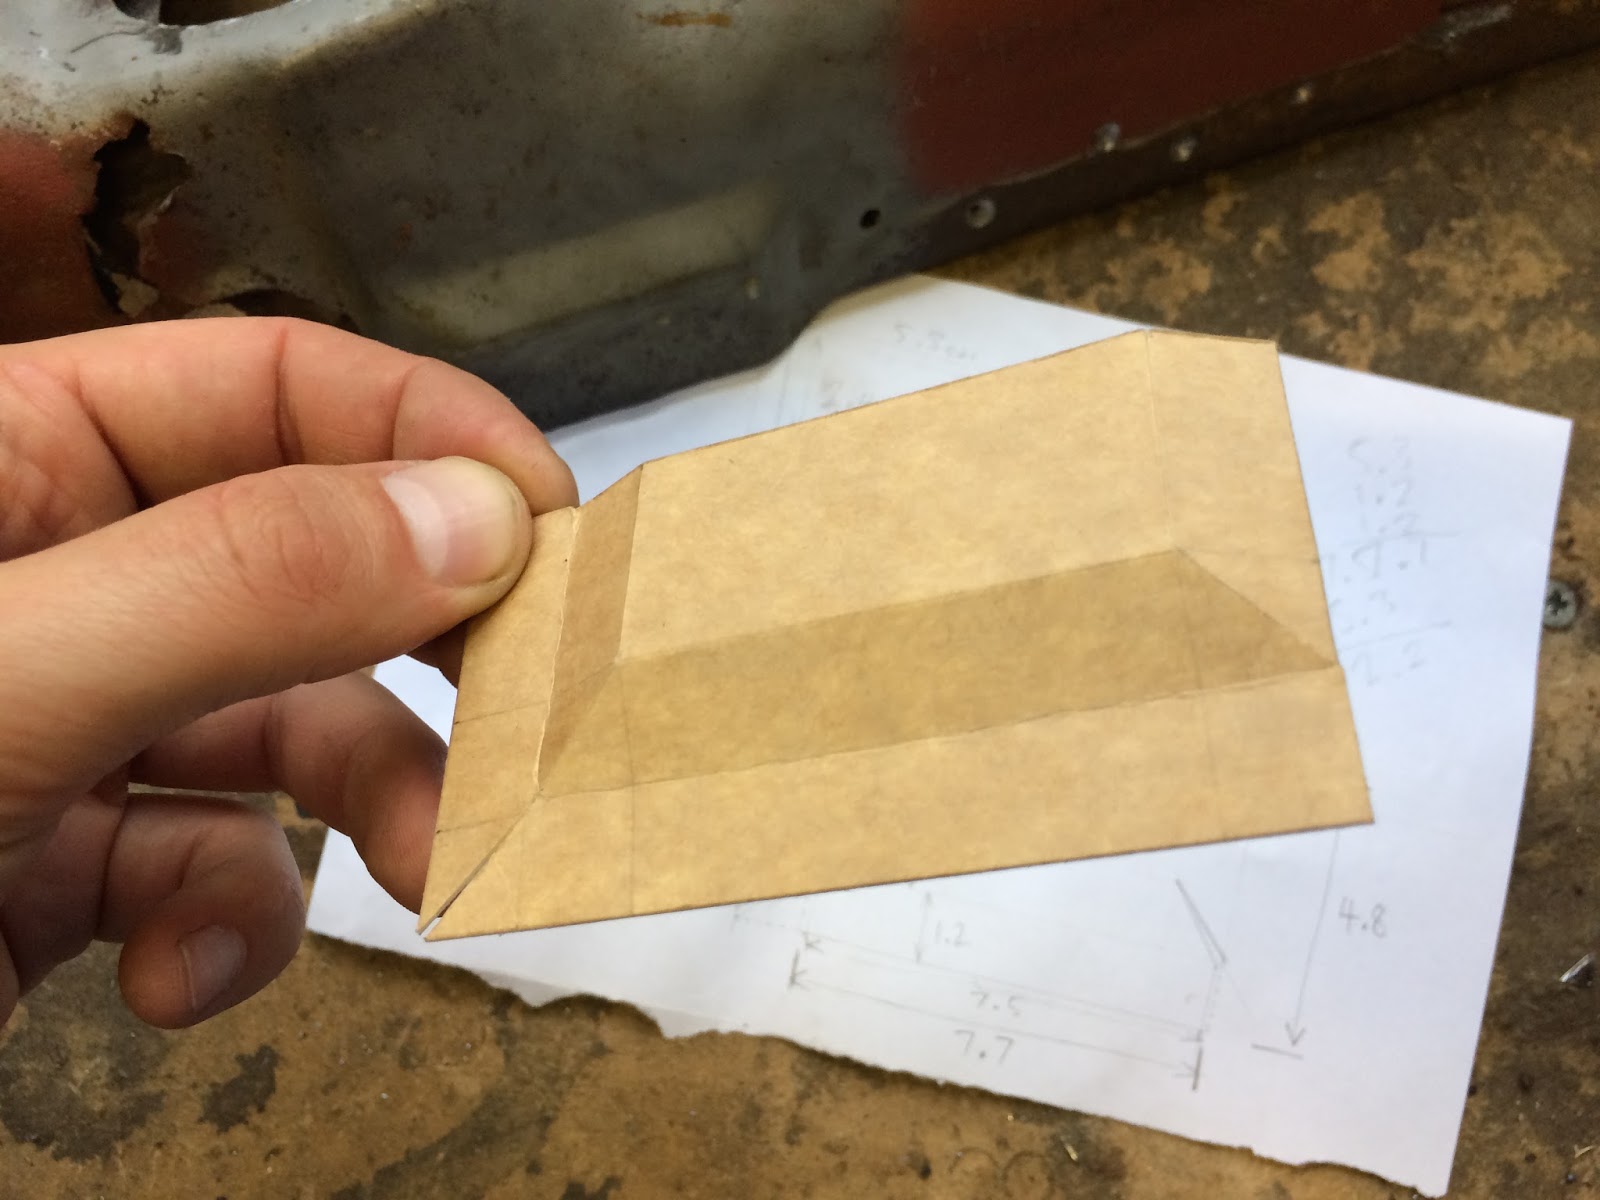
The rear edge needed a new profile adding to accommodate the correct upward angle of the heater pipe. After careful measuring and scribbling a few notes I mocked up a cardboard version of the hump I was trying to recreate:


I then transferred the measurements to sheet steel and cut out the geometric net:


After some folding on the vice and a quick zap of the MIG welder to close up the slits:


Linished back and compared to the original:


tacked into place on the cross member once the appropriate recess was measured and cut out:


After being fully welded, tweaked and dressed:


Just after the hump is a small section that is bent down on the original. I had to improvise around this section as access for clamping was tight. After some careful tapping with the hammer (remember that man light taps are better than fewer hard bashes), I got the 90 degree bend I was after:


Next task was to alter the heater pipe hole to the correct oval shape:


And trim the return flange to match the original (which terminates about halfway down):


At this point I roughly bolted up the heater channels to the pan and added the crossmembers. The fit wasn't as good as I had hoped and I was unsure at this stage if this was due to the restored pan being off or it the location of the mounting holes in the new panel were incorrect. After some head-scratching I discovered that the lower holes were not spaced apart close enough. There was a 5mm difference compared to the OG spacing. 

To correct this I elongated the hole;


Then using a copper backer I welded the other end to close up the gap slightly:


After some Dremel tool action I had it all looking correct again:


I then shot blast the entire panel before plug welded the mounting reinforcement sections back into place:


Moving on to the thicker supporting rear panel that I removed in the first step, I proceeded to cut out the unnecessary hump and chopped off the rear section that I assume adds strength to the underside of the boot corners. However, this was not present on the originals so I determined that it was surplus to requirements:


Welded in some flat sheet to replace that bump and welded up the access hole that was also present on the main section:


I welded up this little join to add a bit more rigidity:


Shaped the mating flange that will eventually fix to the inner side of the rear wheel arch:

Shot blast the reinforcement panel and got it realigned the best I could to the main section. I decided not to plug weld the pieces together at this point, just in case I needed to adjust anything further down the road. So, here is the nearly finished article just prior to spraying with zinc primer:


Now to do the same on the other side...