Wednesday, 16 June 2021

Passenger side demister vent

A quick point of clarification up front; some of the following work was done in the old garage a few years back, but I didn't make significant enough progress to blog about it at the time. However, as I am now picking up where I left off you may notice that the environment changes in a few of the photos.

With the front of the car removed I have comfortable access to the rear dash area. There are a bunch of tasks that I need to do at the front end before I am in a possition to reinstall the bulkhead and heater channel assembly. So, I figured I would start with a job that I have already done once before on the drivers side - the demister outlet vent and surrounding rust. The underside revealed the extent of the undesirable mess;


As before, the whole area was pretty crispy and peppered with rust holes. Some of the worst heavy pitting extended downwards onto the cowl (outlined in red sharpie);

Learning from my previous experience, I knew that the best approach was to split the repair into two parts: the front (outside cowl) section and rear (inside dash) section. I marked up the outside cowl section with blue tape and set about removing the bad steel;


Once removed I had a better view of the sandwiched vent outlet section. Although not as bad as I expected it to be, I determined that it was too far gone to save, so opted to use my donor section to repair the entire piece. Once again, I outlined my cuts with blue tape and set about surgically removing the affected section from the inside dash;


Unfortunately the donor scuttle/dash was not without its faults, so it required a few repairs before I could use it. I split the panel into the two sections as per the above proceedure:
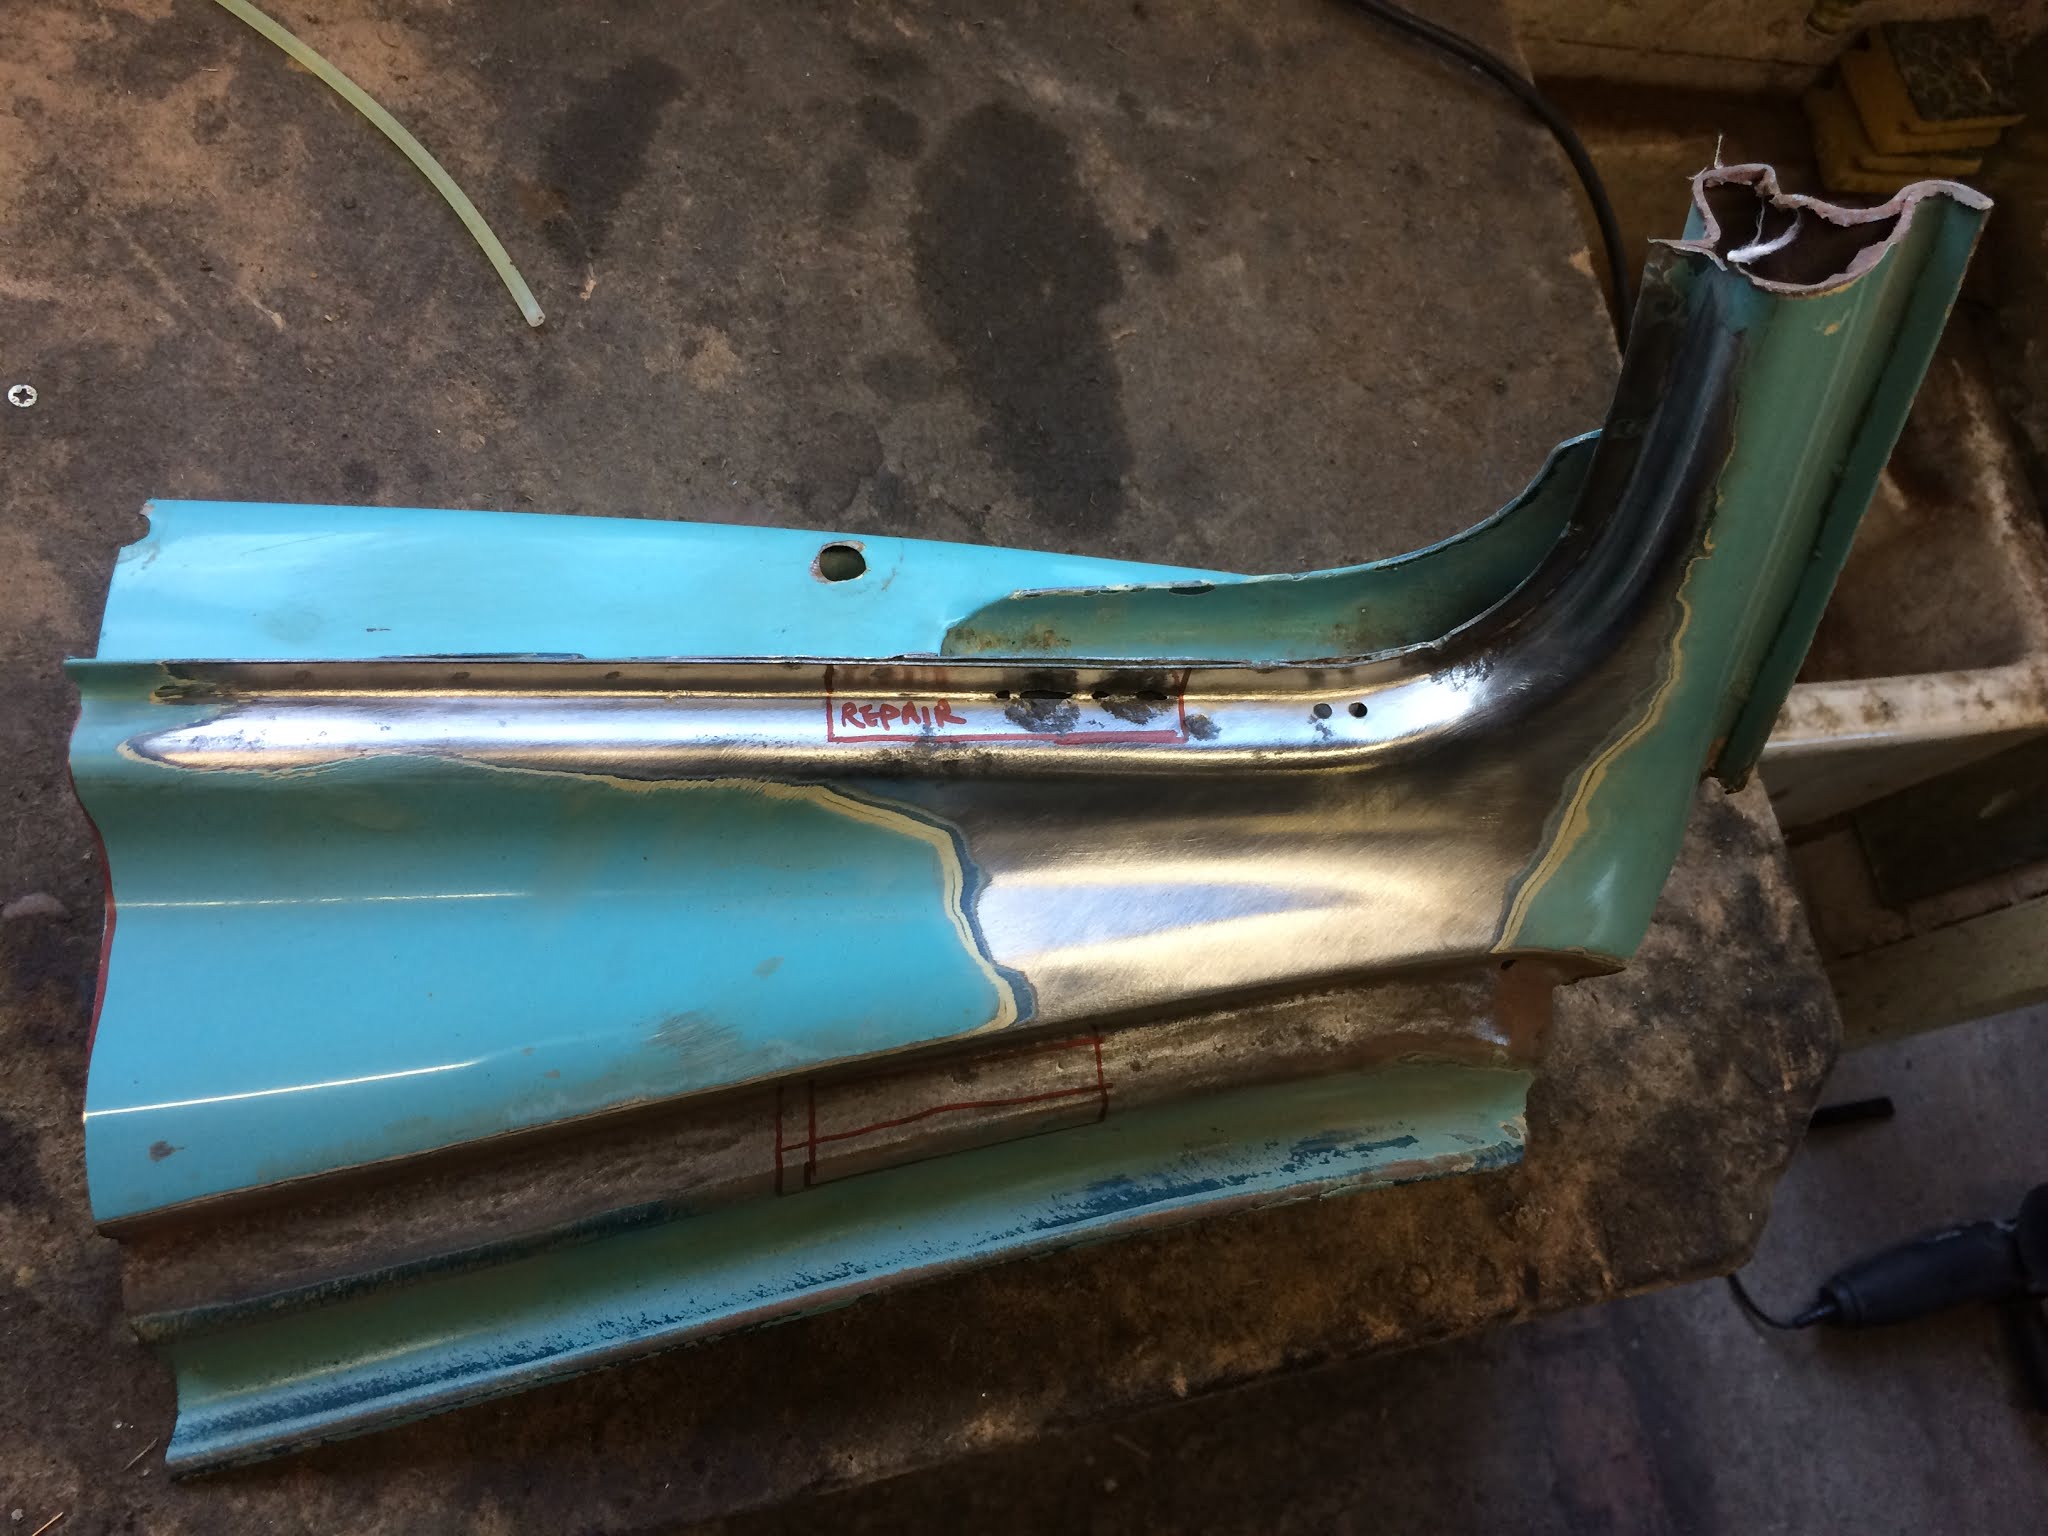

Once I had roughly blasted the vent section it became apparent that the steel had become paper thin on the end piece. I cut out this thinned section and fabricated a small patch:

Welded and smoothed to an invisible finish (a shame this neat work will never be seen);

 
On the flipside I cut the excess from the repair section using a low tech, but very accurate method. Basically I added masking tape to the original cut section and then used a dirty finger to trace the outline of the area. I then peeled this off and positioned on the doner section;

Gave me an accurate result;


The next step was to repair the angle grinder gash, which was the result of whoever cut up the doner car. Oh well, better make it solid again;


Almost there...


All welds ground down and looking like new again;

Wednesday, 9 June 2021

Quickie: NOS rear quarter

Throughout my long hiatus I kept my eyes peeled for any VW rarities that came up for sale. To my delight a year correct NOS rear quarter came onto my radar, which I purchased without hesitation for a barginous price. These genuine panels seem to be as rare as rocking horse sh*t these days; 


A fortutius find to say the least as I was dreading the idea of having to patchwork something together on what is the worst side of the car (both in terms of chronic rot and warping from old crash damage). The only thing that needs doing to make it complete is to graft on the bumper mount section, but this is a relatively straight forward by comparison.

As with all old genuine VW panels, it has a liberal layer of surface rust, but this is superficial and will clean off without much sweat. 

Big thanks to T-Bone for kindly couriering this half way across the country for me!

Wednesday, 2 June 2021

Blast cabinet lighting upgrade

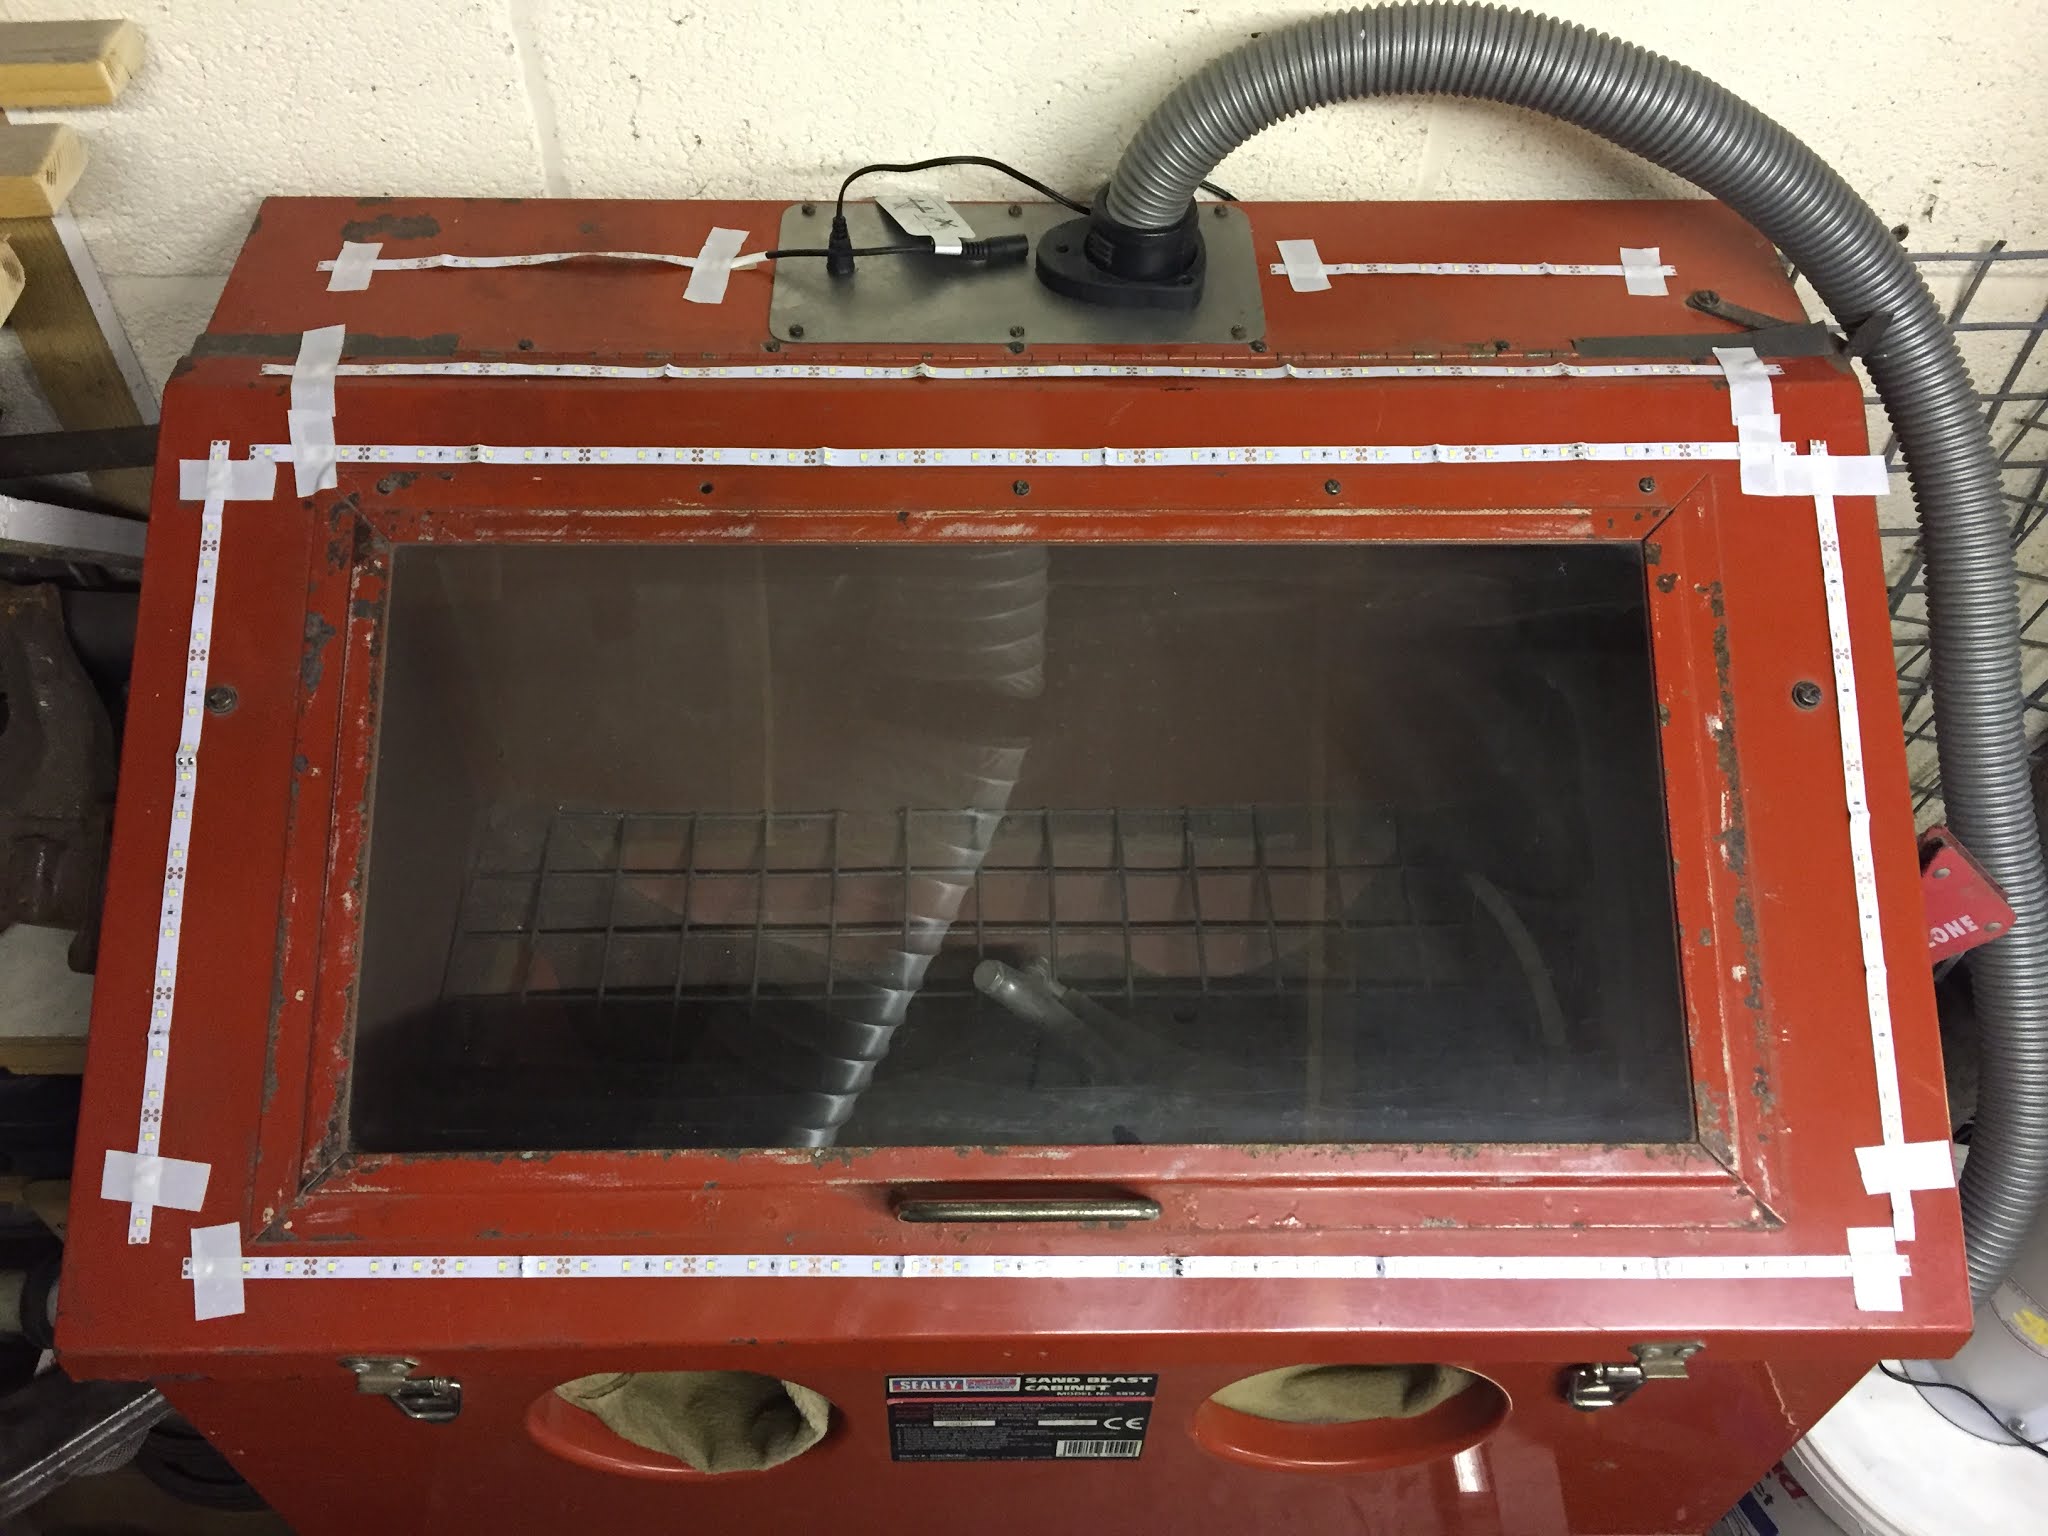
I decided to upgrade the lighting in the blast cabinet using a 3M sticky-backed LED light strip;

I purchased one that came complete with a power adapter and had a corresponded dongle presoldered onto the stip. I opted to mount the connection point using a rubber grommet that I salvaged from a scrap vacuum cleaner. As previously mentioned, I didn't want to drill any additional holes into the cabinet itself, so instead I drilled into the newly fabricated blanking plate;

With the grommet added it not only holds it firmly in place, but also prevents dust leaking out;


I measured out and cut my LED tape having carefully considered how best to lay it out to achieve the most consistant lighting. Here is a mocked up layout that made on top of the cabinet that I have marked up to show the order that the sections would be soldered together;

Had to solder the joints and then slid some heat shrink tubing over to keep them protected; 

A quick test before sticking everything into its final position; 

An obvious point when using any adhesive backed product is to ensure the surface you wish to affix to is clinically clean. It was then a case of mounting everything in place inside the cabinet ...and here is the grand reveal; 

Ample illumination and importantly the light is evenly distributed, which eliminates cast shadows obsuring the item being blasted. Very happy with this set-up and I hope that it will prove to be low maintenance.


Wednesday, 26 May 2021

DIY outlet coupler for blast cabinet dust extractor

Following on from last weeks success with the cyclone separtor, I was eager to get the unit attached to the shot blast cabinet. The model I have (an old model Sealey SB972) does not have a connection for a dust extraction hose. However, it does have two air inlets, one of which has an air filter. My first idea was to utilise one of these inlets as the connection for the dust extraction. The problem, I quickly found through testing, was that the suction was greater than the air being drawn through the one remaining inlet and this would doublessly cause an implosion to the weakest part of the rig. I figured that I had two options; either reduce the power of the vacuum or increase airflow through the cabinet. However, with regards to that latter; I really didn't want to have to cut more holes into cabinet if I didn't have to. 

With this in mind, I then had a brainwave - remove the ineffective light unit (I will be upgrading to internal LED light strips anyway) and utilise the remaining aperture as the basis for creating a custom extraction port. Crucially this would leave the two existing air inlets as they were and keep airflow maximised;

With the light fitting out, I had a sizable hole to work with;

I set to work by cutting out a blanking plate from 2mm mild steel sheet, using the old light fitting as a handy template; 


Basic form cut out and trimmed down;

I then repurposed a hose attachment from an old vacuum cleaner that I was throwing out and trimmed it down to make it flush on the underside;


I cut a corresponding hole in the steel to accomodate the hose attachment and then tapped some M3 threads for the bolts;

....which worked perfectly for securing the repurposed vacuum connector in place; 


The end result was just about right, with the airflow keeping up with the vacuum suction;

Happy with that! Now to get this thing illuminated...

Wednesday, 19 May 2021

DIY Cyclone Dust Separater

Before throwing myself back into anything substantial, I reasoned that it was high time to take stock and make a few upgrades to my ailing equipment. I want to ensure that workflows are optimised, so that I am not demotivated by ramshackle set-ups. Time invested now is time saved in the future...

Top of my hit list was to get the blast cabinet back in operation, but with improved dust extraction, lighting and longer work-cycle times. Previously I had daisy-chained two small compressors together, but not long ago one of those compressors gave up the ghost, so that left me with just one underpowered unit with a tiny 25ltr tank. The solution to this was simple; I invested in the largest compressor that I could afford which could run off of the standard UK plug (I don't have 3-phase power in the garage). Introducing this behemoth;


SGS 100ltr Direct Drive Air Compressor (14.6CFM, 3hp). Should serve me well! NB: I salvaged the 25ltr tank of the old broken unit and I may repurpose this in the future to serve as an expansion, or 'pig' reservior tank. 

Next up was to consider dust management, which has been a perennial problem that I have never found an adequate solution for. Fortunately, times have moved on and many hobbyists were championing the use of Cyclone Dust Sepatators. Using a regular household vacuum cleaner, my plan is to suck out the cloud of dust from the cabinet and keep visibility clear when blasting. Having the separator positioned between the cabinet and the vacuum cleaner would stop the dust clogging it up and deposit it into a bucket ready for convenient disposal. I am riding on the coattails of many others here and I pinched ideas about how to go about this from various online sources. Nothing original, but here are a sequence of pics which detail the assembly of my apparatus;

My cyclone separator didn't come with a gasket, so I custom cut one out of 2mm SBR rubber sheet;


Found a novel way of punching the holes;

To reinforce the underside of the lid, I used an offcut of hardboard and cut the necessary holes;

Secured everything together with 20mm M4 pan head machine screws and nylocs;


I purchased some hose adapters from an eBay seller who produces purpose-made 3D printed items from PLA (a plant based thermoplastic polymer). These particular ones fit the 50mm ID of the cyclone and reduce down to 32mm ID to accommodate a regular vacuum hose. They fit like a glove and it saved me a headache of trying to conjure up something from scratch;


 Here is the basic unit completely assembled and plumbed up;


I gave it a test run on some saw dust and the results were encouraging: 


As well as primarily serving as a cabinet dust extractor, I am confident this will also double as a means of quickly repurposing spent grit when blasting bigger items over a tarpalin. So, the next phase of the plan is to find a way to connect the hose to cabinet. Unfortunately, my cabinet doesn't have an outlet coupler, so I may have to fabricate something usable... 

Monday, 29 March 2021

New garage and long overdue blog reboot

After what can only be described as a 'sizable' intermission, I am back and excited to announce that I now live in a wonderful new home which boasts one of the best garages I could ever wish for;


Having come so far on this resto journey, I do not take this good fortune for granted. Buying a house is certainly an arduous process that I don't wish to endure again anytime soon, but I am ecstatic that Gretchen now has a permanent roof over her.

My thanks to; Chris, George, Gordon and Terje helping me with bringing the car over (no suspension bridge detour this time around). Special thanks to; Dangerman for tolerating my encroaching garage mess for so many years!