Monday, 10 May 2010

Seperated after 45 years together!

Significant headway was made this weekend as the shell was finally removed from the chassis! The night before I was incredibly restless and this was followed in the morning by sweaty palms and butterflies relentlessly dive-bombing my stomach – I guess I was just a little anxious! Oh, I would just like to say a big thank you to my wonderful assistant, Dangerman, who came down to the garage and helped me out for the afternoon (and whose poor yet infectious humour kept me going when things got tense!).


The first task was to reorganise my garage and finish the assembly of the giant saw horses. The picture below shows just how snug the fit is at the back of the garage


Confident that all the pre-flight checks had been done and the front wheels chocked on both sides with wooden wedges, I began jacking up the rear of the car. This had to be done in stages adding pieces of wood at various intervals to effectively ‘shim up’ my little trolley jack. This process was not exactly safe and I kept a good distance from the car at all times. Having a second person around at this point was very reassuring (thanks again Dangerman) and ensures that the car can be monitored from different perspectives for anything precarious!


With another piece of wood added to the top of the jack (gulp!) I was able to achieve the necessary 3 ft clearance under the rear valance to slide the saw horse underneath.


The theory was then to lower the jack and let the combined weight of the chassis and transmission pull itself free of the shell. I lowered the jack with great anticipation and ...nothing happened apart from a slight bit of flexing! I pumped the jack back up to support the weight of the chassis and after probing around the key areas of the car I identified another small patch that had been welded to an area that was previously hidden from view. No problem – a quick bit of cutting later and I was confident that nothing else would hold me back. With a confident smile I lowered the jack again and still NOTHING! I was perplexed – there was nothing visibly stopping the car separating and I hypothesized that the whole thing just need a short sharp jolt to break the 45 year old bond. What happened next was probably the most regrettable decision that I have taken thus far! I pumped up the jack as high as it would go and dropped it quick to shock the car. The only thing this achieved was to stress the body work. In the short video below you can see how the moment of impact caused massive flexing….


Oooouch! Anyway, after a lot of swearing and searching through an ocean of rusty metal flakes with a flat head screwdriver I uncovered the distinct outline of an equally rusty bolt below where the rear seat once sat (which I have circled in the photo's below).


I checked the other side of the car and found the same thing. My heart sank – if only I had found those bloody bolts before resorting to violently abusing my poor car!


With the nuts removed the car came apart without any drama. The video below captures the delightful moment(s) of separation…


Getting the front of the car up onto the saw horse was a lot more straight forward as me and Dangerman were able to lift the shell up between the two of us. I think we were both surprised at just how deceptively light the shell actually is!


Then it was just a case of rolling the chassis out from underneath....


Finally after months of planning and tinkering the rolling chassis was free!

Tuesday, 4 May 2010

Fiddly (adjective): Difficult to do, handle, or use, usually because intricate work with the hands or small objects are involved

Well, since my last post I have been intermittently busy working on the bug. The reason I haven’t blogged for a while is because all of the jobs have been rather small and awkward, so I thought I would wait until I had made significant visual headway before summarising my progress.

I seem to be using the reciprocating saw more than the ratchet at the moment in order to remove the old corroded botched patches that have been haphazardly holding the car together for decades. Spot the difference in the images below:


Now you see it...


...and now you dont! Another messy chunk of rotten bug removed.

Because the car now contains less material, coupled with the fact that I am frequently discovering more corroded metal lying in wait beneath the suspicious layers of underseal, there is now less overall structural stability. Feeling slightly uneasy about the situation I decided to take vital precautions!


Using a couple of lengths of angle iron I made some temporary cross braces for the bottom of the doors to stop the shell warping and spreading as the support from those old heater channels diminishes.


It was just a simple case of drilling a couple of holes in the door posts (high enough up so that the metal was still sound)……


……Then using some self tapping screws to secure the angle iron in place.


The exciting news is that the shell is now finally ready to be lifted off the pan. Ooh, the anticipation! It is kind of funny that from what I have read in various manuals, a confident individual should be able to do this whole task in an afternoon! The reality is that this is not the case for a 45 year old car! 9 times out of 10 the old stubborn bolts just don’t want to budge, so the only solution is to douse them with WD40 and use the breaker bar for maximum leverage. The brief seconds of celebration that I feel when they finally start to turn is usually quashed by a disconcerting crunching sound. The bolt then spins freely indicating that the captive nut inside the car has broken free due to my arch enemy ...corrosion! Bugger, I sigh to myself - time to get the reciprocating saw out again!

Anyways, tune in next week for more cuts, bruising and musing!

Thursday, 11 March 2010

A quick mid-week update


I have been continuing to strip the car in my spare time this week in preparation for separating the shell from the chassis. I finally got the drivers' side front wing off with a little persuasion that resulted in bloody knuckles! For some reason this wing had more seized bolts than all of the other wings put together.

I then turned my attention to removing the steering column (with the steering wheel still attached!)...


The parts in the photo below are off the end of steering column and needed to be removed in order to pull the column through the tube that runs up inside the car.


Then the fun began! With my new battery powered reciprocating saw I set about chopping up the old patch that awkwardly connected the shell directly to the floor pan. Because this whole section will be replaced I did not have to worry about being too neat and accurate. From the picture below you can see that the saw went through the metal like a hot knife through butter...


I did not want to remove or cut through the old seat runner in case I need to graft it onto my new floor pan half at a latter date, so decided to cut around it. Once I had cut along the whole length of the patch I used a large flat-headed screwdriver to bend the metal back enough so that I could tap it flat with a hammer. I was then able visually check that the body to pan gasket was unobstructed...


This not-so-pretty operation was a complete success and the floor to shell gasket is now clearly visible (as it should be) in the photos below. I am confident that the body will lift off without any problem (although part of me knows that I am going to regret saying that!).


Tuesday, 2 March 2010

Vodka seems like lemonade when compared to brake fluid!

I managed to devote a couple of hours on Saturday afternoon to work on Gretchen and began by removing the speedo cable from the passengers' side front wheel. This was easily removed by gently pulling it through from the back:
 

Next I detached the brake fluid reservoir. The first step was to drain the brake fluid using a bulb syringe – unfortunately I did not have one handy and had to improvise by using the casing of a biro as a straw. Using the suction of my mouth I carefully drew the fluid up about half way and decanted it into a tin can by releasing the pressure. This technique is definitely NOT recommended and on a few occasions I sucked so vigorously that I tasted the foul fluid. I can not recall a worse taste and it lingers on your taste buds for hours afterwards!


Next I removed the brake pipe from the master cylinder that was held in place by a rubber grommet and quickly positioned the end of the pipe over the tin can to catch any dribbles of excess fluid.


With the fluid drained I pulled the reservoir out of the car and set it aside for cleaning.


It was held in place by a thin metal strap that is attached to the body by a small Phillips head screw.


There was a small tab of metal at the very front end of the chassis tunnel that needed to be folded up with pliers in order to release the pipe.


I then coxed out the washer bottle that sits next to the reservoir using a large flat headed screwdriver to ‘pop’ it out.


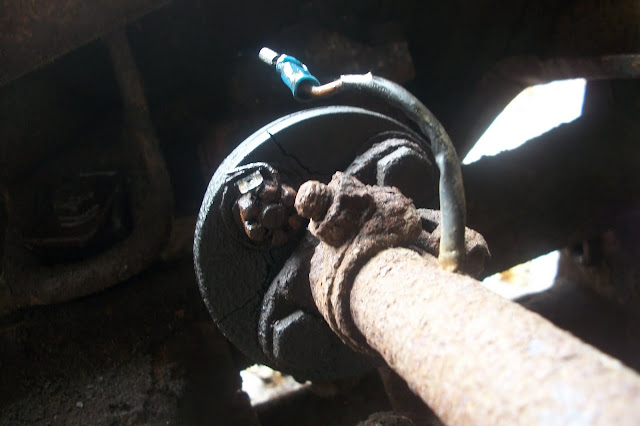
The next job was to undo the steering coupler, which connects the rod running from the steering wheel to the mechanism that turns the wheels. It looks like this......


The wire that you can see runs to the horn and can simply be pulled off of its terminal, like so......


Then it was just a case of removing two blots, easy!


Whilst working at the front end of the car I noticed the VIN plate, so I thought I would take a photo and decipher its meaning from the comfort of my home – more on this soon.


After thorough lubrication I was able to remove the two 17mm bolts that fasten the shell to the chassis. They are located just behind the spare wheel well:


Inside the car I removed the four bolts that can be seen under the rear seat. There were two of these on either side of the tunnel:


The bolts that run along the outer edge of the floor pan on the underside would not budge, so rather than forcing them and potentially risk shearing them off I decided to douse them in penetrating oil and come back to tackle them next weekend.
Upon closer inspection inside the car I realised in horror that in a previous repair job to the drivers side heater channel, a large patch had been welded in over the affected area and directly onto the floor pan! The red line on the image below highlights where the weld runs...


The patch starts directly under the front and runs to the back of the door. In the pictures below the red line indicates the border of the patch and the yellow line shows where the chassis to body seal emerges. In an ideal situation, the seal should be visible all the way along the underside of the door!


I can’t believe that I used to pay people £££ to ‘fix’ my car only to discover all these years later that they actually made things worse by cutting corners, grrrrrrhhhhh! Oh well, I was younger and more naïve back then with a primary focus on getting the car through the dreaded MOT’s by any means! Anyway, in order to remove the shell this area will need to be cut away. I do not have access to electricity in my garage so will need to acquire either a generator or a cordless reciprocating saw. My shopping list of power tools continues to grow…

Wednesday, 24 February 2010

"Now you know, and knowing is half the battle" – GI Joe

Some big steps are looming over me and this has induced the stark realisation that up until now I have been idly ‘tickling’ the car without any clear idea or structure on how to transform the rusty old girl into a gleaming low-rider. If I am honest, I guess I have been ignoring the scary stuff! But no more I tell thee! I am determined to steer this project into a more focused direction, so with a ravenous lust for knowledge I have been immersing myself in books, magazines and instructional videos. An unhealthy amount of spare time has been spent scouring the internet to learn from the experiences of other car restorers. I have also been progressively equipping myself with the proper tools and together with a confident state of mind I have developed a plan of action for separating the body from the chassis over coming the coming weeks.

I will be using Rick Higgin’s technique to accomplish this daunting feat, which I have learned by religiously watching and re-watching the ‘Bug Me, Vol 6’ video. Truly essential viewing for simplifying the intimidating processes involved in restoring a Bug. I got this and ‘Bug Me, Vol 7’ off eBay for the combined bargain price of £7! Good old low cost / low quality VHS!


Step 1: Disconnect the myriad of parts that run between the shell and chassis. Locate and remove all the relevant bolts (for any that will not budge I will liberally apply WD40 and leave it to penetrate for a few days). Take exact measurements of my garage to determine the dimensions that I need to build the saw horses on which the body of the car will be sitting on whilst I focus on restoring the chassis.

Step 2: Purchase wood and brackets for making some sturdy saw horses. Cut to all pieces to the required size and partially assemble.

Step 3: Finish assembly of saw horses after transporting them ‘flat packed’ to the garage. Beg, borrow or steal a large floor jack that will provide enough elevation to get the car onto the saw horses. Enlist the help of a friend to !GULP! assist me in splitting the car in half!

Step 4: Strip chassis down and transport back to my house to begin repairing.

Tuesday, 2 February 2010

A few gems from afar

I got back from Berlin a couple of weeks ago but unfortunately I never did make it to Wolfsburg for my planned day trip to the Autostadt (aka the Volkswagen factory museum). Oh well, another time. It turns out that Germany is rather a large place and what I thought would be a short inexpensive journey was in reality an expensive lengthy one (the train ticket alone cost more than the return flight from Bristol to Berlin!). However, I did get to see a beautiful example of an early Beetle in the German history museum which helped sooth my disappointment of not going to the Autostadt!


As you can see from the pictures above it is a split rear screen model, from 1951 I believe, but there is one inharmonious feature that really bugged me (no pun intended)… The rear light clusters are from a 1962 > model! My friends were quick to point out that I needed to “get out more” and it would probably be healthy to calm down and “let it go”. Whilst I agreed to an extent with their dismissive opinion I still felt that a museum, especially one dedicated to German history, should have made the effort to ensure that the car was historically accurate! I mean, how could I possible trust the integrity of the other exhibits knowing that this particular example of iconic German design was in fact an amalgamation of inconsistent parts?!  Even so, it was still beautiful to behold. Here are a couple of commemorative coins that were produced to celebrate the 5 millionth and 10 millionth Beetles to roll of the production line:


Back in Blighty very little progress has been made on the bug lately. Occasionally I seize the opportunity to run outside with my power tools when the weather permits and it’s not dark! This general lack of activity means that I have nothing of interest to report.