Wednesday, 26 May 2021

DIY outlet coupler for blast cabinet dust extractor

Following on from last weeks success with the cyclone separtor, I was eager to get the unit attached to the shot blast cabinet. The model I have (an old model Sealey SB972) does not have a connection for a dust extraction hose. However, it does have two air inlets, one of which has an air filter. My first idea was to utilise one of these inlets as the connection for the dust extraction. The problem, I quickly found through testing, was that the suction was greater than the air being drawn through the one remaining inlet and this would doublessly cause an implosion to the weakest part of the rig. I figured that I had two options; either reduce the power of the vacuum or increase airflow through the cabinet. However, with regards to that latter; I really didn't want to have to cut more holes into cabinet if I didn't have to. 

With this in mind, I then had a brainwave - remove the ineffective light unit (I will be upgrading to internal LED light strips anyway) and utilise the remaining aperture as the basis for creating a custom extraction port. Crucially this would leave the two existing air inlets as they were and keep airflow maximised;

With the light fitting out, I had a sizable hole to work with;

I set to work by cutting out a blanking plate from 2mm mild steel sheet, using the old light fitting as a handy template; 


Basic form cut out and trimmed down;

I then repurposed a hose attachment from an old vacuum cleaner that I was throwing out and trimmed it down to make it flush on the underside;


I cut a corresponding hole in the steel to accomodate the hose attachment and then tapped some M3 threads for the bolts;

....which worked perfectly for securing the repurposed vacuum connector in place; 


The end result was just about right, with the airflow keeping up with the vacuum suction;

Happy with that! Now to get this thing illuminated...

Wednesday, 19 May 2021

DIY Cyclone Dust Separater

Before throwing myself back into anything substantial, I reasoned that it was high time to take stock and make a few upgrades to my ailing equipment. I want to ensure that workflows are optimised, so that I am not demotivated by ramshackle set-ups. Time invested now is time saved in the future...

Top of my hit list was to get the blast cabinet back in operation, but with improved dust extraction, lighting and longer work-cycle times. Previously I had daisy-chained two small compressors together, but not long ago one of those compressors gave up the ghost, so that left me with just one underpowered unit with a tiny 25ltr tank. The solution to this was simple; I invested in the largest compressor that I could afford which could run off of the standard UK plug (I don't have 3-phase power in the garage). Introducing this behemoth;


SGS 100ltr Direct Drive Air Compressor (14.6CFM, 3hp). Should serve me well! NB: I salvaged the 25ltr tank of the old broken unit and I may repurpose this in the future to serve as an expansion, or 'pig' reservior tank. 

Next up was to consider dust management, which has been a perennial problem that I have never found an adequate solution for. Fortunately, times have moved on and many hobbyists were championing the use of Cyclone Dust Sepatators. Using a regular household vacuum cleaner, my plan is to suck out the cloud of dust from the cabinet and keep visibility clear when blasting. Having the separator positioned between the cabinet and the vacuum cleaner would stop the dust clogging it up and deposit it into a bucket ready for convenient disposal. I am riding on the coattails of many others here and I pinched ideas about how to go about this from various online sources. Nothing original, but here are a sequence of pics which detail the assembly of my apparatus;

My cyclone separator didn't come with a gasket, so I custom cut one out of 2mm SBR rubber sheet;


Found a novel way of punching the holes;

To reinforce the underside of the lid, I used an offcut of hardboard and cut the necessary holes;

Secured everything together with 20mm M4 pan head machine screws and nylocs;


I purchased some hose adapters from an eBay seller who produces purpose-made 3D printed items from PLA (a plant based thermoplastic polymer). These particular ones fit the 50mm ID of the cyclone and reduce down to 32mm ID to accommodate a regular vacuum hose. They fit like a glove and it saved me a headache of trying to conjure up something from scratch;


 Here is the basic unit completely assembled and plumbed up;


I gave it a test run on some saw dust and the results were encouraging: 


As well as primarily serving as a cabinet dust extractor, I am confident this will also double as a means of quickly repurposing spent grit when blasting bigger items over a tarpalin. So, the next phase of the plan is to find a way to connect the hose to cabinet. Unfortunately, my cabinet doesn't have an outlet coupler, so I may have to fabricate something usable... 

Monday, 29 March 2021

New garage and long overdue blog reboot

After what can only be described as a 'sizable' intermission, I am back and excited to announce that I now live in a wonderful new home which boasts one of the best garages I could ever wish for;


Having come so far on this resto journey, I do not take this good fortune for granted. Buying a house is certainly an arduous process that I don't wish to endure again anytime soon, but I am ecstatic that Gretchen now has a permanent roof over her.

My thanks to; Chris, George, Gordon and Terje helping me with bringing the car over (no suspension bridge detour this time around). Special thanks to; Dangerman for tolerating my encroaching garage mess for so many years! 

Thursday, 4 October 2018

The front end is off

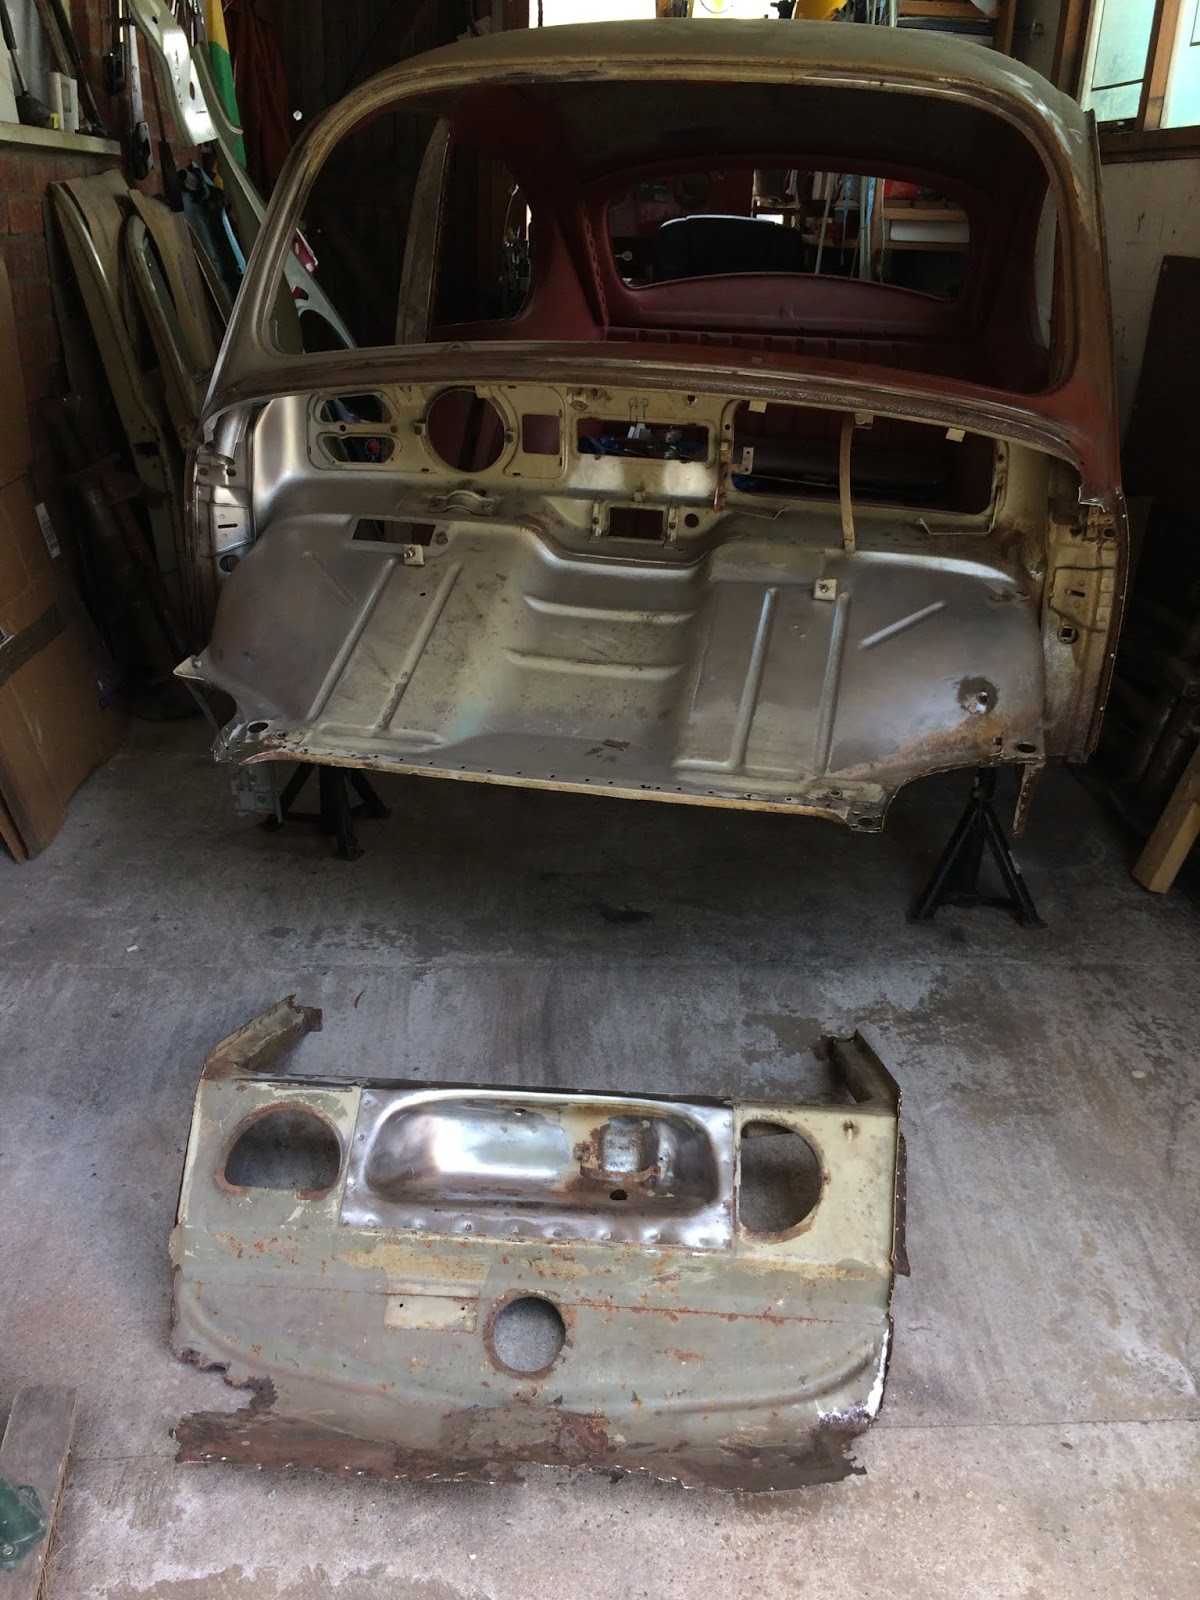
Well, I'm now in as deep as it gets with the restoration of Gretchen as the entire front has now been removed:


When I started this adventure I never thought I would be getting this savage with my beloved VW. If I did have any insight into the extent I would eventually be going to, I think I would have been too overwhelmed to even make a start!

Anyway, let me back up and go over the steps I took to remove the passenger side front quarter panel. Firstly, I removed the bonnet cable guide tube having carefully noted its position and orientation on the quarter panel. It was brazed on in several places and I will hopefully do the same (another skill I will need to learn) when I reattach it back to the new panel. The Dremel tool with mini grinding wheel was great for this delicate job:


With all the brazed welds either ground down or cut through, the guide tube came free without any trouble:


I then need to take care of a dodgy old 'repair' at the bottom of the A-post (nothing to do with me by the way). It was annoyingly seam welded to the inner arch as opposed to spot welded:


The angle grinder made fast work of it. Oh look, it appears to be another crappy old Veng repair panel:


With those smaller tasks out of the way I could then move forward with the Removal of the quarter panel. This was basically the same process as before, so I will just post a few visual highlights and spare you the protracted write up:


Cut around the top of the panel underneath the point where it meets the scuttle panel:


Had to locate and drill out a bunch of spot welds hiding at the bottom of the spare wheel well. Conveniently, I didn't have to bother with this step before as the same section on the other side had entirely disappeared due to rot: 


After a lot of patience I had the panel off:


To finish off it was a case of removing the few remaining spot welds to free the inner fuel tank and space wheel well structure, which I wanted to keep together as one assembly:


Having this section free of the car means it will be far easier to clean up and make repairs:


...And so this leaves me with a significantly shortened car, the advantage of which is that I have now liberated a couple of extra feet of precious workshop space, haha.

Thursday, 6 September 2018

No Quarter

Close the door, put out the light. No, they won't be home tonight...


Ohh yes, the drivers side front quarter panel has now been removed! Here is a write up about how I undertook this procedure. Firstly, I need to give huge credit to Dan (aka 'Dodgerodder') over on the Samba forums, who's excellent approach to this particular task heavily influenced my own method. In fact, I literally 'carbon copied' what he did in some places. His thread can be viewed here and the panel removal begins on page 5.


To start I fabricated a jig that locates the position of the boltholes that house the petrol tank. This rigid brace helped to keep things in place whilst unpicking the panel, but I anticipate that it will be a valuable tool one I come to rebuild the front end (yes, you read that right. I am totally taking apart the front section of the car).


Built using 25mm angle iron and box section steel:


I added a couple of thick oversize nuts to act as spacers on the front bolts to prevent stress being added to the captive nuts once tightened as they do not sit in perfect horizontal alignment with the rear nuts:  


Bolted up and holding firm:


Next task was to make a seam picking tool to pry up the folded steel running up the gutter near the A-post. This was another one of Dodgerodder's ideas that I stole:


It is pretty easy to use, Simply pry up the lip of the gutter at the bottom a little until the tool slips in and then tap with a hammer all the way up the section: 


I did several passes apply a little outward pressure each time until the seam was fully open:


This gave me access to the rear vertical edge of the old quarter panel which was spot welded every 6 cm or so. I carefully ground these spot welds away using the Dremmel tool.

For the spot welds in the main panel I used a Sharpie to highlight there positions and then relied on my spot weld removal tool to drill out each one. This took a long time as there were an awful lot as you can tell from the pics below:


Eventually the panel came free. Patience really is key with this process: