Sunday 31 December 2017

The 'double smile' bulkhead panel

I could put it off no longer - I had to tackle the larger 'double smile' bulkhead panel. The reason that I was fearing this job is simply that the steel is a mere 0.7mm thick, which I knew would be a sod to weld without blowing holes or causing distortion. Additionally I would have to be more cautious than ever when linishing back my welds to avoid overgrinding such thin material.


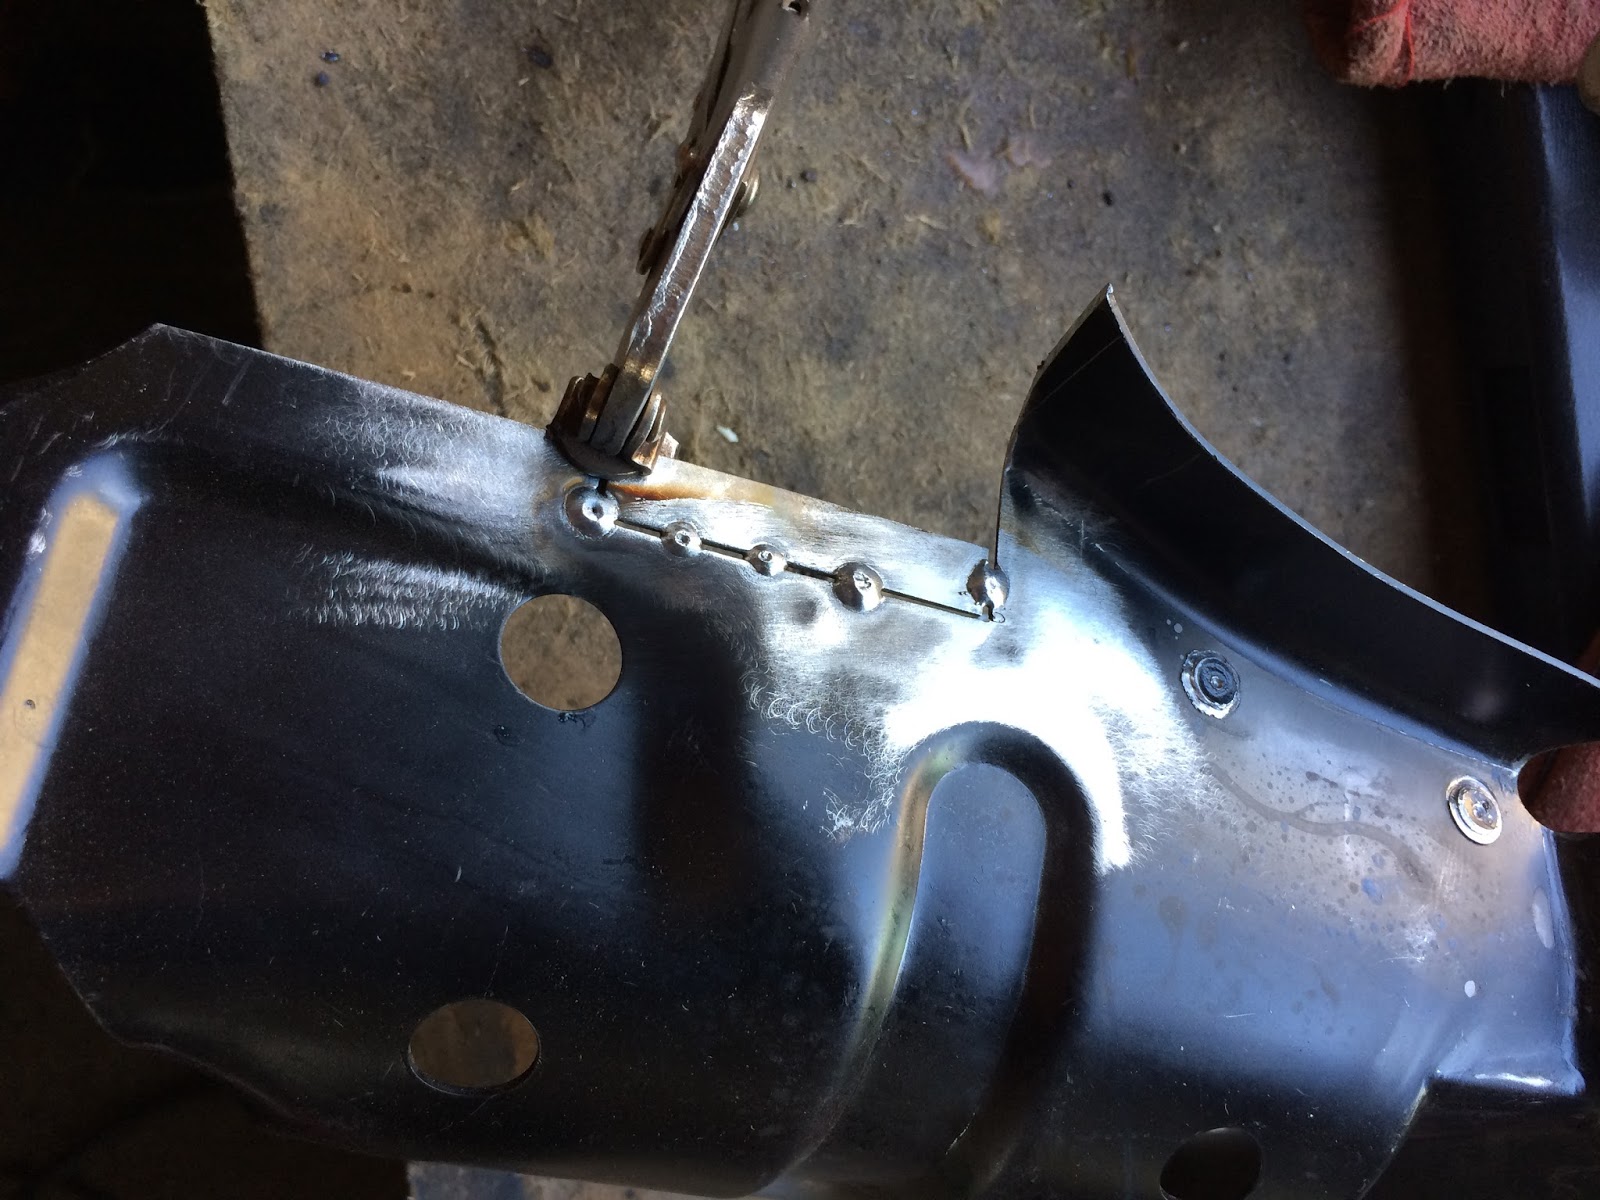
In a nutshell, the plan was to cut the bottom rotten third off of my original panel and graft on a donor section from the Mexi panel. Sounds pretty straight forward but there were several issues that I identified from the outset. Firstly, the original panel had been patched up in the past with thicker steel plated over the top (you may recall that I removed those unsightly patches back in a previous post). Unfortunately that repairer from yesteryear was rather aggressive with his welding and used a high heat and laid down a continuous bead. The heat build-up must have been immense because the panel had completely warped and distorted. Secondly, the Mexi panel would take some modification for it to look correct on a '65 car. A couple of pressed dimples would need to be deleted and one of the 'smiles' would need to be shortened and reworked to symmetrically match the one on the opposite side. The amount of the Mexi panel I could use was limited by the large protruding rectangular areas. The bottom edge of these impressions became my default cut line, but as one of the 'smiles' extended above this point I decided to tackle it before proceeding any further. I cut out a rectangular section around the end point use a Rotary Tool (i.e - a Dremmel) to keep things as precise as possible and to keep the resulting gap small and consistent. This would help when it came time to weld into position:


  I trimmed off the unneeded length and repositioned the tip so that it lined up perfectly with the other side:

  Carefully welded in:


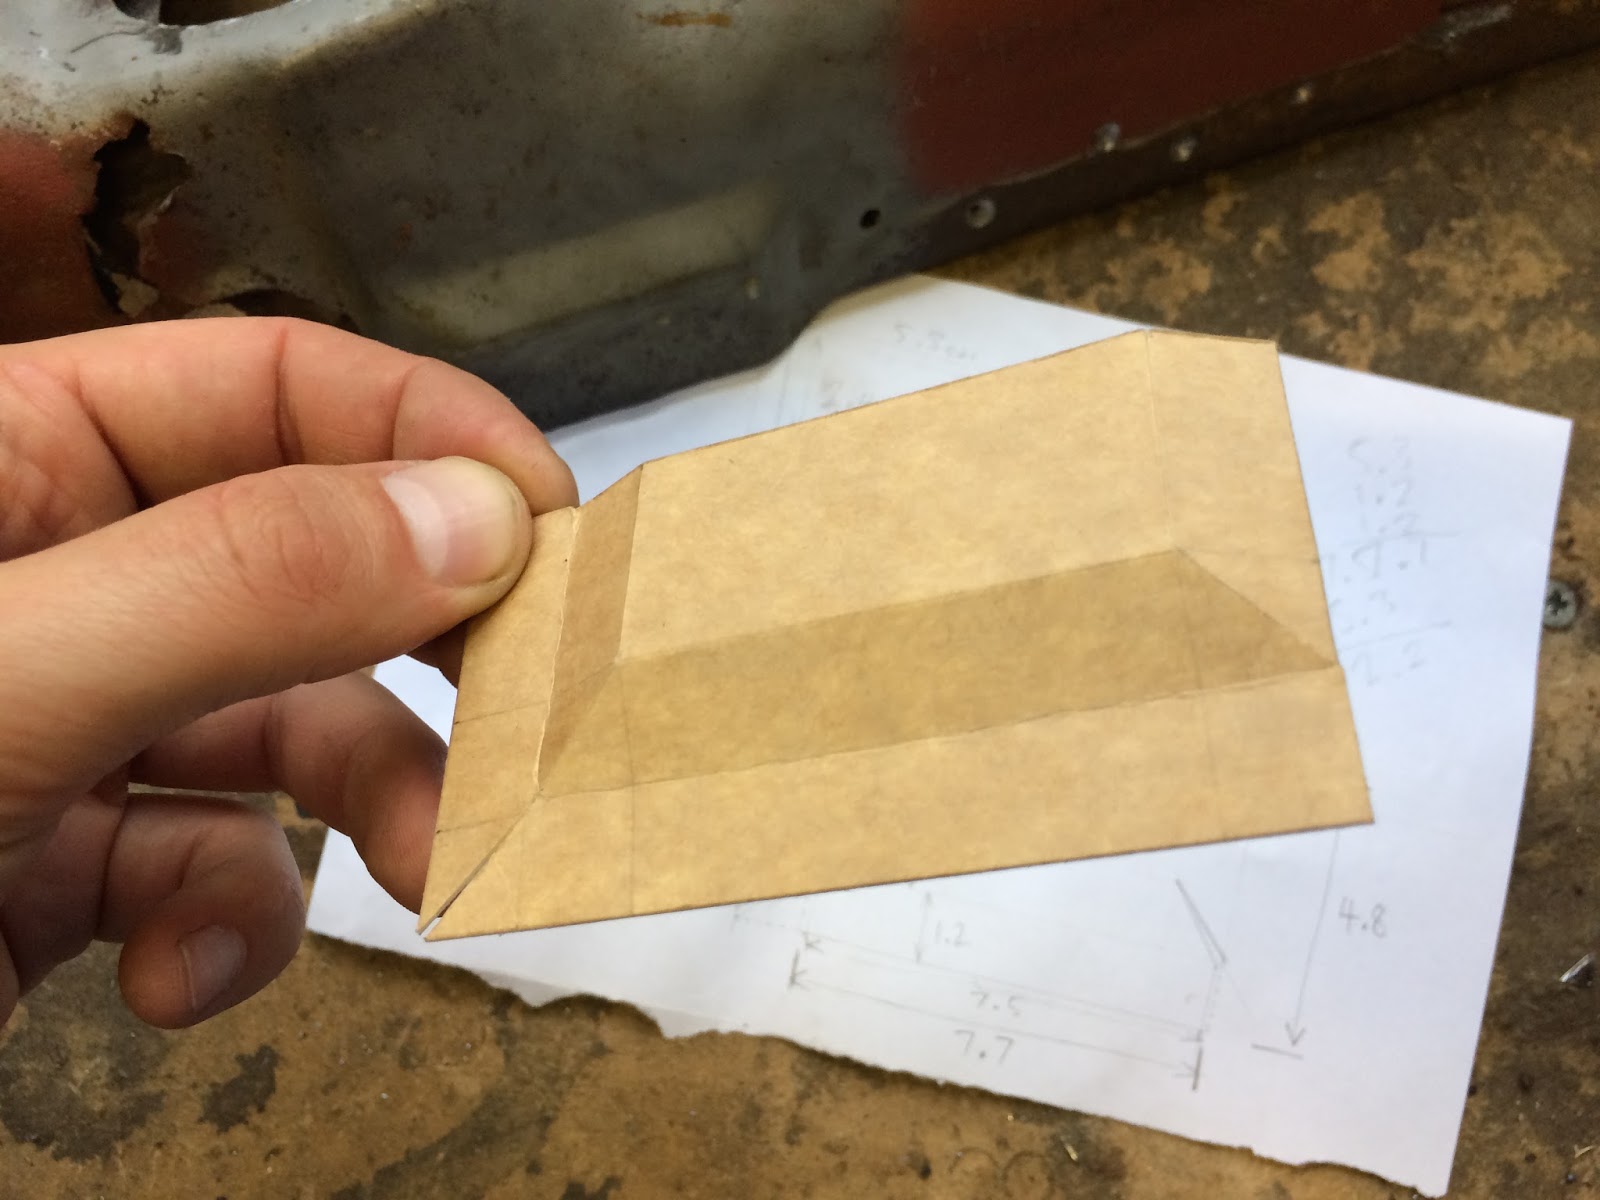
After making careful measurements of the panel dimensions, I made the horizontal cut along the width of the panel. Note the small piece of angle iron that I clamped in place to add some rigidity in that narrow area. This then was my donor section:

 
I linished the reworked smile:

 
I then deleted the dimples which were positioned too low using heat and a lot of gentle hammer taps to eventually bring it flat:


I then made a corresponding horizontal cut on the original panel:   


  it had a wavy cross section that came from the panel distortion I mention earlier and I spent a great deal of time attempting to put right by shrinking the metal in places. Unfortunately my patience ran out as I just couldn't get it back to anywhere near flat. I did attempt to tack the sections together with the thought that I would possibly work the metal flat as I went along. However, the opposite proved to be true and the panel buckled and twisted up worse than ever, so I cut through the tacks and went for a reset:


Before launching into a hasty second attempt I decided to walk away from this task for a while and do some research on more advanced bodywork methods. Hopefully the start of the new year will yield some better results.

Thanks for reading and I wish you all a happy 2018 :-)

Monday 6 November 2017

Bulkhead repairs with Mexi steel

Made another thrifty eBay purchase, which came up for sale right when I needed it (what timing!). It's a genuine VW front firewall / bulkhead / cross panel;


Despite being for a '68 and later car I figured I could use generic sections of it to repair my original. Before cutting it up I couldn't resist a quick layout of my Mexi steel collection:


I must confess that I do get a mild thrill when I acquire these Mexi panels. Although they are not as crisp as original German stamped parts, they are still vastly superior to the usual repro options. Talking about repro alternatives, I did actually purchase a Klokkershite panel a while back as I thought I could rework it with some effort into something half decent. My enthusiasm was quashed when I received the panel and I promptly sent it back for a refund!  It was riddled with defects with the spot welds literally coming away at one of the seams. The two sections of the panel were clearly misaligned. Additionally, it was apparent that it had been returned before by someone else as there were pencil marks on it as well as a lot of scuff marks & scratches to the transit paint. I was glad to see the back of it;


Back to the Mexi panel and I carefully drilled out a bunch of spot welds and separated the inner section from the main panel. They were pretty beefy spot welds and I had to drill out to 6mm to get them loose:


Note the small patches of rust already getting a foothold in between the seams - it goes to show that just because the panel is NOS doesn't mean it is corrosion free! I figured I would start with the inner footwell section first as it is thicker steel than the main panel (which is a mere 0.7mm) and therefore easier to weld. I think subconsciously I was after an quick win to boost my confidence before embarking upon something I knew would be tricky. Anyway, I blasted my original so I could make an assessment of its true condition:


Believe me, it was even worse than it looks in those pics. Quite a lot of pin holes and thinned areas of steel along the bottom flange where water had got inside and worked its corrosive magic. I marked up some cut lines and trimmed off the bad sections:


It was then a case of marking up the corresponding sections of the Mexi panel and chopping those out accordingly. I cut them a little bit oversize so that I could finely trim and file to the perfect fit:


Once trimmed up I blasted the donor sections. Here is a comparison between the old and the new. This illustrates just how much of my original had rotted away on the bottom corners:


After a lot of trail fitting, more trimming and rechecking I had the repair sections prepped and ready to weld:


welded, linished and finished (note that I also welded up those unneeded holes):


I did not smooth the welds on the rear side as this wont be visible and will add a little extra strength to the repaired areas. So, that's it for the front panel and I am fairly pleased with how it turned out. 

Still debating the best approach for the main panel, but have a few ideas that are percolating in the back of my mind and work will commence shortly...

Monday 23 October 2017

Two is company

After another few weeks of part-time garage tinkering the other cross member has now undergone its wondrous transformation to make it '65 accurate:


I followed exactly the same process as before, so see my previous post if you would like the recipe and wish to indulge yourself with countless photos of metal fettling. 

I now present the two modified cross members together for the very first time:


A very fine pair indeed. Although they are now complete, the rear reinforcement panels do still need spot welding into place. As I am sure i've mentioned previously; I don't want to commit and attach them together just yet as I'm keen to have a proper test fit with the chassis and rest of the shell before finalising. Just want to ensure that I have some wiggle room if things don't line up right (which I am half expecting things not to!)...

Saturday 30 September 2017

Modifying the new cross members

As I mentioned in the last post, I now have some new 'German' cross members which I am going to be using as a foundation to produce some year correct ones (i.e: '64 - '66 Beetle). They will not be 100% accurate, but will come pretty damn close. I have given this a lot of thought and it seems like the best approach as mid-sixties cross members simply don't exist as a repro item. Cross members commonly rust out on a vast majority of old bugs, so getting hold of a rot-fee OG section is almost impossible and only exist on rare foreign cars that have been driven exclusively in dry climates. Anyway, I have not seen this particular modification done before, so hopefully this detailed overview will be of some help to others who may be interested in doing the same... 

I began by drilling out the spot welds and separating the reinforcement section from the main panel. This gave me better access and allowed for a neater job:


On the main panel I smoothed out the unnecessary hump by simply cutting around it and welding in flat sheet steel:


These repros include an access hole to the heater channel. This was not something that mid-sixties cross members had, so I welded it up:


The rear edge needed a new profile adding to accommodate the correct upward angle of the heater pipe. After careful measuring and scribbling a few notes I mocked up a cardboard version of the hump I was trying to recreate:


I then transferred the measurements to sheet steel and cut out the geometric net:


After some folding on the vice and a quick zap of the MIG welder to close up the slits:


Linished back and compared to the original:


tacked into place on the cross member once the appropriate recess was measured and cut out:


After being fully welded, tweaked and dressed:


Just after the hump is a small section that is bent down on the original. I had to improvise around this section as access for clamping was tight. After some careful tapping with the hammer (remember that man light taps are better than fewer hard bashes), I got the 90 degree bend I was after:


Next task was to alter the heater pipe hole to the correct oval shape:


And trim the return flange to match the original (which terminates about halfway down):


At this point I roughly bolted up the heater channels to the pan and added the crossmembers. The fit wasn't as good as I had hoped and I was unsure at this stage if this was due to the restored pan being off or it the location of the mounting holes in the new panel were incorrect. After some head-scratching I discovered that the lower holes were not spaced apart close enough. There was a 5mm difference compared to the OG spacing. 

To correct this I elongated the hole;


Then using a copper backer I welded the other end to close up the gap slightly:


After some Dremel tool action I had it all looking correct again:


I then shot blast the entire panel before plug welded the mounting reinforcement sections back into place:


Moving on to the thicker supporting rear panel that I removed in the first step, I proceeded to cut out the unnecessary hump and chopped off the rear section that I assume adds strength to the underside of the boot corners. However, this was not present on the originals so I determined that it was surplus to requirements:


Welded in some flat sheet to replace that bump and welded up the access hole that was also present on the main section:


I welded up this little join to add a bit more rigidity:


Shaped the mating flange that will eventually fix to the inner side of the rear wheel arch:

Shot blast the reinforcement panel and got it realigned the best I could to the main section. I decided not to plug weld the pieces together at this point, just in case I needed to adjust anything further down the road. So, here is the nearly finished article just prior to spraying with zinc primer:


Now to do the same on the other side...