Thursday, 19 July 2018

Converting the Klassic Fab firewall panel to RHD

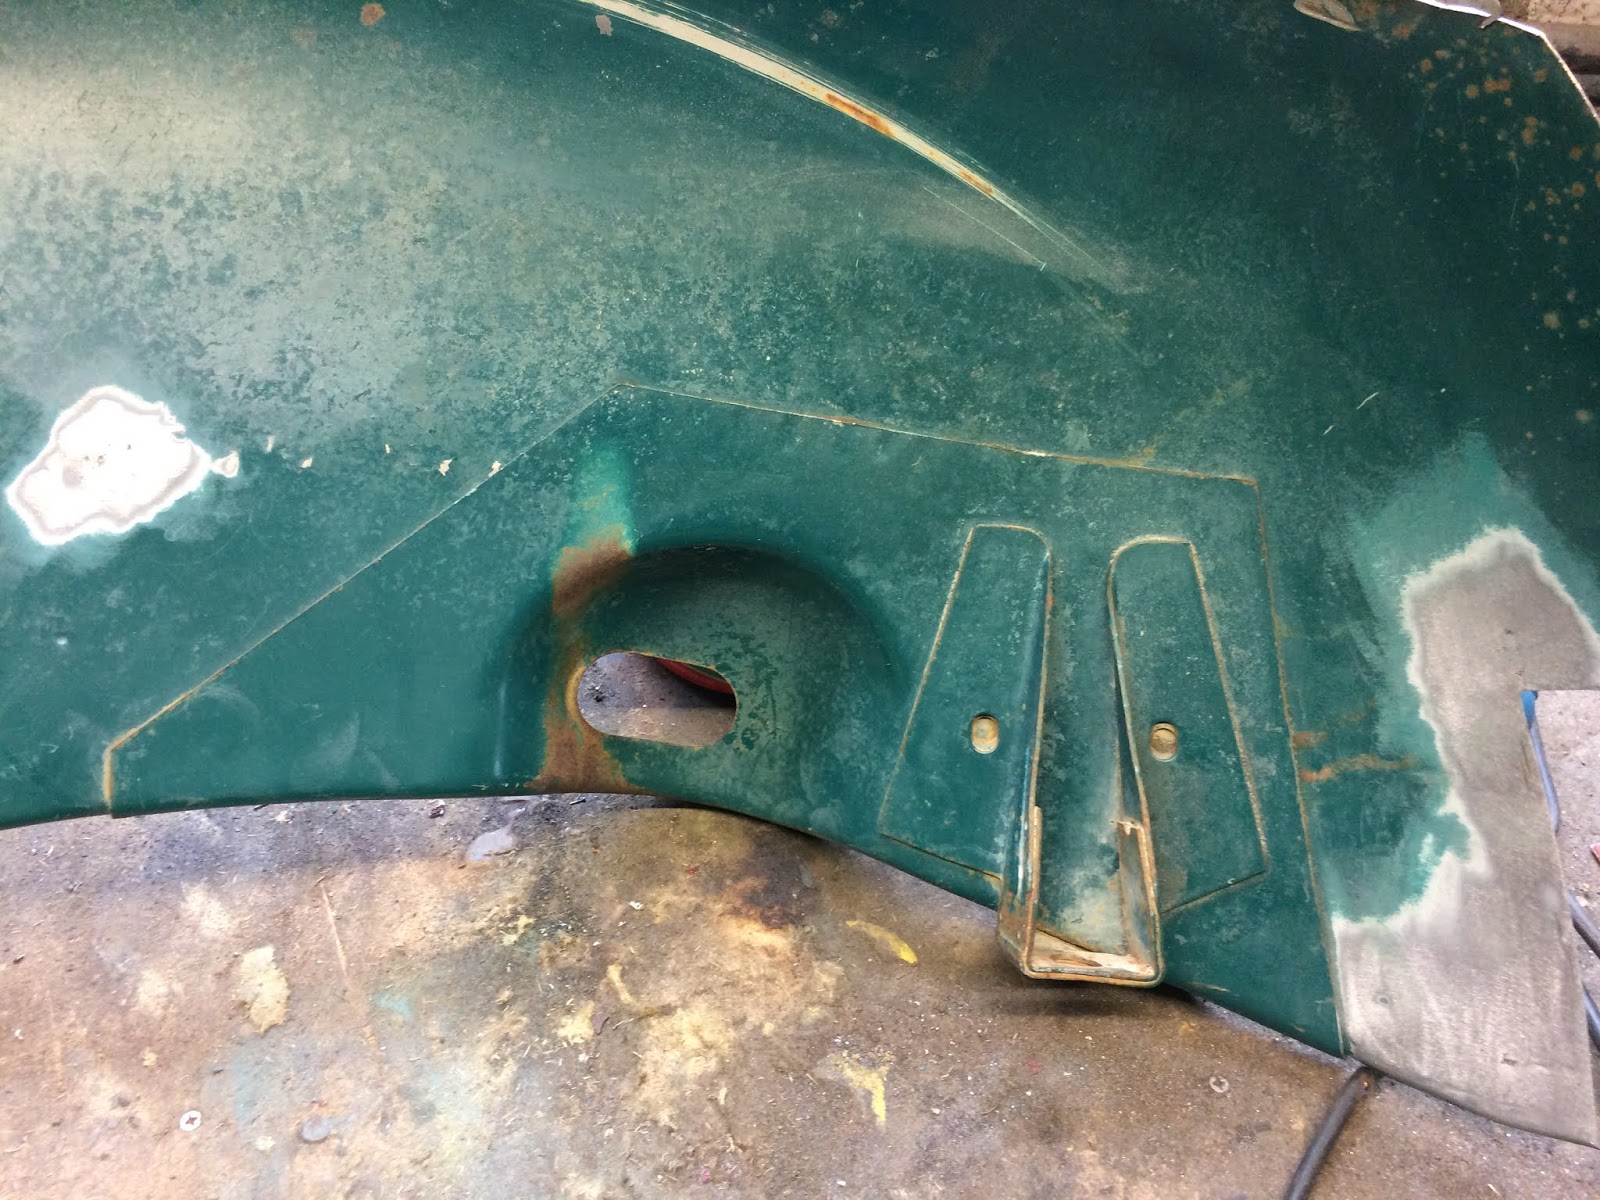
With renewed vigor I have been cracking on with the adaptions to the replacement firewall panel. First of all I welded up the unneeded (on a '65) holes:


The central rounded pressing (shown above, that was formerly a hole) is the primary difference when compared to the original '65 panel, which resembles a protruding bulbous nose. I am not too fussed about this detail as trying to recreate it with my humble tools and limited knowledge would be an impossibility. Oh, and before you suggest it; no, unfortunately I cannot simply cut the original section out of the old and weld it into the new panel because the steel is a different thickness. Not to worry, I like how it now looks.


Next I had to consider how best to convert the panel to work for a RHD car. More specifically, the flanged hole that the steering column passes through needed moving over to the other side. My initial idea was to cut a hole and bend up a circular flange by hand. In fact, I had a brief practice at doing exactly that with some steel offcut of the same thickness. It didn't turn out all that badly considering it was all done quickly by hand tools:


However, I grew a little concerned that this would not be adequate as this section houses a rubber grommet which surrounds the steering column and keeps the elements out. If it was not perfectly round and smooth it could be susceptible to water ingress and then the inevitable arrival of rust! I shelved that idea and reverted to an approach that I felt more comfortable with; welding!

I removed the circular-flange-thingy off of the mexi bulkhead panel:


Trimmed it down to match the correct thickness of my original part:


Then drilled out a large hole in the KF panel:


and opened it up to the required size using the power file:


I think you can see where this is heading:


All tacked into place with alignment looking spot on, ready for the rest of the welding:


And here we have it:


After some careful grinding and finishing:


The backside had good penetration, but decided to grind as flat as I could so that the grommet would bed in correctly:


Test fit of the grommet confirmed that it was spot on:


Blanking of the left section was a lot more of a straight forward task. Here is the before:


The during:


And the after:


To finish up I had to drill a ...mm hole to the right of the steering column where a couple of wires pass through a grommet:


Took a bit of work, but I am pleased with the finished result:


Monday, 9 July 2018

I surrender! The firewall has beaten me

I keep trying and failing to repair the front firewall panel and have reluctantly concluded that it is impossible! 0.7mm sheet steel is just too thin for me to weld without distortion creeping in, even with the MIG on the lowest setting and cautiously tacking one spot at a time. Ggggrrr! Anyway, the spirit of this blog is to always give an honest insight at not just the successes, but also the failures because it offers rich learning for future readers who may be thinking of doing the same. So I invite you to learn from my mistakes...

You may recall a that in a post a while back I was basically using the top section of my original panel and the lower section of a later Mexi panel. The trouble with this section is that VW used a particularly thin gauge of steel and as it is a flat panel it tends to warp and twist as soon as heat it applied. Just trying to get the two sections flush prior to welding proved to be a futile task and my first ill-fated attempt to stitch the sections together became a horrendous mess after only several tacks! So I took some time out and revised the approach. For this attempt I clamped the two sections in a kind of make shift jig that was simply a few lengths of angle iron clamped together with my work pieces sandwiched in the middle:


Now, the problem on that first failed attempt (not shown) was that the two sections buckled and were progressively forming a valley along the width. No matter how careful I was about heat build-up the panel did not want to stay flat and was getting worse with each welded tack. The angle iron in theory would mitigate this issue and hopefully keep things relatively level. As I mentioned, the edges to be welded were not flush all the way along, so I began joining them together in the middle were things lined up reasonably well. 

The temporary jig did work to an extent, but I still got a lot of buckling and distortion issues. Rather than giving up this time I decided to go with it and did my best to work out the kinks with the hammer and dolly as I went along:


It really was like welding two wavy edges together and I would occasionally unclamp the panel and carefully coax things flat and work the worst of the bumps out of the panel before reclamping and continuing on with the welder. I knew this section would never be completely perfect under close scrutiny, but I consoled myself with the fact that it is not an easily visible area of the car and if needs be I could smooth things over with a skim of filler if it came to it. It doesn’t translate too well into a 2D photo, but no matter how carefully I proceeded the panel would end up warped and stretched. 


The prominent discoloured areas are where I attempted to heat shrink the stretching, but as soon as a problem was solved in one localised area, an equally problematic area would spring up elsewhere. It was like that old fair ground game ‘whack-a-mole’. In a desperate attempt to correct this I tried cutting out a few of the offending areas and let in fresh flat steel:


As you can tell, it came out pretty well apart from that section at the top which was stretched. So, out came the butane torch for more heat, quench and shrink action. From this point on the panel just became more unsightly as I feverishly chased the problems around the panel like a maddened fool.

Well, I'm now officially done with this sh*t as I am simply losing too much time and heart trying to make it straight, when the reality is that it will never turn out well. Not now.

My distant 'plan B' option was to purchase a Klassic Fab panel and be done with it. However, they only produce them for LHD split or oval Beetles, so adaptions would be required in order to make it work. They are pretty damn expensive for what they are, but fortunately the UK distributor recently run their first (to my knowledge) 15% off funky green sale. I didn't hesitate and pulled the trigger:


Much better. The pressings are pretty close to my '65 firewall, so I am happy to roll with it. Time to roll my sleeves up and convert it over to RHD...

Before I sign off, I thought I would share a photo of my growing collection of Klassic Fab panels. Sobering to think that this represents almost a grands worth of steel, although I think it is best if I just don't think about that fact:


Wednesday, 16 May 2018

Desert seasoned German steel

Quite an exciting post this one; at least for a self-confessed panel pervert like me! I have just taken delivery of some wonderfully preserved original German steel cut from an old Bug that had been languishing in the sunshine of the dry Mojave desert, USA! 

Here is the donor; a '66 still sporting its original factory Jade Green paintwork:


Got to love dry state cars; no rot anywhere to be seen, just the expected patches of light surface rust and sun bleached patina. My box of goodies:


Delighted to have got my mitts on both rear body mounts: 


and some of the hard-to-find recessed wing mounting nuts: 


Arranging and sorting out the logistics of the sale was an interesting mission in itself. In fact, I had previously tried and failed to acquire similar donor cuts from another seller a year ago, but communication proved to be an issue and it never came to fruition. However, knowing that the utterly abysmal Klokkershite panels were the only repro option on the market, I thought it was worth giving it another shot. Honestly, I could not stand the thought of attempting to weld this inaccurate wrinkly-bin-bag crap into my car:


The photos fail to convey just how disappointing this panel is. Nothing is where it should be, the body mounts are not double layered and have been spot welded at the wrong angle. On the reverse the finish is rough and there is no return flange:


So, I made contact with a small VW breakers (literally a one man operation) through the classifieds section of the Samba forums. We exchanged a few emails and after some pleasant negotiation I arranged for the sections to be cut out and shipped over to the UK for a very fair price. At the same time I was busy making phone calls to HMRC and thoroughly researching how much the import VAT, duty and handling fees were likely to amount to once the parcel had bee processed by border force. Pleased that my estimate was actually within £3 of the final cost and there were no alarming charges that I hadn't accounted for. 

I set about the panel preparation with much enthusiasm. Opted to start with the drivers side panel, as this was the side currently accessible on my car in the garage. The donor section needed a few hours of work to straighten it up and to weld up the odd gash and hole where the spot welds had been separated. I'll let the pics do the talking:


I will put it through the blast cabinet once it is trimmed down to its final size which will take care of the surface rust around the return flange and bowl section. 

Now to decide the best course of action with regards to cutting out the old section and grafting in this fresh steel. Internalised brooding, pondering and deliberation now in progress...

Monday, 30 April 2018

Quickie: All about tool rolls

It's funny, I have been on the look out for an original tool kit for my car for some years, but nothing suitable has come up for sale. Occasionally I have seen the canvas roll minus tools and sometimes the odd individual tool, but nothing close to complete. I decided to invest in a good quality reproduction item that Wolfsberg West manufacture and picked one up recently at a VW show. However, less than a few weeks later a complete original kit from a '62 turned up on eBay and fortunately I was the highest bidder. I was delighted that I actually paid less for the original kit than I did for the repro WW version! 


Anyway, I thought it would be good to do an overview and comparison post as I am now in possession of both an original kit and the re-manufactured version.

The original kit includes the following (as confirmed by the official owners manual): 
  1. Tool roll
  2. Hub cap removal tool
  3. Combination pliers
  4. Screwdriver 0.8
  5. Screwdriver 0.5
  6. Open end wrench 8/13mm (Hazet)
  7. Socket wrench (for spark plug, fan pulley nut and wheel bolt)
  8. Socket wrench 14mm
  9. Bar (for socket wrench and jack)


The WW remanufactured item is largely the same with small variations. These deviations could be a way of making the kit appropriate for a wider range of cars years. Anyway, you would have to be a really anal person to let that put you off as the kit is pretty sweet for the price point. Here be a few shots giving some side by side comparisons:


All original items shown on top and repro versions underneath:


In summary, there are no prizes for guessing which one I will be keeping. Although, I do have to say that WW have certainly produced a great item here and my only minor criticism is that the finish on a some of the tools could be better. However, I guess any small quality refinements would inevitably push up the manufacturing cost and subsequently the retail price. On balance it seems WW have struck a perfect balance between affordability and a product that closely resembles the original.

Ohh, last thing. I do get a geeky tingle from the fact that my combination pliers say this on the side: