Sunday, 18 March 2012

Spring plates and hand brakes

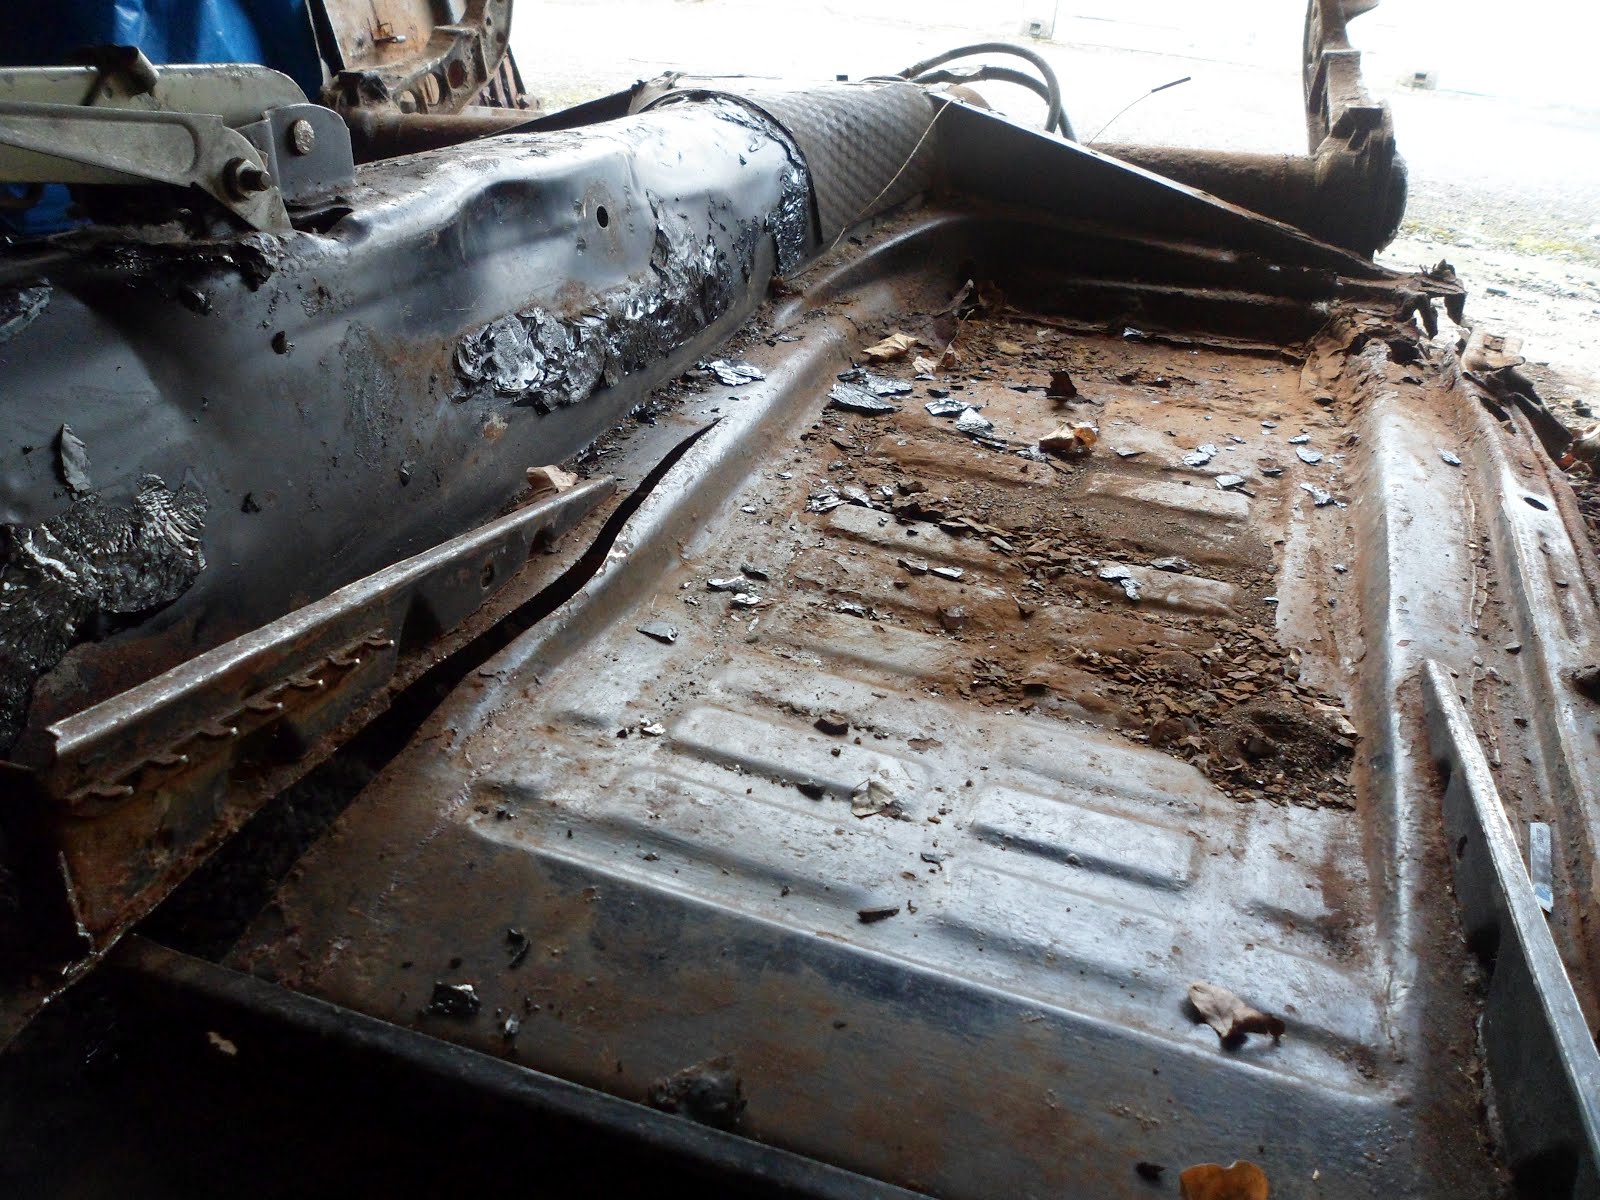
Well, I finally finished cutting out the drivers side floor pan over the weekend:


I then turned my attention to the removal of the spring plates. I drenched the four bolts that secure the spring plate cover with WD40 then used my breaker bar to get the bolts turning.
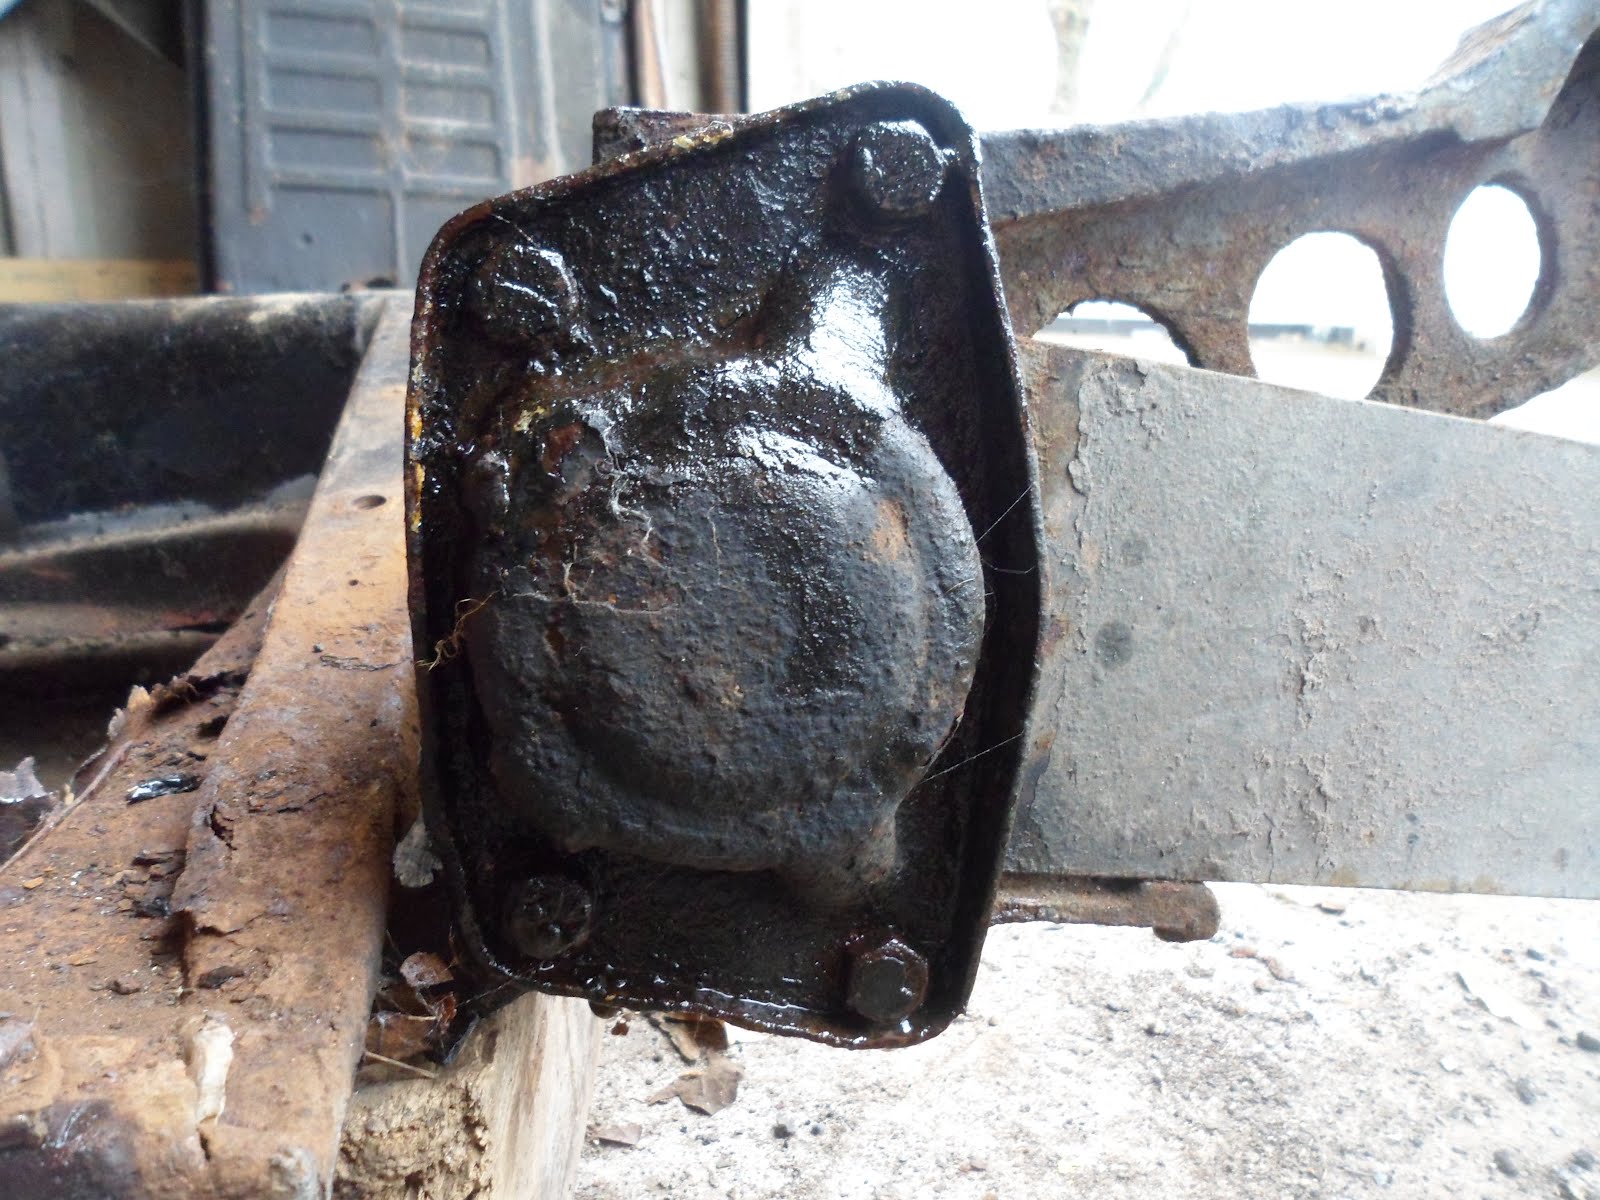


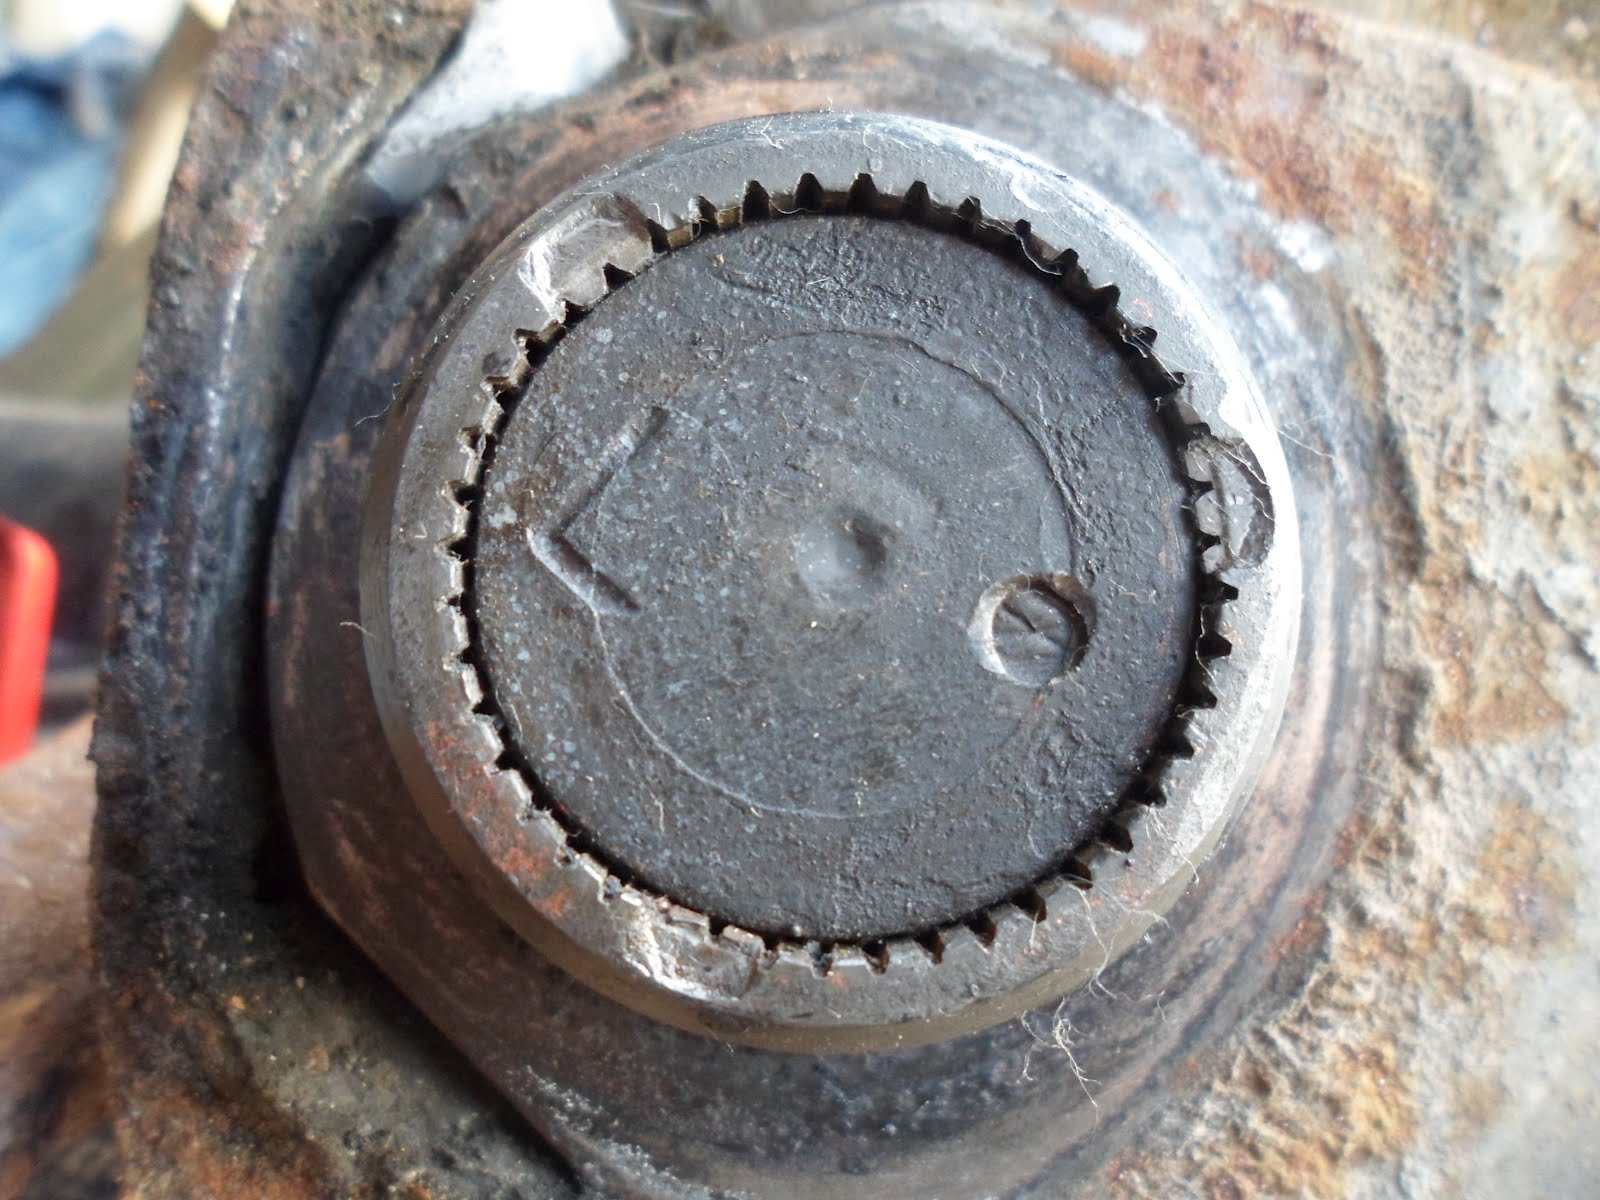
With the cover off I could clearly see the end of the torsion bar with the splines located inside the spring plate:


And here is a close up with the rubber bushing removed:


I opted for the ‘jack and chain’ method to control the tension of the spring plate whilst I pried it off the torsion bar. If you are reading this post and considering doing the same; please be careful and always put your safety first! There is a lot of tension in the spring plates, so proceed with caution. O.k, so here is the set-up:


It basically involves looping a length of chain around the axle of a trolley jack:


…..and securing the ends to the top shock absorber mounting point with a sturdy bolt:
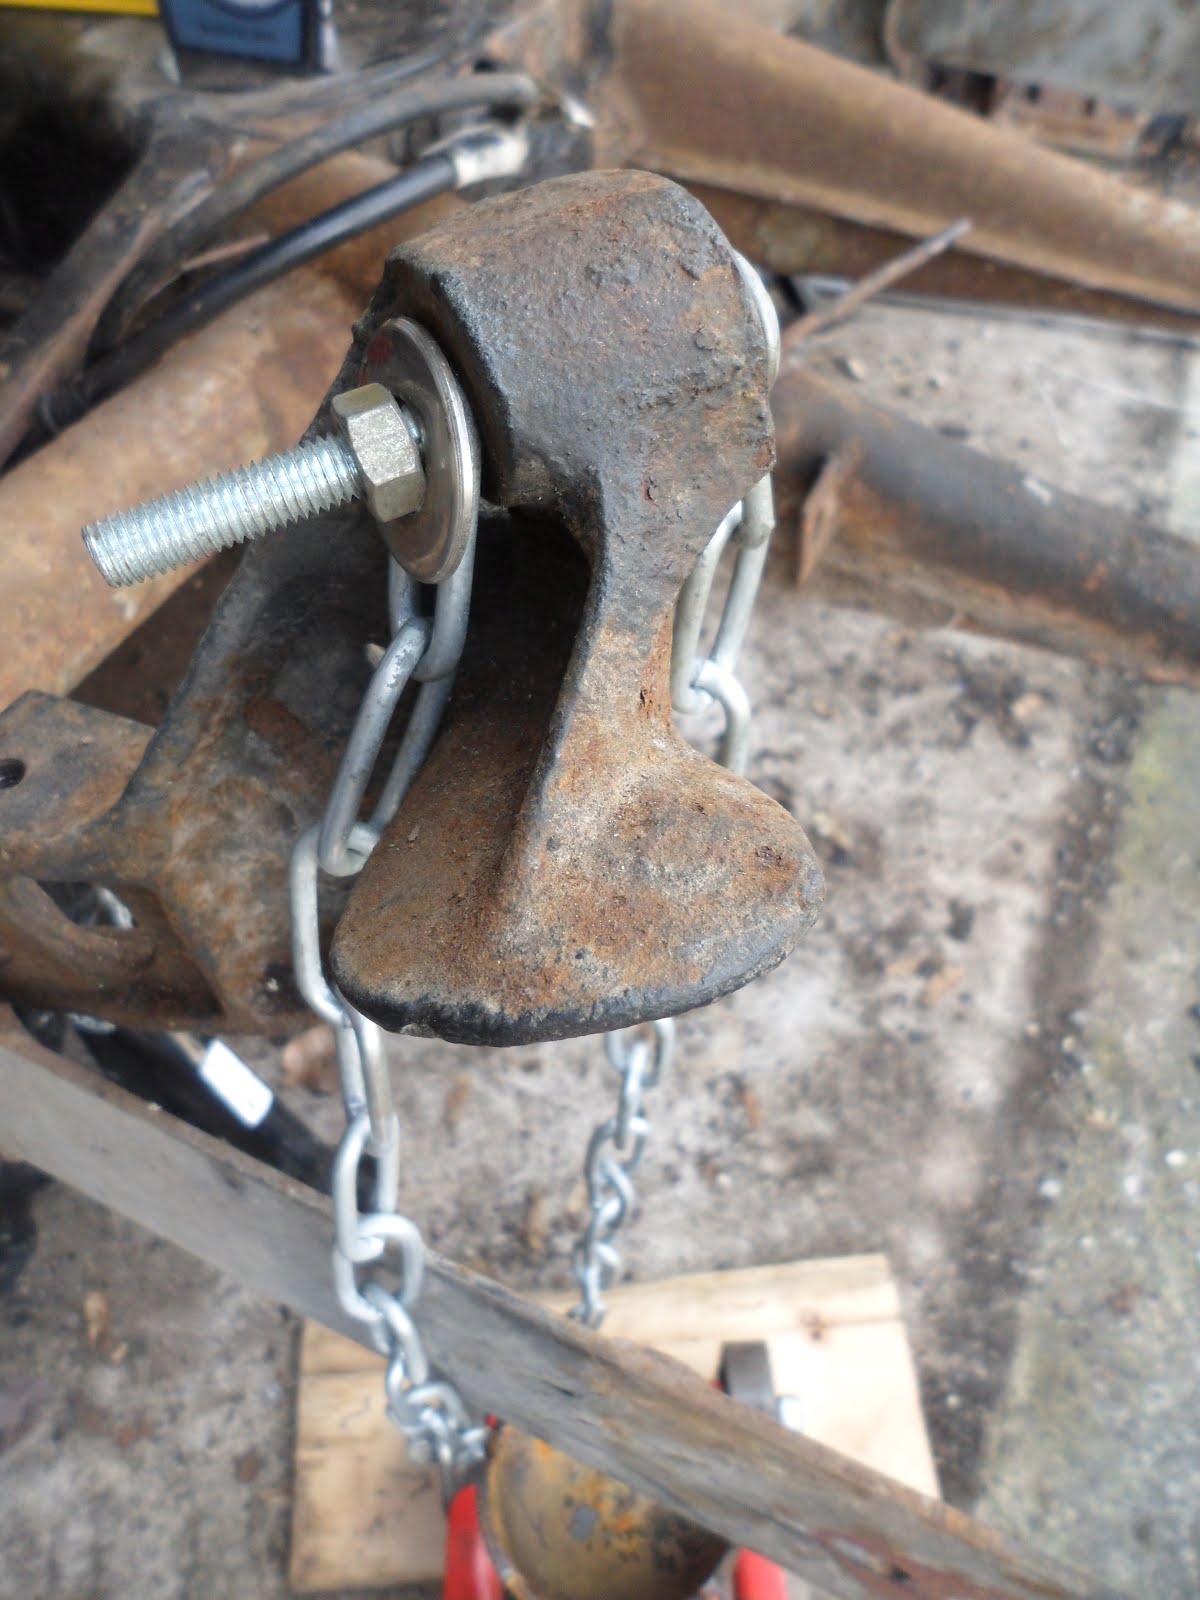


The jack can then be raised so that it makes contact with the spring plate and pushes it upwards and thus takes the pressure off of the shelf that it usually rests on. I then got a big flat headed screw driver and started prying. My spring plate did not require too much persuasion and was clear of the shelf within 5 minutes of prying. I slowly lowered the jack and the plate came to rest in this position:


It should be noted that on a stock VW that the spring plate would have dropped to a steeper angle, but my bug was slammed by the previous owner some 13 years ago and so the shallow angle was to be expected – as was the relative ease of getting the thing to come free in the first place. Next I made sure that my chassis was perfectly horizontal by placing a long spirit level on the tunnel and adding shims under the chassis where required:


Once I was assured that the car was level I measured the angle of the spring plate using an inclinometer. This is important to ensure that everything goes back together at the same angle that it came apart:


I then wiggled the spring plate off of the torsion bar being careful not to disengage it from the inner splines. With the spring plate off I located the top point of the torsion bar by balancing a socket piece on top of it and then made a small mark with permanent pen. In theory this should help me find the correct inner spline location during the rebuild:


It was then just a simple case of pulling the bar free from the inner splines and drawing it out:


All done and thankfully without any drama:


One thing that I forgot when I did the previous side was to mark the spring plate and torsion bar before pulling it apart to aid with the reinstallation:


With the spring plates off the chassis was looking very bare. The only bits still to remove were the handbrake and heater levers. So, a couple of spanner turns later they were off and bagged and tagged:


And here is the result at the end of the day. One chassis tunnel ready for sandblasting and minor repairs (I hope)


Friday, 9 March 2012

Should last me a while (maybe!)

Thoroughly replenished my stock of metal cutting blades - don't want a repeat of last weekend's nonsense!

Monday, 5 March 2012

Fun with tar board!

I managed to get down the garage for a quick session on Saturday afternoon. I was planning to cut out the passenger side floor pan. However, this seemed more difficult than I remember the drivers side being for some reason and I had soon snapped all of my metal cutting blades (despite having picked up a couple of new ones from the tool shop on the way over!). I managed to get about half way round the floor pan, so at least I don’t have too far to go next time:


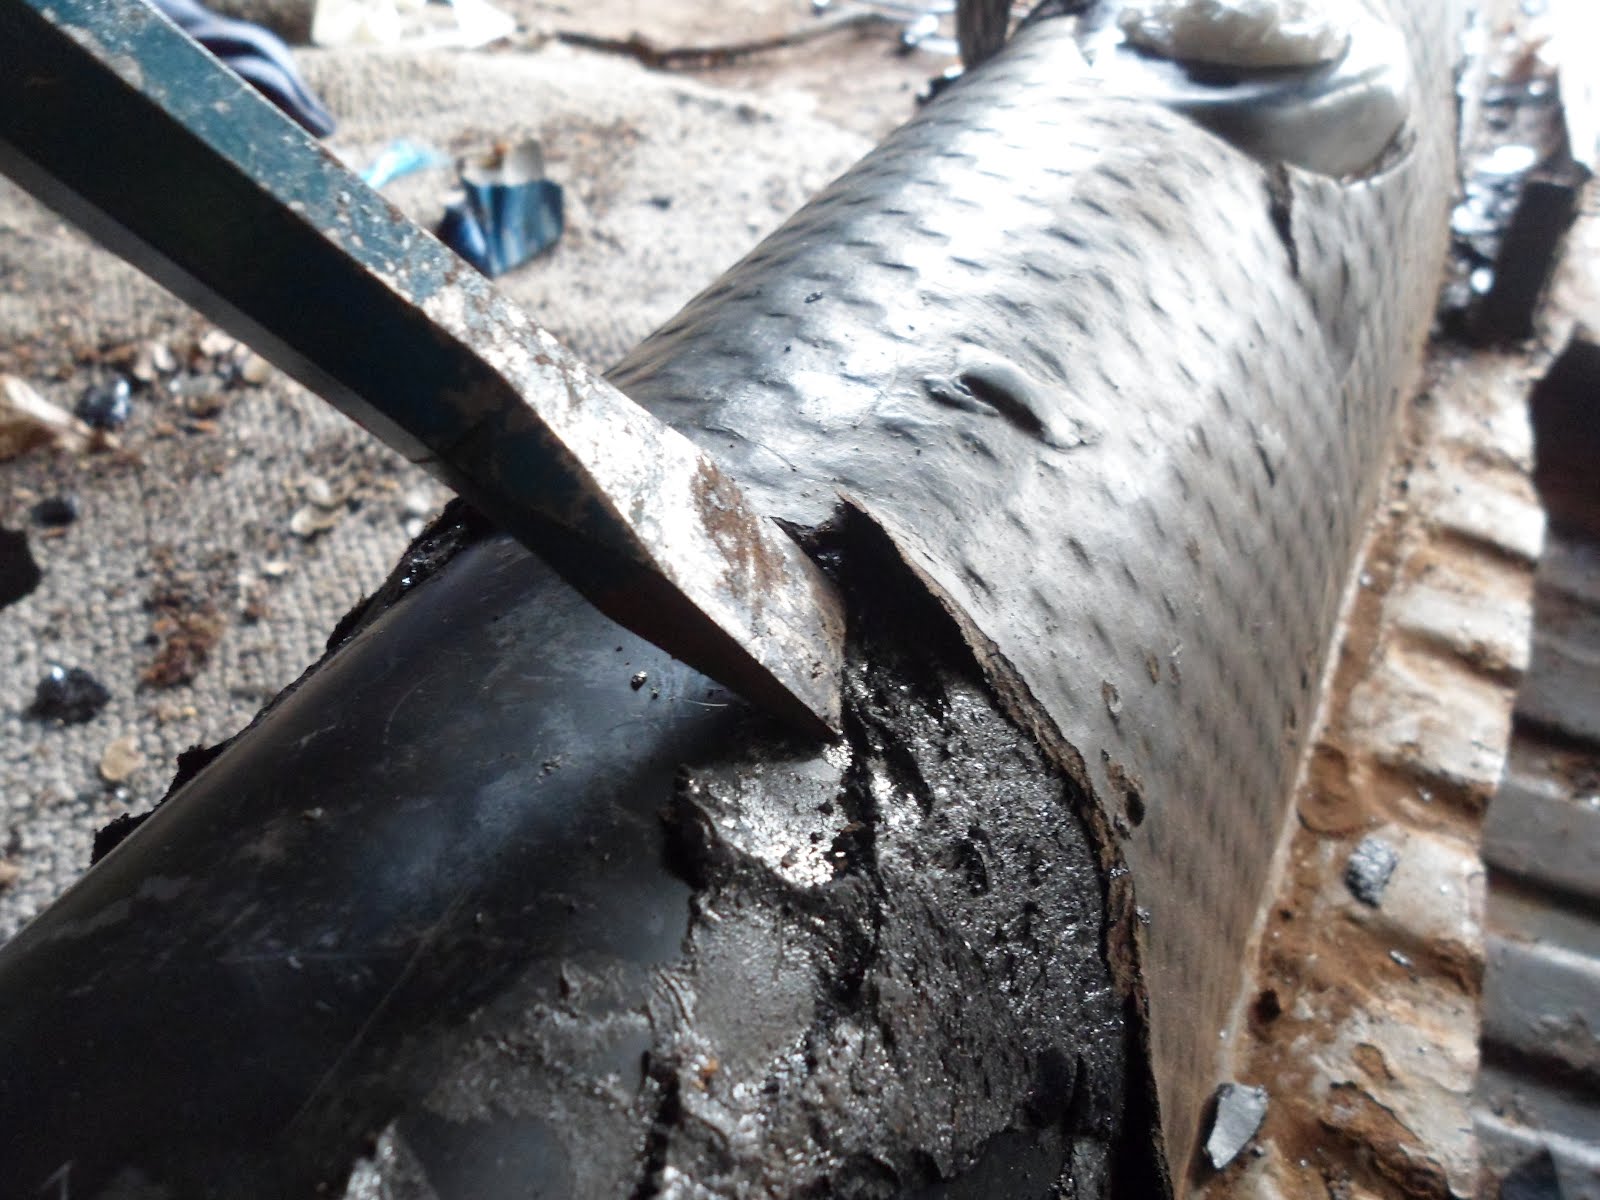
Next I decided to turn my attention to removing the old tar board and seam sealer from the tunnel. I found using a fat chisel with wooden mallet to be an effective method and it would usually chip off in big chunks. Any residual tar could be taken off by gently scraping with the chisel held at a shallow angle:


What a satisfying mess:


So, not the most productive of weekends, but it sure felt good make a little headway after so long!

Monday, 31 October 2011

Removal of one rusty floor pan

I finally got back down the garage this weekend and after a substantial tidy up I managed to cut out one of the rotted floor pans from the chassis. I started from the back and gradually worked my way around the perimeter:


I followed the technique outlined by Rick Higgins in the ‘Bug Me’ video (volume 6), but ended up cutting wider than was necessary due to be over cautious. I will trim up the cut next time and then chisel off the remaining metal that is tack welded to the tunnel. 


As recommended by Mr Higgins I cut on the inside of the seat track. In theory the runner should now easily pop off using a chisel and a few swift hits of a hammer. Looking closer at mine I realised someone had previously repaired the area and reinforced the seat track with more than just a few tack welds! I shall purchase a suitable chisel and report back.


.....and the pan is out! I think I am going to hang onto this scrap metal for practicing my welding technique when the time comes.


Because my garage has no power I am completely limited by battery operated tools and my reciprocating saw was only able to cut out the drivers side pan before both batteries died. In fact, there was about 6 inches of cutting still to go, so I finished the last bit with a junior hacksaw (broke 3 blades though)!


So, one down one to go (and I promise not to leave it another 16 months before I tackle the passenger side!)

Thursday, 20 January 2011

The project is still happening - it's just been in hibernation for the winter!

Wow, such a vast amount of time has elapsed since I have even set foot in the garage, let alone posted anything on this blog! The problem with this time of year, apart from the numbing cold and relentless drizzle, is that it gets dark at around 4pm (although the days are starting to get longer...). Sadly, these factors make working in a garage without any electric a bit of an uninviting prospect!

However, I am determined to resume the work shortly.....

Monday, 7 June 2010

The chassis teardown ends!

Armed with a shiny new 26mm socket I set about dismantling the last few parts of the chassis. I am pleased to say everything went smoothly this week and I sustained virtually no cuts or abrasions!


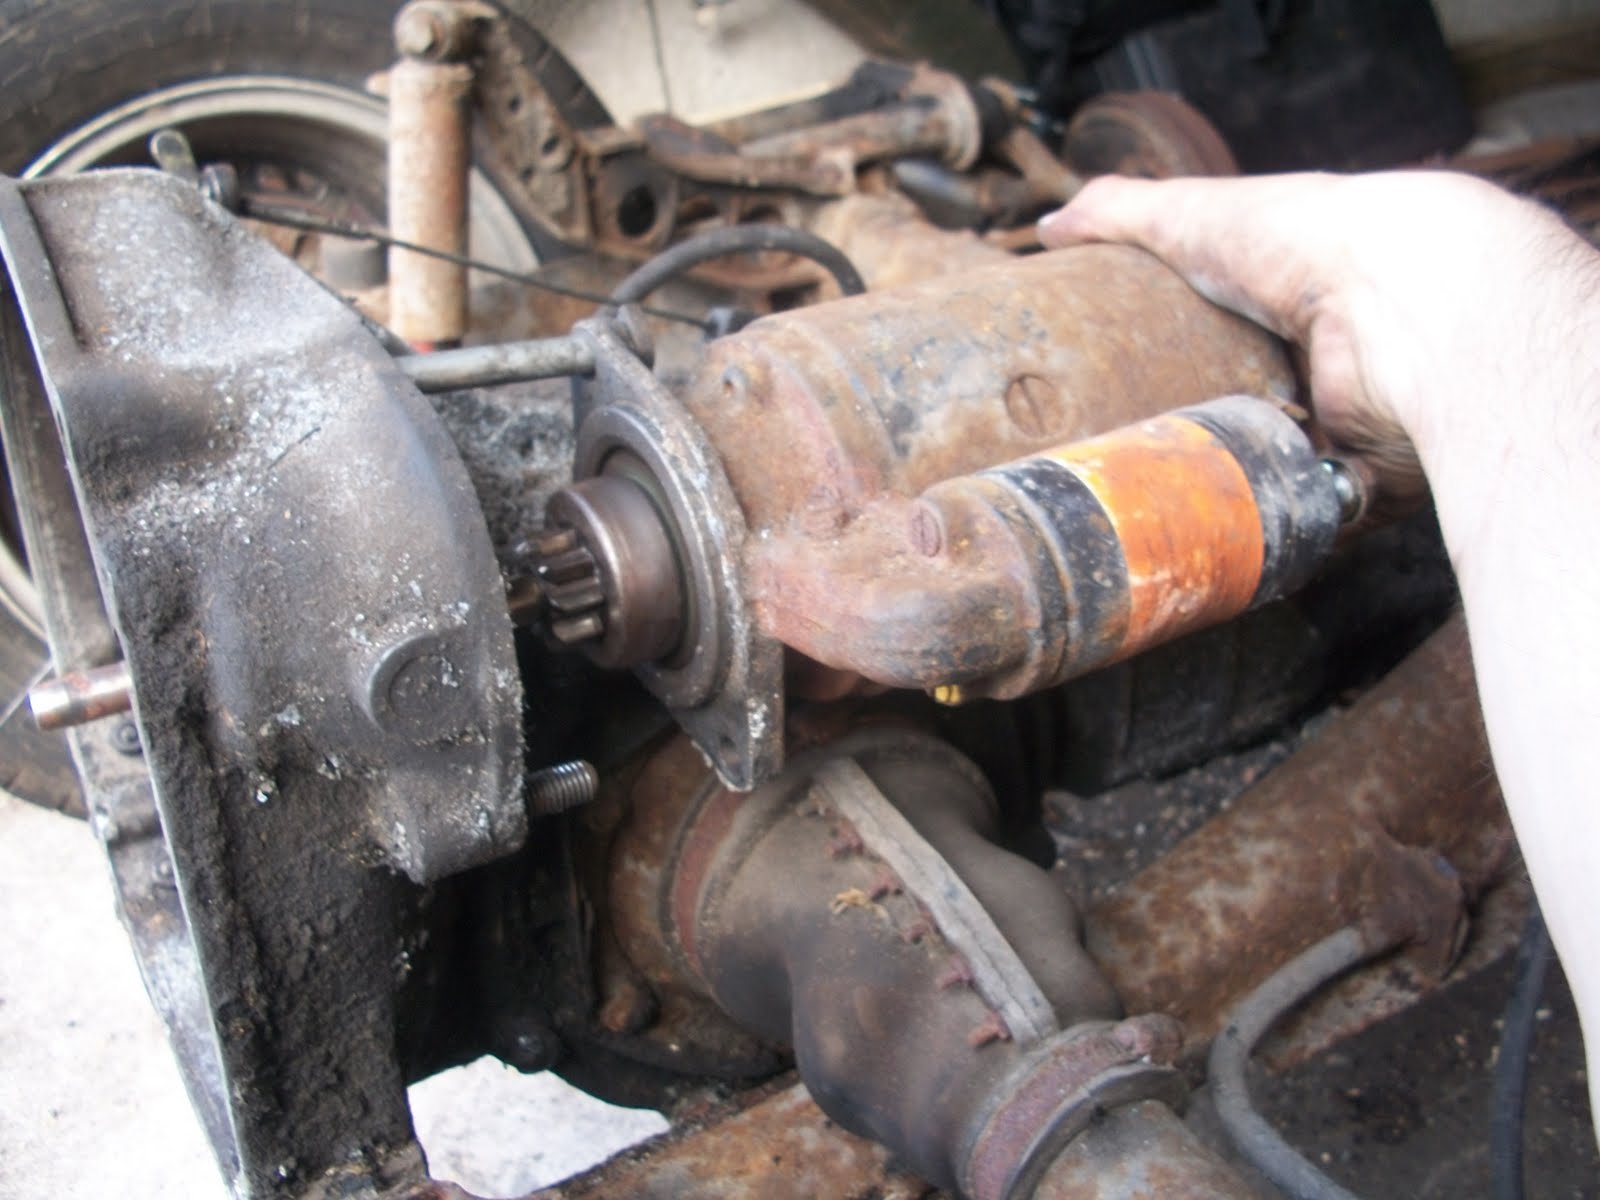
First of all I decided to unbolt the starter motor from the transmission casing:


Then I detached the rear shock absorbers, which is achieved by undoing a few nuts and bolts….


And they are off (but looking incredibly warn and filthy)! .....


Next I detached the clutch cable by removing the wing-nut that I have circle in the image below:


Just behind the transmission (underneath where the rear seat once sat) is a small inspection hatch which is held in place by a single cross headed screw:


This gave me access to the coupler that hooks the shift rod to the transmission. The square headed bolt that I have circled below just needed to be loosened to allow the shift rod to detach:


The axle tubes are held in place by three bolts. Please note that in the picture below only two of the bolts are visible and the third is obscured by the axle tube itself. It is behind there though, I promise!


I used my new 26mm socket combined with the breaker bar to take out the rear transmission nuts. Below you can see the left hand side one coming out and the right hand side one I have circled:


To release the handbrake cables from the rear brake drums I had to remove a cluster of nuts located on top of the handbrake, which I have circled below. In case you are wandering, I am pretty sure these improvised spacers (aka: unaesthetic stack of miss-matched nuts), which effectively increase the tension on the cables, are not standard VW issue:


Once the ends of the cables are loose they can be drawn out of the tubes at the rear of the car:


My next task was to remove the rear wheels and prop the chassis up on axle stands. Using my trusty trolley jack and a small piece of wood, I supported the weight of the transmission before attempting to pull it free:


All that remained was the removal two more smaller nuts that held the end of the transmission casing to the chassis. This is where the left hand side one was hiding:


.....and the right hand side:


After a small tug the transmission was free:


At this point the only other thing I could remove from the chassis was the pedal cluster. So I did. This cover plate is on the opposite side of the central tunnel to the pedals:


With the cover removed you can see the operating lever which the accelerator cable hooks onto. The lever was easily removed by taking off the spit pin (top red arrow in picture below) and the circlip (indicated by the bottom red arrow):


The lever then just pulls loose leaving just the end of the accelerator rod protruding from the tunnel:


Once the accelerator rod was drawn out from the other (driver's) side, the pedals were free to be lifted out. Using a small screwdriver I coaxed loose the 'guide-tube-backing-plate-thingy' and pulled it out of the tunnel:


And so at the end of the day this is what was left of my bride n' joy.......

Wednesday, 2 June 2010

The chassis teardown begins!

I have just had a very productive bank holiday Monday and managed to strip a lot of components off the chassis. The first job I tackled was the brake lines. You can see below where they attach to the master cylinder:


And here is the junction where they connect at the rear of the car:


After dismantling:


For the first time during this project I was 100% confident that the components that make up the brake system would come apart without any drama. This is because I replaced all of the brake lines and master cylinder with new ones about 8 years ago and liberally applied copper grease to all of the threads at the time. It made everything so much easier and I gave myself a pat on the back for thinking ahead.


Before I could remove the master cylinder I needed to detach the push-rod that connects to the brake pedal. This was simply a case of removing a circlip and sliding out the pin:

 
I was then able to pull out the push rod and remove the master cylinder:

I then turned my attention to front beam which connects to the chassis by 4 bolts which are clearly visible in the image below:


I drenched the bolts in lots of penetrating fluid and then jacked the front up slightly to take the strain off of the bolts as I began to remove them: 

Once they had all been taken out, the front beam (with the wheels still attached) came free easily:


.....then I decided to take the wheels off (I have no idea why I did it this way round, I just did!) and this is what I was left with:


Next weekend I shall hopefully find the time to work on the rear section of the chassis and will be removing the transmission.
Note to self: I will need to purchase a 26mm socket for unscrewing the two huge bolts that secure the transmission onto the frame.