Pages

Wednesday, 30 June 2021

Quickie: sheared bolt extraction

Whilst I had good access under the scuttle area with the demister vent removed, I was able to deal with the remains of an old stubborn bolt that had sheared off from when I removed the bonnet;

This needed to be carefully drilled out. My goal, as always, was to go slow and not damage the threads of the mounting point;


I carried on drilling with slightly larger drill bits to increase the diameter of the hole. Eventually I was able to start picking out remnants from the thread. Using the correct size tap to finish up;

I could then check with a new bolt that everything was as it should be (with a liberal coating of copper greased for good measure);


Admittedly a small step, but this restoration malarky is all about ticking off thousands of these odd jobs. I will keep on inching forward...

Wednesday, 23 June 2021

Demystifying the demister

Continuing on from last week's undertakings... 

On the cowl section of the donor cut there was a 6" section that was totally shot along the rolled edge that forms the seam;

 
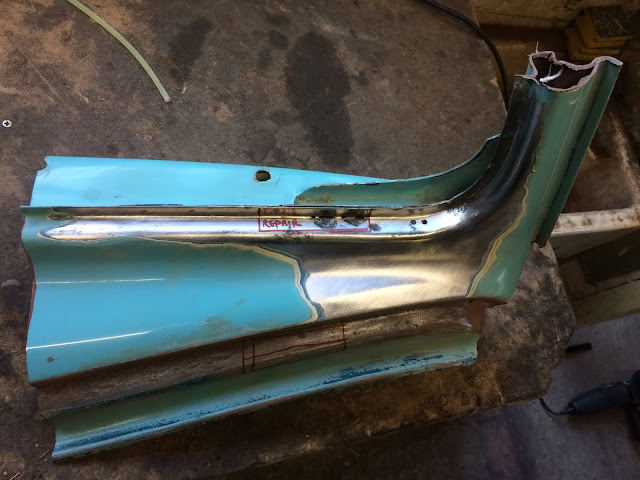
I flipped the piece over and marked out around the affected steel with a dotted line. This was duly cut out:


To make a repair piece I used a section from a different part of the donor panel. I had to pie cut the end to accurately recreate the corner curve using the old piece as a pattern;

Repair section was then glued into place:  

...and then ground back as per usual;

I then trimmed up the section to match the profile of the area to be filled;

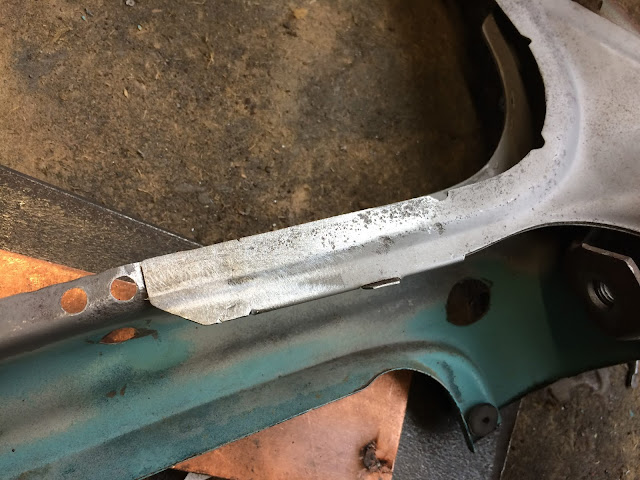
Out with the old an in with the new; both pieces blasted and ready for fettling and final fitting;

Wednesday, 16 June 2021

Passenger side demister vent

A quick point of clarification up front; some of the following work was done in the old garage a few years back, but I didn't make significant enough progress to blog about it at the time. However, as I am now picking up where I left off you may notice that the environment changes in a few of the photos.

With the front of the car removed I have comfortable access to the rear dash area. There are a bunch of tasks that I need to do at the front end before I am in a possition to reinstall the bulkhead and heater channel assembly. So, I figured I would start with a job that I have already done once before on the drivers side - the demister outlet vent and surrounding rust. The underside revealed the extent of the undesirable mess;


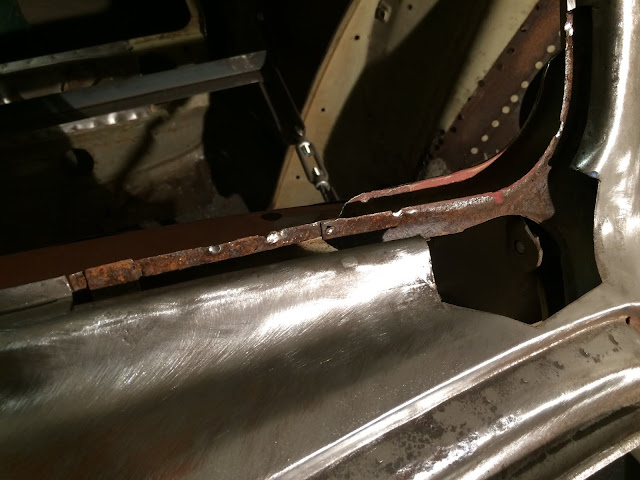
As before, the whole area was pretty crispy and peppered with rust holes. Some of the worst heavy pitting extended downwards onto the cowl (outlined in red sharpie);

Learning from my previous experience, I knew that the best approach was to split the repair into two parts: the front (outside cowl) section and rear (inside dash) section. I marked up the outside cowl section with blue tape and set about removing the bad steel;


Once removed I had a better view of the sandwiched vent outlet section. Although not as bad as I expected it to be, I determined that it was too far gone to save, so opted to use my donor section to repair the entire piece. Once again, I outlined my cuts with blue tape and set about surgically removing the affected section from the inside dash;


Unfortunately the donor scuttle/dash was not without its faults, so it required a few repairs before I could use it. I split the panel into the two sections as per the above proceedure:


Once I had roughly blasted the vent section it became apparent that the steel had become paper thin on the end piece. I cut out this thinned section and fabricated a small patch:

Welded and smoothed to an invisible finish (a shame this neat work will never be seen);

 
On the flipside I cut the excess from the repair section using a low tech, but very accurate method. Basically I added masking tape to the original cut section and then used a dirty finger to trace the outline of the area. I then peeled this off and positioned on the doner section;

Gave me an accurate result;


The next step was to repair the angle grinder gash, which was the result of whoever cut up the doner car. Oh well, better make it solid again;


Almost there...


All welds ground down and looking like new again;

Wednesday, 9 June 2021

Quickie: NOS rear quarter

Throughout my long hiatus I kept my eyes peeled for any VW rarities that came up for sale. To my delight a year correct NOS rear quarter came onto my radar, which I purchased without hesitation for a barginous price. These genuine panels seem to be as rare as rocking horse sh*t these days; 


A fortutius find to say the least as I was dreading the idea of having to patchwork something together on what is the worst side of the car (both in terms of chronic rot and warping from old crash damage). The only thing that needs doing to make it complete is to graft on the bumper mount section, but this is a relatively straight forward by comparison.

As with all old genuine VW panels, it has a liberal layer of surface rust, but this is superficial and will clean off without much sweat. 

Big thanks to T-Bone for kindly couriering this half way across the country for me!

Wednesday, 2 June 2021

Blast cabinet lighting upgrade

I decided to upgrade the lighting in the blast cabinet using a 3M sticky-backed LED light strip;

I purchased one that came complete with a power adapter and had a corresponded dongle presoldered onto the stip. I opted to mount the connection point using a rubber grommet that I salvaged from a scrap vacuum cleaner. As previously mentioned, I didn't want to drill any additional holes into the cabinet itself, so instead I drilled into the newly fabricated blanking plate;

With the grommet added it not only holds it firmly in place, but also prevents dust leaking out;


I measured out and cut my LED tape having carefully considered how best to lay it out to achieve the most consistant lighting. Here is a mocked up layout that made on top of the cabinet that I have marked up to show the order that the sections would be soldered together;

Had to solder the joints and then slid some heat shrink tubing over to keep them protected; 

A quick test before sticking everything into its final position; 

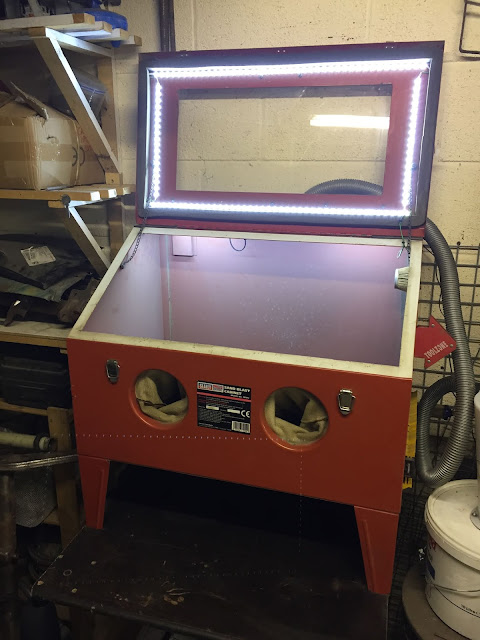
An obvious point when using any adhesive backed product is to ensure the surface you wish to affix to is clinically clean. It was then a case of mounting everything in place inside the cabinet ...and here is the grand reveal; 

Ample illumination and importantly the light is evenly distributed, which eliminates cast shadows obsuring the item being blasted. Very happy with this set-up and I hope that it will prove to be low maintenance.