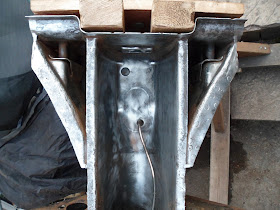
Using a wire wheel attached to an angle grinder I cleaned off most of the dirt and surface rust from the frame head. This allowed me to see what I was really dealing with in terms of the metal work condition. Thankfully the frame head looked fairly solid despite being pitted in places. The same could not be said for the bottom plate which was in a sorry state. I agonised for a while as to whether I should try to patch it up or simply cut it out and replace with a repro panel. I choose to cut it out and replace as it was the more thorough option. The added advantage is that with it gone I will have better access to the front of the chassis tunnel. In the near future I intend to clean out all the accumulated rust flakes, dirt and grease from the inside the tunnel and then treat it with Waxoyl or similar to seal evering up. Anyway, I started by cutting around the spot welds:


I then switched to the angle grinder and ground down the seam welds along the front edge. It was quite a long process, but I was deliberately going slow to ensure that I did not damage any metal that I wanted to save:
For the smaller areas and tight corners I used a Dremmel, which I found to be surprising capable:
Here is the bottom plate starting to come free. Note the area at the top of the image that I separated by 'thinning' the metal of the unwanted bottom plate until it could easily be broken free:
So, after a few evenings of intensive cutting and grinding the bottom plate was off:
A comparison between the old panel and the repro one that will eventually be welded in:
I have heard other people mention that taking off the bottom plate is no easy task and they were certainly right! It takes a lot of persistence and at times I felt frustrated, but I resisted the urge to cut corners (both metaphorically and literally in this case!). I am feeling pretty good about the result as none of the metal that I am trying to save was damaged by the clumsy use of power tools. Slow and steady wins the race!
Now I need to grind down the rough edges, clean everything up and straighten up those flanges....


